Cisco DNA Center - Sites
DNAC Series
This is part of a DNAC series:
- Part 1: Getting started
- Part 2: Cisco DNA Center - Devices
- Part 3: Cisco DNA Center - Assurance
- Part 4 (this post): Cisco DNA Center - Sites
- Part 5: Cisco DNA Center - Discovery (POSTMAN)
- Part 6: Cisco DNA Center - Discovery (Python)
- Part 7: Cisco DNA Center - CommandRunner (Python)
- Part 8: Cisco DNA Center - Flow-Analysis (POSTMAN)
- Part 9: Cisco DNA Center - Flow-Analysis (Python)
Disclaimer: the code in this post is not production-grade code obviously. The examples in the post are merely conceptual and for informational purposes.
Introduction
In previous posts, we already looked at how to retrieve information from the devices or from the client API. We’ll now look a bit into the Sites API.
Retrieve all sites
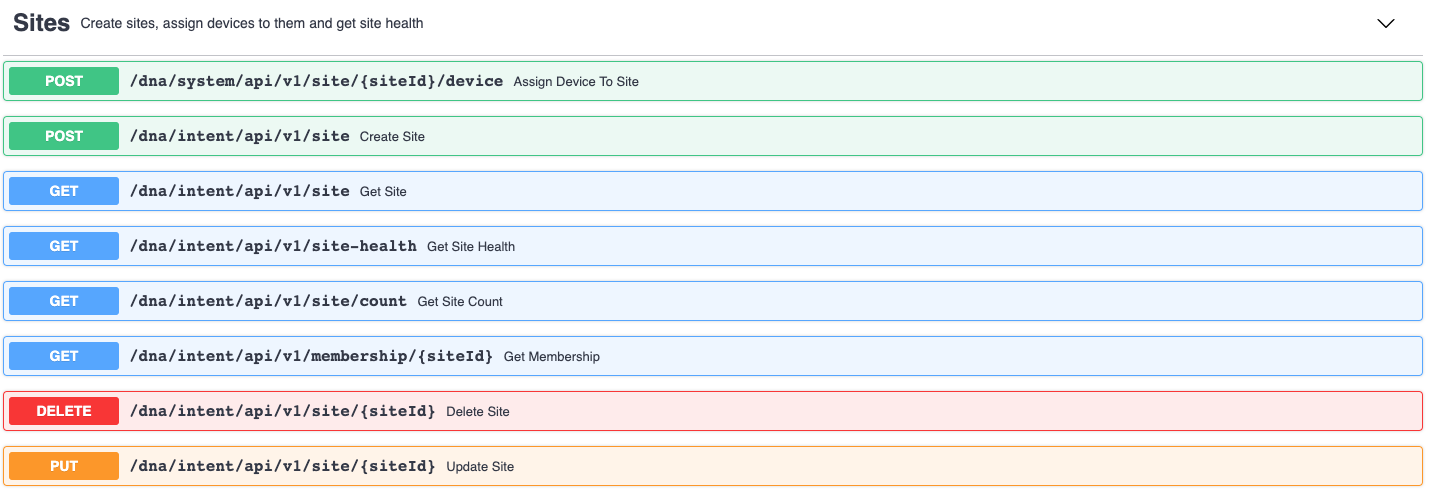
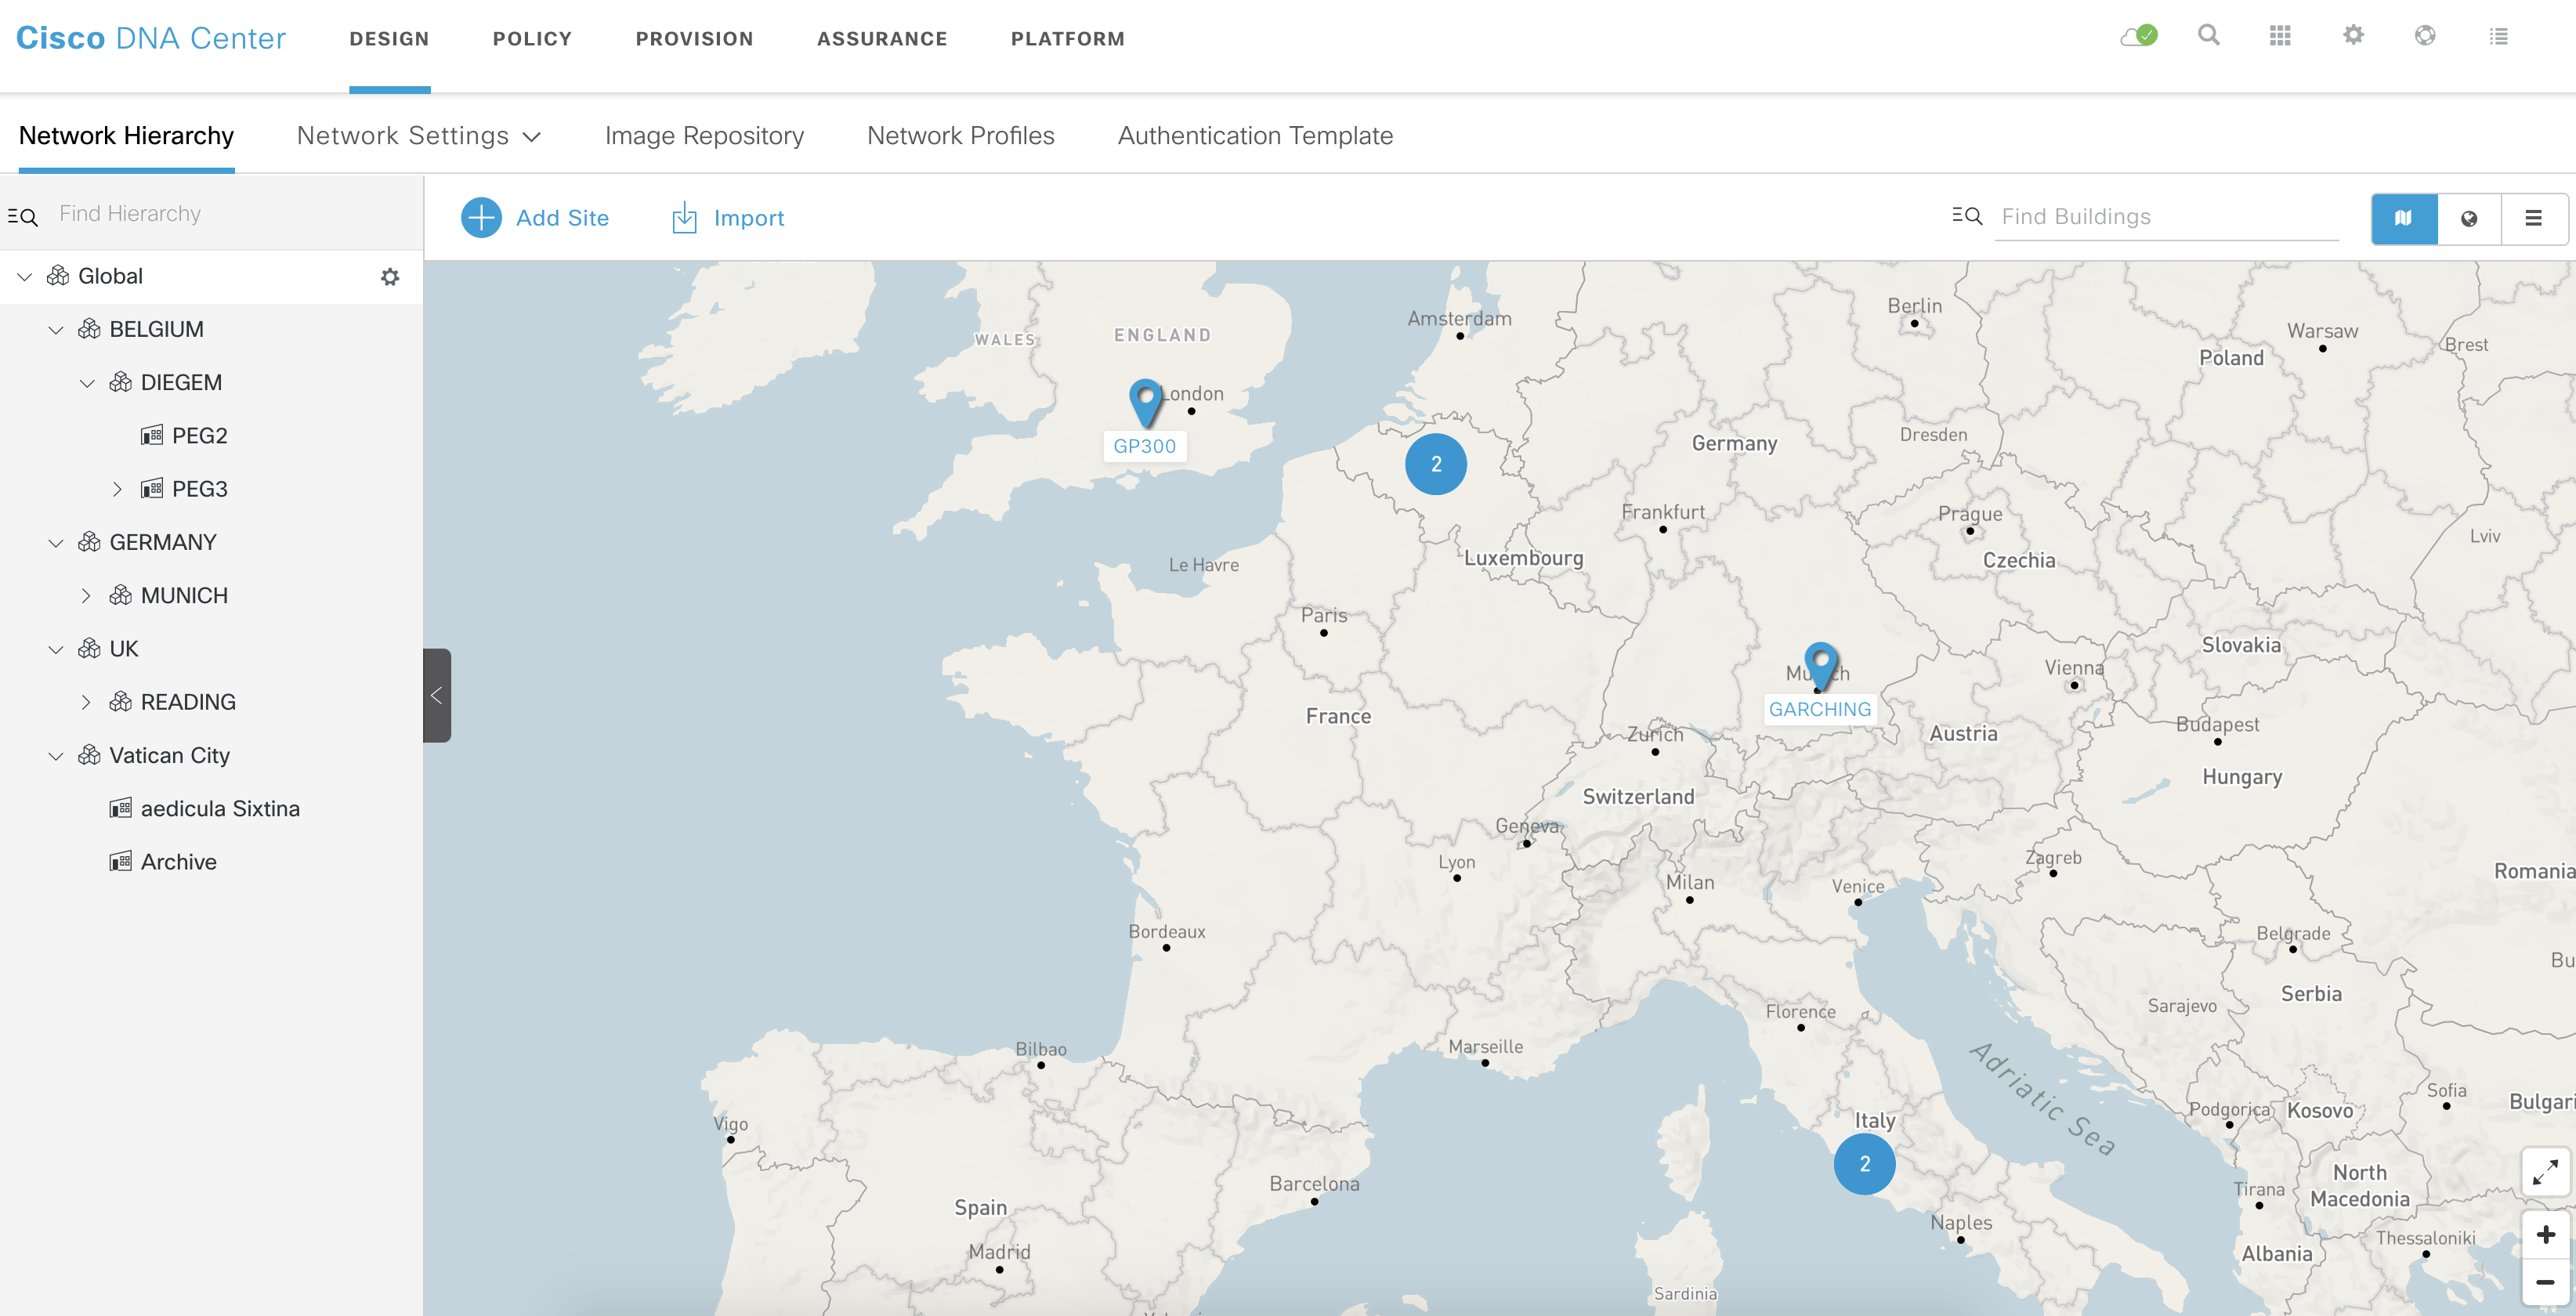
We will start of with implementing the get sites API call (third one in above screenshot). Before we do so, let’s login to the DNAC Controller and see an overview of all the sites (and buildings/floors) currently configured.
The below script achieves exactly that. As a result we want to have an indented list of all sites (and children).
First, we will perform a REST call to the correct API endpoint. We will get back a list of sites, which we store into the sites variable. Next, we iterate over this list and we will add each site to a list called sitelist. In sitelist, we have the following information:
['Global/GERMANY', 'Global/GERMANY/MUNICH', 'Global/GERMANY/MUNICH/GARCHING', 'Global/GERMANY/MUNICH/GARCHING/Garching-Floor', 'Global/BELGIUM/DIEGEM/PEG2', 'Global/BELGIUM', 'Global/UK', 'Global/UK/READING', 'Global/UK/READING/GP300', 'Global/UK/READING/GP300/Reading-Floor', 'Global/Vatican City/aedicula Sixtina', 'Global/BELGIUM/DIEGEM/PEG3', 'Global/BELGIUM/DIEGEM/PEG3/LAB-Floor', 'Global/BELGIUM/DIEGEM', 'Global/Vatican City', 'Global/Vatican City/Archive']
Next, we iterate over this list. We walk over each line and we count the number of /. We do this just to understand how much we need to indent the line.
On that line, we will also split the line based on the /, so we have entries like ['Global', 'BELGIUM'], ['Global', 'BELGIUM', 'DIEGEM'], ['Global', 'BELGIUM', 'DIEGEM', 'PEG2']. We each time will only print the last item (and put it on the next line with the correct indentation).
import requests
from authenticate import get_token
from pprint import pprint

def main():
   dnac = "10.48.82.183"

   token = get_token(dnac)

   url = f"https://{dnac}/dna/intent/api/v1/site"

   headers = {
      "Content-Type": "application/json",
      "Accept": "application/json",
      "X-auth-Token": token
   }

   response =  requests.get(url, headers=headers, verify=False ).json()

   sites = response["response"]

   sitelist = []
   for site in sites:
      if 'parentId' in site.keys():
         sitelist.append(site['siteNameHierarchy'])

   sitelist.sort()

   for line in sitelist:
      print('   '*line.count('/') + line.split('/')[-1])

if __name__ == "__main__":
   main()
If we run the script, we get our indented list:
wauterw@WAUTERW-M-65P7 Sites % python3 get_sites.py
BELGIUM
      DIEGEM
         PEG2
         PEG3
            LAB-Floor
   GERMANY
      MUNICH
         GARCHING
            Garching-Floor
   UK
      READING
         GP300
            Reading-Floor
   Vatican City
      Archive
      aedicula Sixtina
Add sites, buildings, floor
In this section, we will add some sites to the existing list of sites. We will also give an example of how to add a building under a site and how to add a floor under a building.
A) Add sites
In order to add sites, we will use some Jinja2 templates. See below:
{
      "type": "area",
      "site": {
         "area": {
               "name": "{{site_name}}",
               "parentName": "Global"
         }
      }
   }
In our Python code, we will read the template and pass in the required data (in our case, we have only 1 variable called site_name)
   jinja_templates = Environment(loader=FileSystemLoader('templates'), trim_blocks=True)
   template = jinja_templates.get_template("site.j2.json")
   payload = template.render(site_name=site_name)
Next, let’s call the sites API:
   site_url = "/dna/intent/api/v1/site"
   response =  requests.post(url + site_url, headers=headers, data=payload, verify=False ).json()
With DNAC, we will get back the following response:
{
  "executionId": "2fca5727-3ae1-4e41-96d8-aa9ff228afd9",
  "executionStatusUrl": "/dna/platform/management/business-api/v1/execution-status/2fca5727-3ae1-4e41-96d8-aa9ff228afd9",
  "message": "The request has been accepted for execution"
}
So, in our Python script we will capture the executionStatusUrl as follows:
executionStatusUrl = response['executionStatusUrl']The idea is that we check regularly the execution status API endpoint https://{{dnac}}/<executionStatusUrl>. This will return us something like:
{
  "bapiKey": "50b5-89fd-4c7a-930a",
  "bapiName": "Create Site",
  "bapiExecutionId": "2fca5727-3ae1-4e41-96d8-aa9ff228afd9",
  "startTime": "Mon Apr 27 14:08:14 UTC 2020",
  "startTimeEpoch": 1587996494784,
  "endTime": "Mon Apr 27 14:08:23 UTC 2020",
  "endTimeEpoch": 1587996503578,
  "timeDuration": 8794,
  "status": "SUCCESS",
  "runtimeInstanceId": "DNACP_Runtime_44568ee2-62da-42b4-b54a-2c28ccbf0dd8"
}
So, in our Python code, we will define a loop that checks every second whether the sites was created successfully. We do this by initiating a call to the above API and to parse the status field.
   while True:
      response =  requests.get(url+executionStatusUrl, headers=headers, data=payload, verify=False ).json()
      if response['status'] == "SUCCESS":
         print("Site was successfully added")
         break
      else:
         print("Still in progress")
      time.sleep(1)
The full Python script to add sites can be found here.
B) Add buildings
Adding buildings is done in exactly the same way.
- use Jinja2 template to create the JSON payload
- call the https://{{dnac}}/dna/intent/api/v1/site API and pass the JSON template
- monitor the https://{{dnac}}/<executionStatusUrl> URL
The Jinja2 template for buildings could be the following:
{
   "type": "building",
   "site": {
      "building": {
            "name": "{{building_name}}",
            "address": "123 Main Street",
            "parentName": "Global/{{site_name}}",
            "latitude": "51.0458",
            "longitude": "5.6413"
      }
   }
}
We won’t provide the full script here as it’s almost literally the same as for adding sites. In case you are interested, check here for the full script.
Executing this script will result in:
wauterw@WAUTERW-M-65P7 Sites %
wauterw@WAUTERW-M-65P7 Sites % python3 add_building.py
Still in progress
Still in progress
Building was successfully added
C) Add floors
To add floors, the Jinja2 template could look as follows
{
   "type": "floor",
   "site": {
      "floor": {
            "name": "{{floor_name}}",
            "parentName": "Global/{{site_name}}/{{building_name}}",
            "rfModel": "Cubes and Walled Offices",
            "width": "20",
            "length": "30",
            "height": "10"
      }
   }
}
The rest is again similar to the ‘Add site’ Python script. We won’t go in detail here as this was covered already earlier. The entire script to add a floor is available here.
Executing this script will give:
Building was successfully added
wauterw@WAUTERW-M-65P7 Sites % python3 add_floor.py
Still in progress
Still in progress
Still in progress
Still in progress
Still in progress
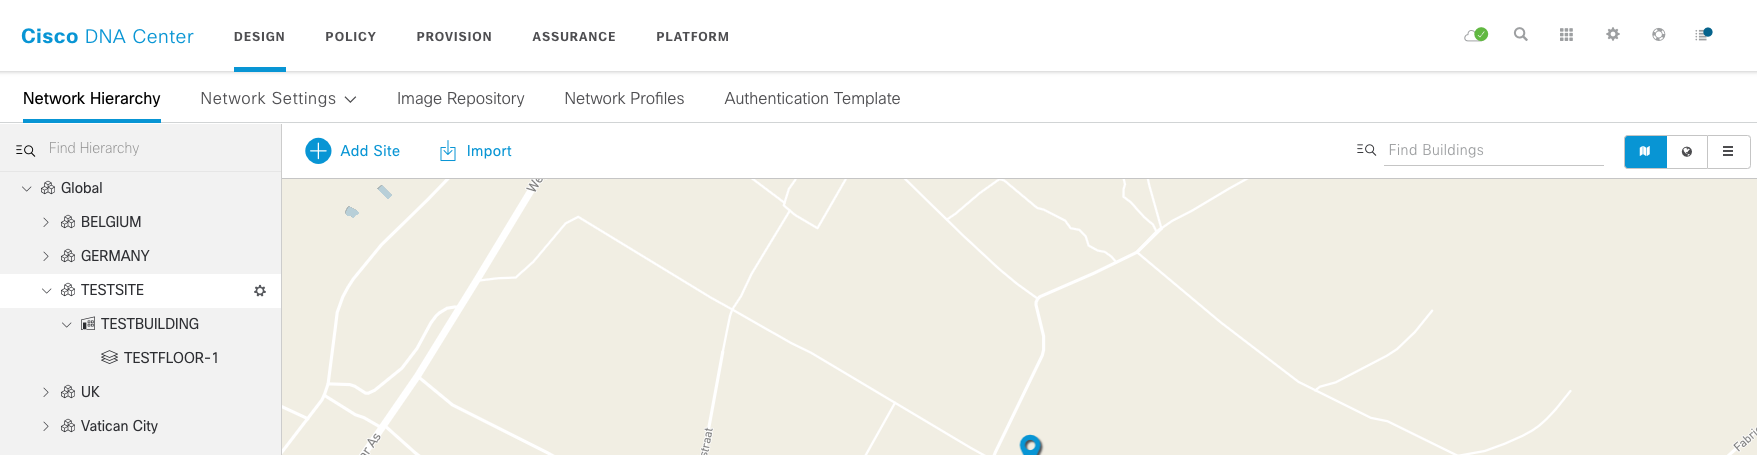
Floor was successfully addedIn the DNAC UI, you will see we successfully added the site called TESTSITE, the building called TESTBUILDING and the floor called TESTFLOOR-1.
Add device
In this section, we will discuss how to add devices to sites. We will do this through a JSON file. Here’s the file:
{
   "ipAddress": [
       "192.80.2.1"
   ],
   "snmpVersion": "v2",
   "snmpROCommunity": "readonly",
   "snmpRWCommunity": "readwrite",
   "snmpRetry": "1",
   "snmpTimeout": "60",
   "cliTransport": "ssh",
   "userName": "wim",
   "password": "cisco123",
   "enablePassword": "cisco1234!"
}
In our Python script, we will read in the json file into a variable called payload:
 with open("templates/dummy_device.json", "r") as file:
      payload = json.load(file)
Next, we will add the device as follows. Note that we extract the IP address from the response and we will store it in variable called deviceip.
device_url = f"{url}/api/v1/network-device"
response = requests.post(device_url, headers=headers, data=json.dumps(payload), verify=False ).json()
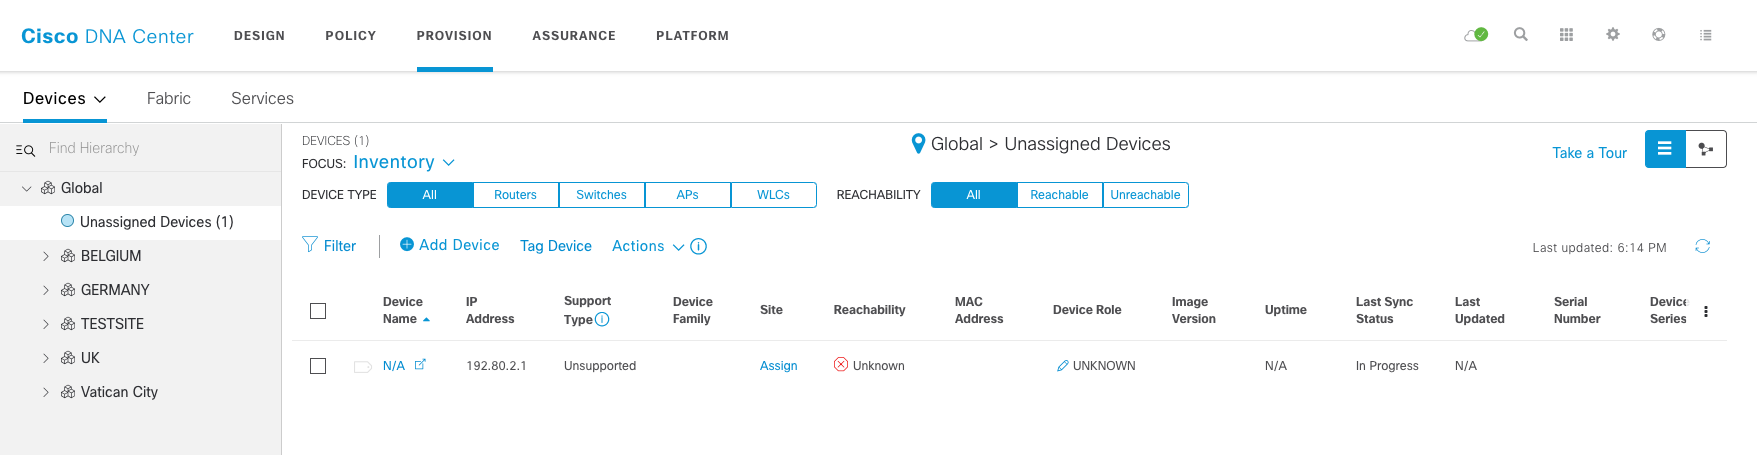
print(response)This piece of code will add a device to our DNAC but it will end up in the Unassigned Devices section. Reason is that we have not assigned it to a site/building/floor.
The code for this script can be found here
Assign a device
Once we have added a device, we can assign it to a site, a building or a floor. There is an API for this which looks like https://{{dnac}}/dna/system/api/v1/site/<siteid>/device. In order to retrieve the siteid, we can call another API. In our case, we would like to assign the device to a particular floor, so we will call https://{{dnac}}/dna/intent/api/v1/site?name=Global/TESTSITE/TESTBUILDING/TESTFLOOR-1.
First, we will retrieve the ID for the floor. We can do this as follows:
# Retrieve the ID of the floor with the provided name
   print("Retrieving the floor ID")
   floor_url = f"/dna/intent/api/v1/site?name=Global/{site_name}/{building_name}/{floor_name}"
   response_floor =  requests.get(url + floor_url, headers=headers, verify=False ).json()
   floor_id = response_floor['response'][0]['id']
   print(f"Floor ID: {floor_id} ")
Next, we call the API endpoint to assgin the device to the floor with the ID we retrieved earlier. The payload is a JSON body in which we provide the IP address of the device.
# Call the API to assign the device to the floor with ID floor_id
   print(f"Assign the device to the floor with id {floor_ID}")
   site_url = f"{url}/dna/system/api/v1/site/{floor_id}/device"
   payload = {"device": [{ "ip" : deviceip }]}
   response = requests.post(site_url, headers=headers, data=json.dumps(payload), verify=False ).json()
   executionStatusUrl = response['executionStatusUrl']
This API will return an executionStatusURL so therefore we define a for-loop which runs until we get back a SUCCESS status.
   print("Checking the execution status")
   while True:
      response =  requests.get(url+executionStatusUrl, headers=headers, data=payload, verify=False ).json()
      if response['status'] == "SUCCESS":
         print("Device was successfully assigned")
         break
      else:
         print("Device assignment still in progress")
      time.sleep(1)
Once the entire script has finished executing, we can verify the DNAC UI.
wauterw@WAUTERW-M-65P7 Sites % python3 add_dummy_device.py
Adding the device
Retrieving the floor ID
Assign the device to the floor with id b0412843-54a2-4ea8-9d68-64303d54ab2f
Checking the execution status
Device assignment still in progress
Device was successfully assigned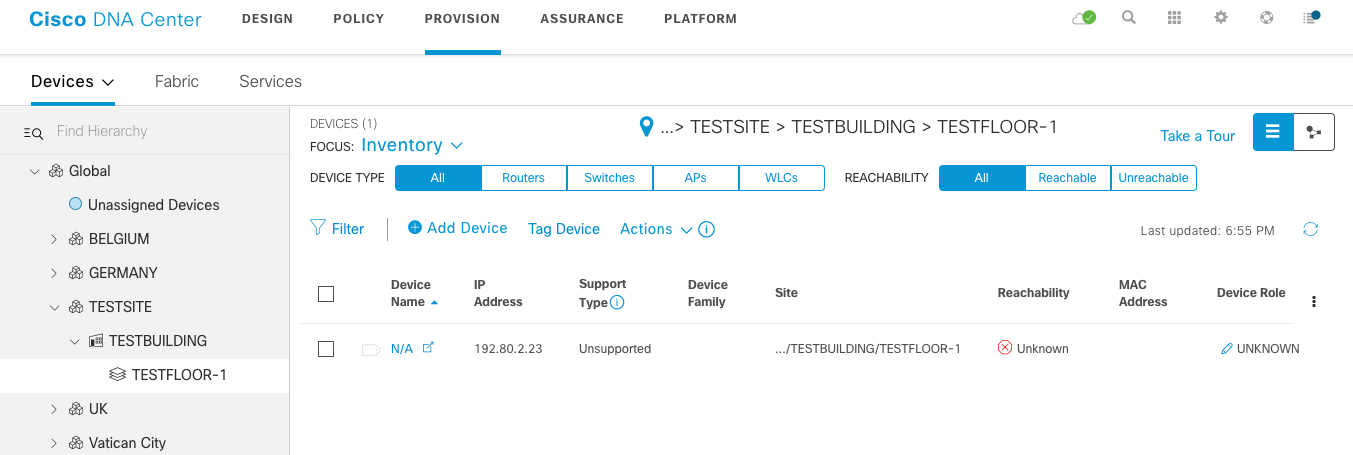
You can verify that a device is now available in the TESTFLOOR-1 site. The entire script can be found here.
Delete device
Next, let’s delete a device. In DNAC, you cannot delete a site if it still has child sites.
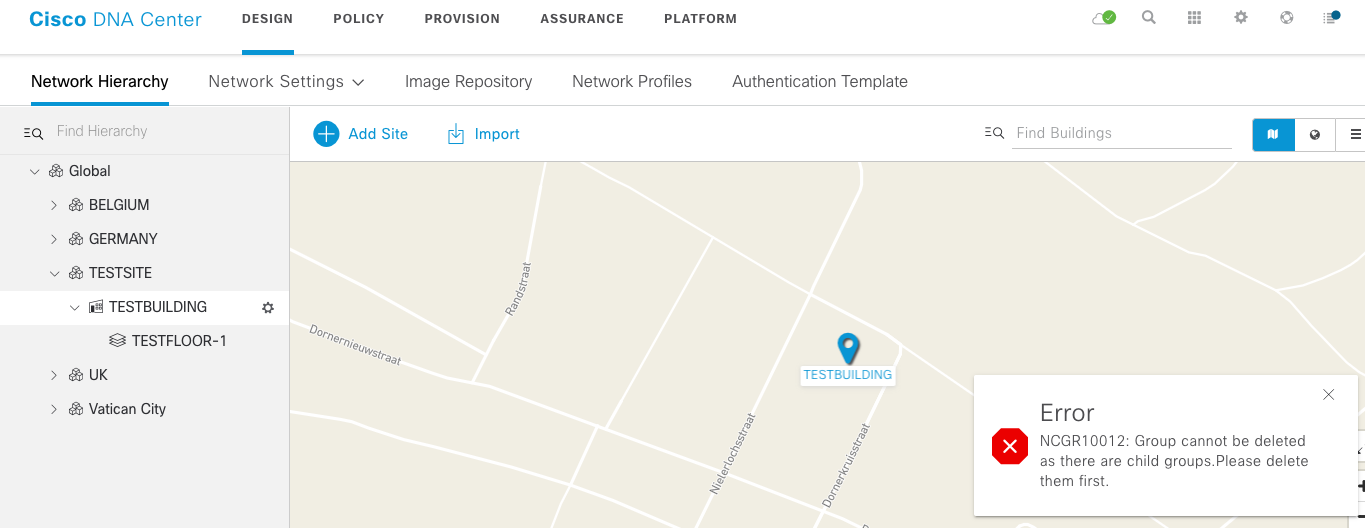
This means we need to delete the sites in a particular order. The delete API endpoint is very straigthforward:

In terms of our Python script, we first will find all the IDs for the various sites and we will add them to a dictionary:
   floor_url = f"/dna/intent/api/v1/site?name=Global/{site_name}/{building_name}/{floor_name}"
   response_floor =  requests.get(url + floor_url, headers=headers, verify=False ).json()
   mydict['floor'] = response_floor['response'][0]['id']

   building_url = f"/dna/intent/api/v1/site?name=Global/{site_name}/{building_name}"
   response_building =  requests.get(url + building_url, headers=headers, verify=False ).json()
   mydict['building'] = response_building['response'][0]['id']

   site_url = f"/dna/intent/api/v1/site?name=Global/{site_name}"
   response_site =  requests.get(url + site_url, headers=headers, verify=False ).json()
   mydict['site'] = response_site['response'][0]['id']
The dict looks as follows: {'floor': '703900d8-f3f8-451c-b4ab-3657234b0708', 'building': '00fc2869-a51a-4942-99c7-4f6693800ea6', 'site': '5b4f5797-1f40-45a6-9227-0a058c208170'}
Next, we iterate over this dictionary, each time calling the DELETE endpoint we mentioned above.
   site_url = url + "/dna/intent/api/v1/site/"
   for k, v in mydict.items():
      response =  requests.delete(site_url + v, headers=headers, verify=False ).json()
      executionStatusUrl = response['executionStatusUrl']
We capture also the executionStatusUrl as we need to use it in order to determine whether the previous site was already deleted. If so, we continue to the next site.
 while True:
         response =  requests.get(url+executionStatusUrl, headers=headers, verify=False ).json()
         if response['status'] == "SUCCESS":
            print("Delete action was successfully")
            break
         else:
            print("Delete action still in progress")
         time.sleep(1)
The entire Python script can be found here. Note that the above script is not really failure proof, e.g. it only works when there are no devices in a particular site, it only works if we execute the delete action in the correct order (first the floor, then the building, then the site).
The entire set of scripts can be found here.