Cisco Webex Teams - Chatbot with Botkit
Introduction
In this post we will experiment a bit with a tool called Botkit. Botkit (see more info here) is a developer tool for building chat bots for the major messaging frameworks. It makes creating chatbots fairly straightforwards and gets you up and running in no time.
We will create a chatbot for Webex Teams which simply makes a REST call to an external service and sends back the result to our chat room. More specifically in our case we will use the DeckOfCards API (see here for more info).
Download ngrok or localtunnel
I’m going to run the chatbot (for now) on my local MAC/PC. As Webex Teams needs to be able to ‘talk’ to our chatbot code, we need to expose our code to the internet. There’s various tools available that make this very easy. Check out ngrok or localtunnel. We will be using localtunnel (check out the code here.
Go ahead and install it as follows
~blog-hugo-netlify-code/WebexTeams_Chatbots/botkit-template ❯ npm install -g localtunnelNext, create a tunnel:
~blog-hugo-netlify-code/WebexTeams_Chatbots/botkit-template master ❯ lt --port 3000
your url is: https://dull-otter-87.loca.lt
You will see that localtunnel has generated a URL which makes port 3000 on your MAC/PC available to the outside world. Pretty neat, isn’t it.
Download Botkit
Next, let’s continue with the Botkit part. Just go ahead and clone the following Botkit template.
~blog-hugo-netlify-code/WebexTeams_Chatbots master ❯ git clone https://github.com/CiscoDevNet/botkit-template.git                                       Cloning into 'botkit-template'...
remote: Enumerating objects: 20, done.
remote: Counting objects: 100% (20/20), done.
remote: Compressing objects: 100% (15/15), done.
remote: Total 424 (delta 6), reused 10 (delta 4), pack-reused 404
Receiving objects: 100% (424/424), 394.00 KiB | 1.19 MiB/s, done.
Resolving deltas: 100% (258/258), done.
~blog-hugo-netlify-code/WebexTeams_Chatbots ❯ cd botkit-template
Next, ensure you install the dependencies as follows:
~blog-hugo-netlify-code/WebexTeams_Chatbots/botkit-template master ❯ npm install
Create a webex teams bot
Creating a Webex Teams bot is very easy. To do so, go to the webex website site and login (if no account, just create one):
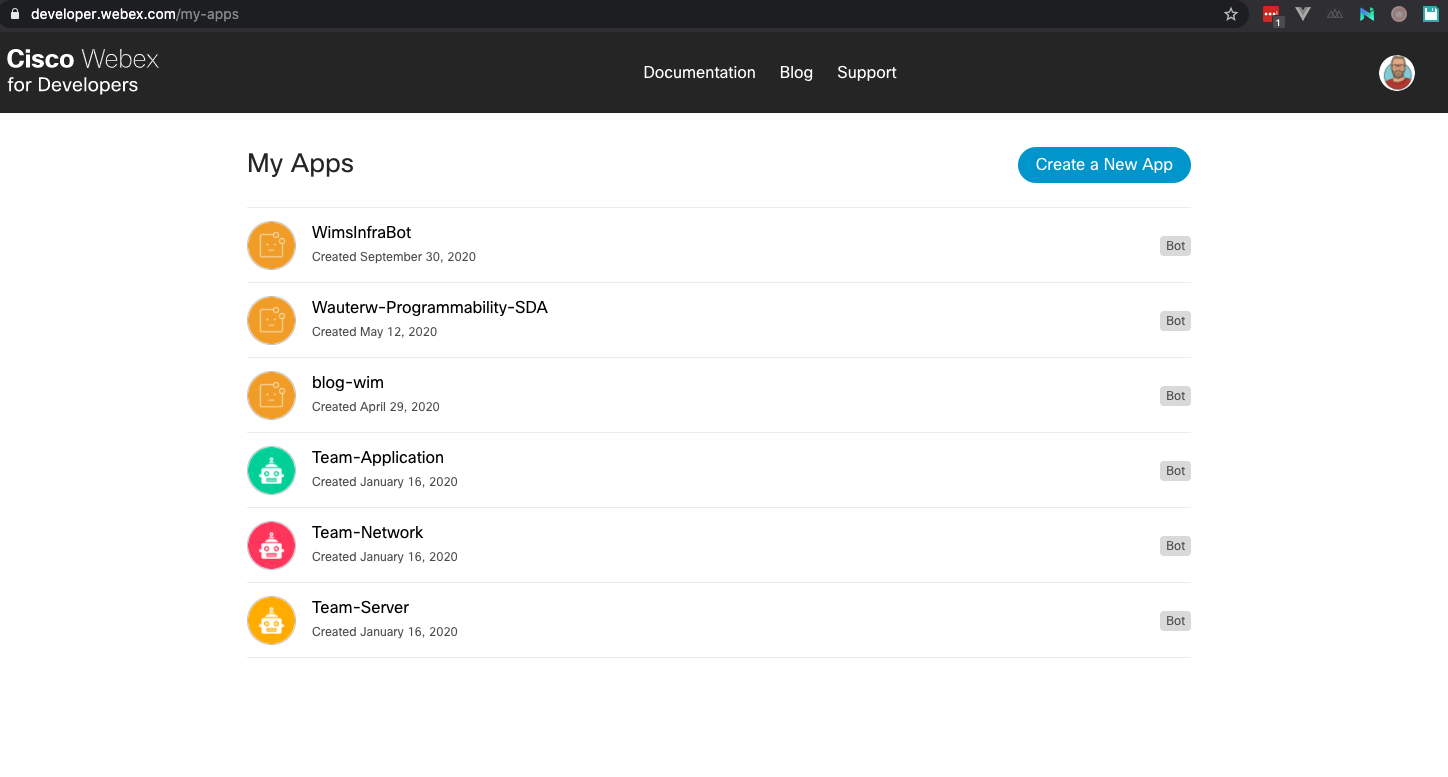
Next, you will need to create by clicking the Create New App button. If you never created an app before, obviously your list will be empty.
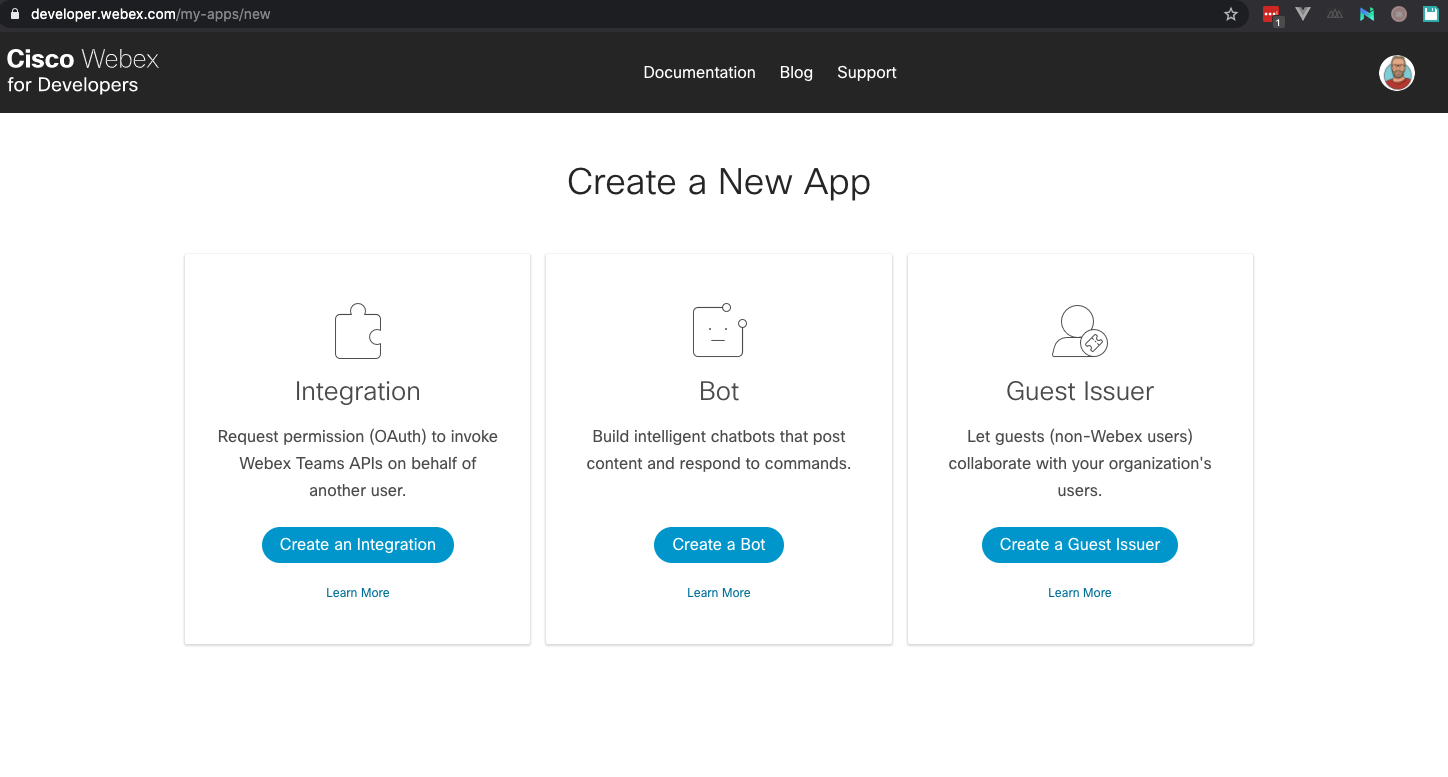
You will get the following screen. Ensure you select the Create a bot option.
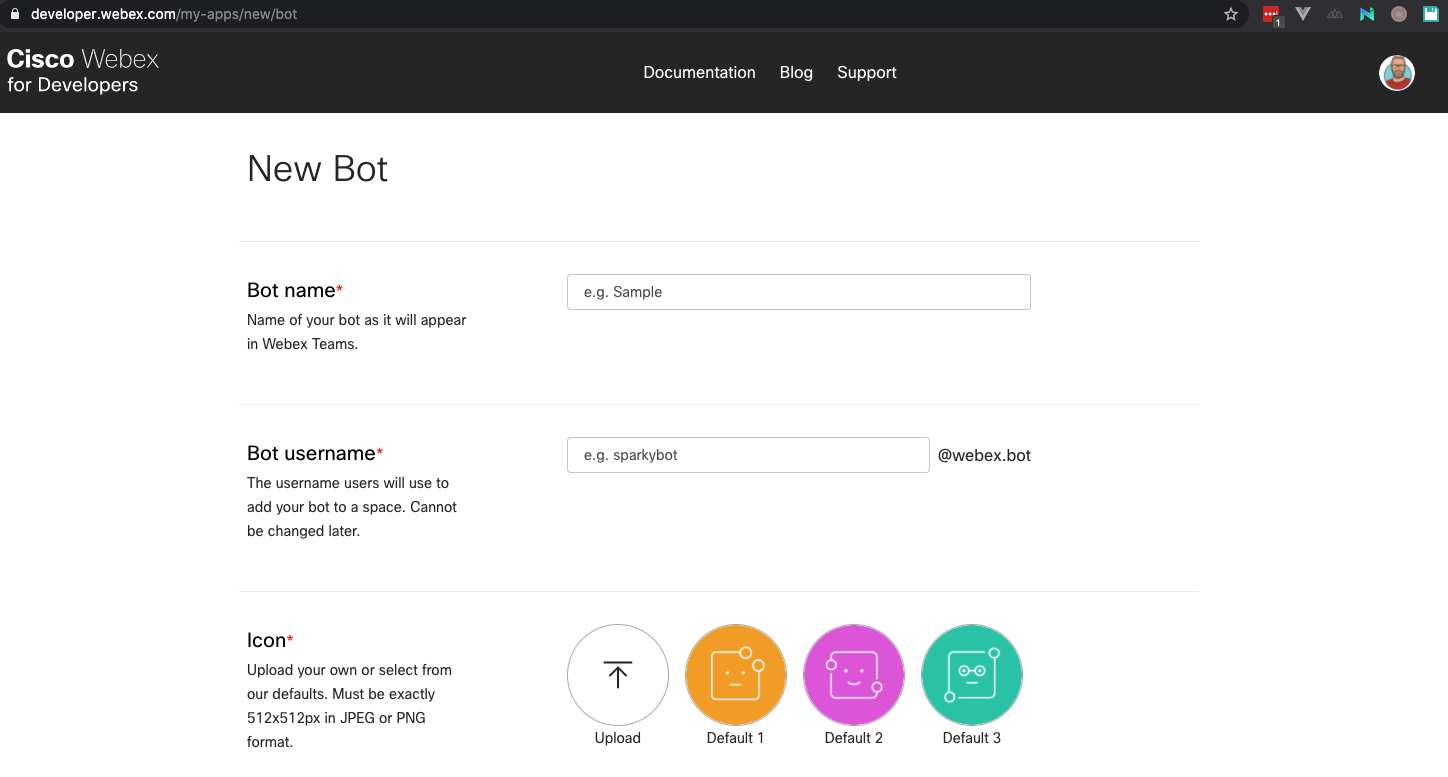
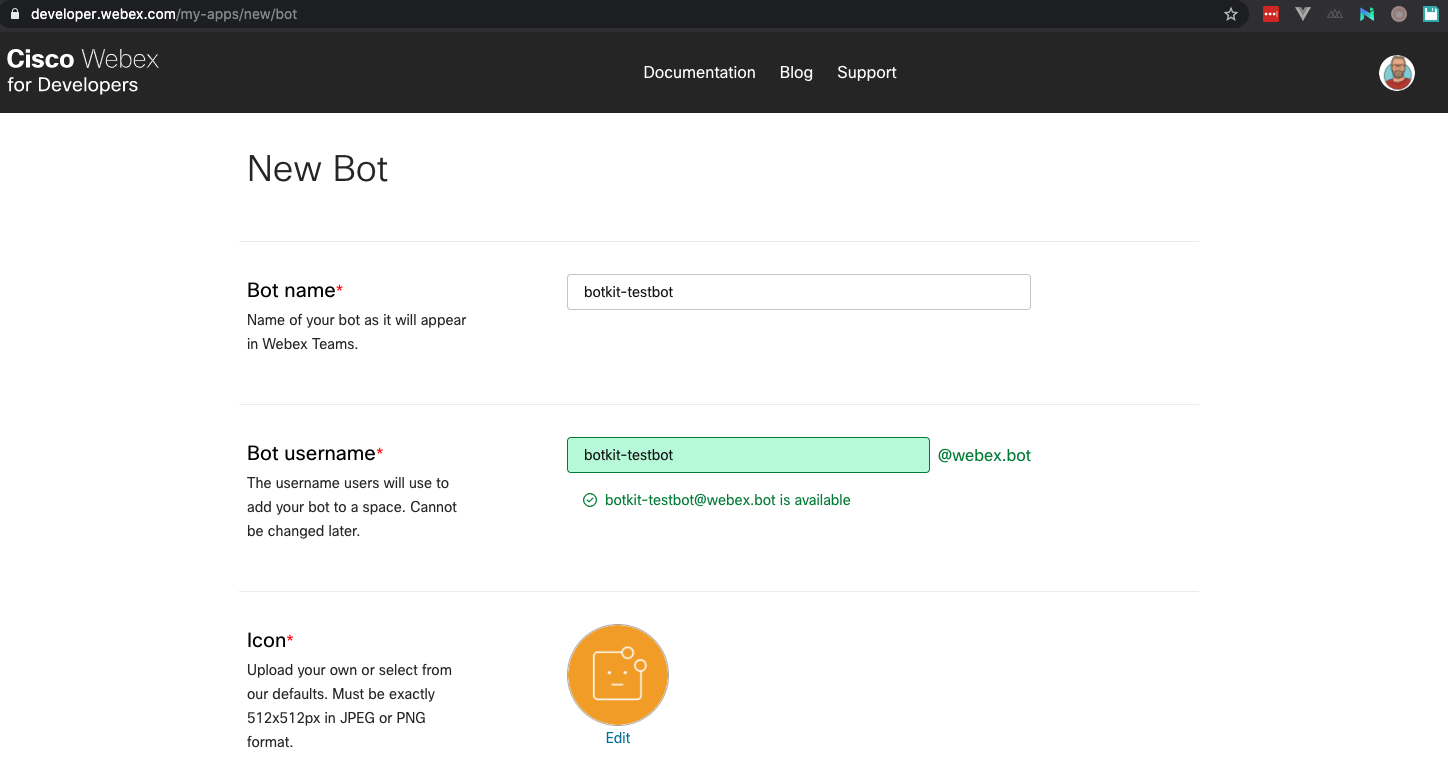
Next, fill in the form. Give your bot a name and username, select an icon etc…
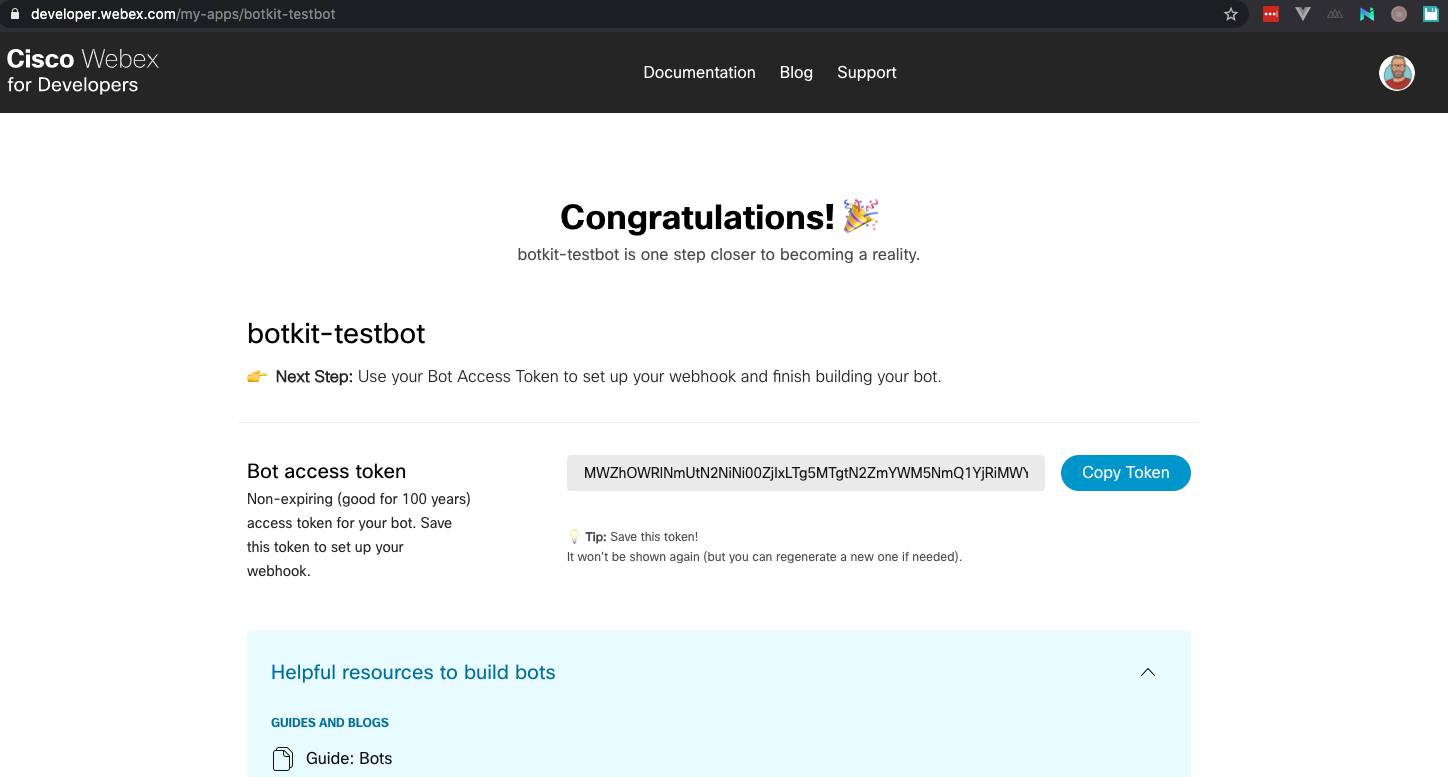
Finally, when the bot is created you will receive a Bot Access Token. Copy/paste this token as you will need it later.
Configure botkit
At this point in time we are ready to start coding. By now you should have the following:
- URL from ngrok or localtunnel, exposing your chatbot to the external world
- Cloned the botkit template
- Created a Webex Teams bot
If you have all of the above, go ahead with the below.
First off, we need to copy the sample .env.example file to a file called .env:
~blog-hugo-netlify-code/WebexTeams_Chatbots/botkit-template master ❯ mv .env.example .env Next, open the .env file and change the values for the WEBEX_ACCESS_TOKEN (= from the webex bot you created) and PUBLIC_URL (= the localtunnel or ngrok URL)
# Webex Teams bot account access token

WEBEX_ACCESS_TOKEN=MWZhOWRlNmUtN2NiNi00ZjIxLTg5MTgtN2ZmYWM5NmQ1YjRiMWYzMmYzODEtNzFj_PF84_1eb65fdf-9643-417f-9974-ad72cae0e10f
PUBLIC_URL=https://dull-otter-87.loca.lt
PORT=3000
Next, start the botkit:
~blog-hugo-netlify-code/WebexTeams_Chatbots/botkit-template master ❯ node bot.js
LoggerProxy->info#NO LOGGER DEFINED
WARNING: No secret specified. Source of incoming webhooks will not be validated. https://developer.webex.com/webhooks-explained.html#auth
** Your bot is using memory storage and will forget everything when it reboots!
** To preserve dialog state, specify a storage adapter in your Botkit config:
** const controller = new Botkit({storage: myStorageAdapter});
Enabling plugin:  Webex Adapter
Health check available at: https://dull-otter-87.loca.lt
Webhook endpoint online:  http://localhost:3000/api/messages
Your chatbot is up and running now. Next, we need to add it to our Webex Teams client.
Add the bot to your Webex Teams space
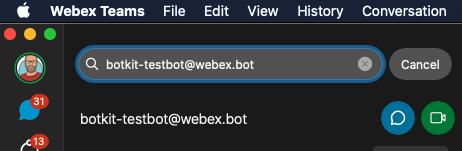
To add the chatbot to Webex Teams space, search for the username (you used while creating the Webex Teams bot) and hit the search button.
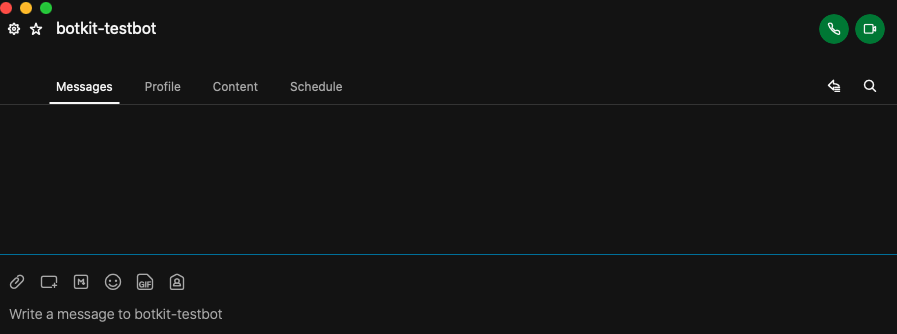
Once you have added your bot, you will be able to interact with it.
Checking out botkit
As we have previously downloaded the botkit template, we can make use of various examples that got shipped with this template. To verify that Webex Team can communicate with your bot, we will try out some of these preshipped examples.
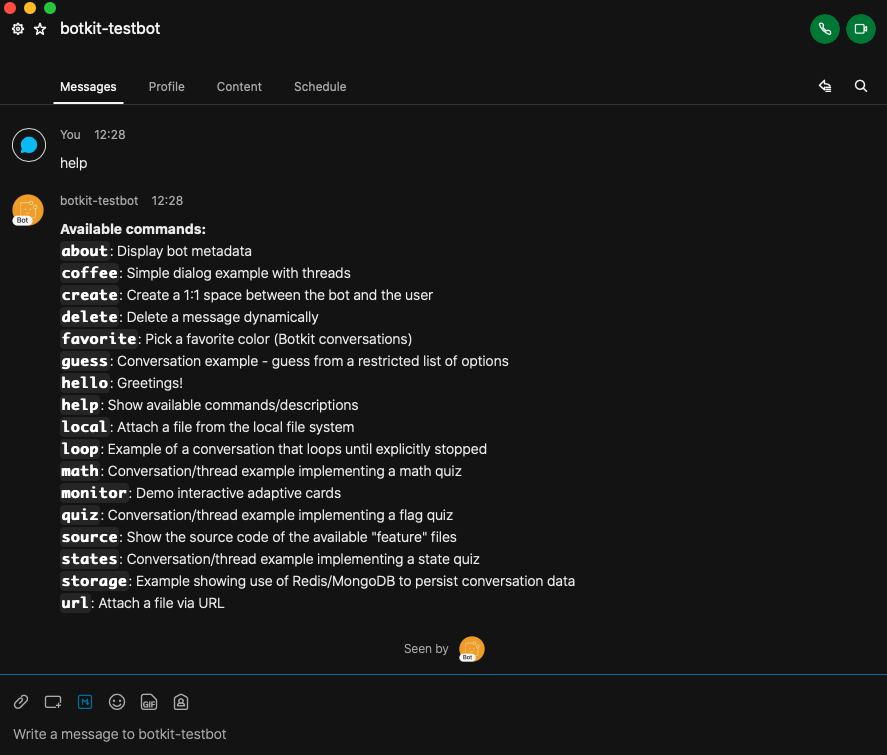
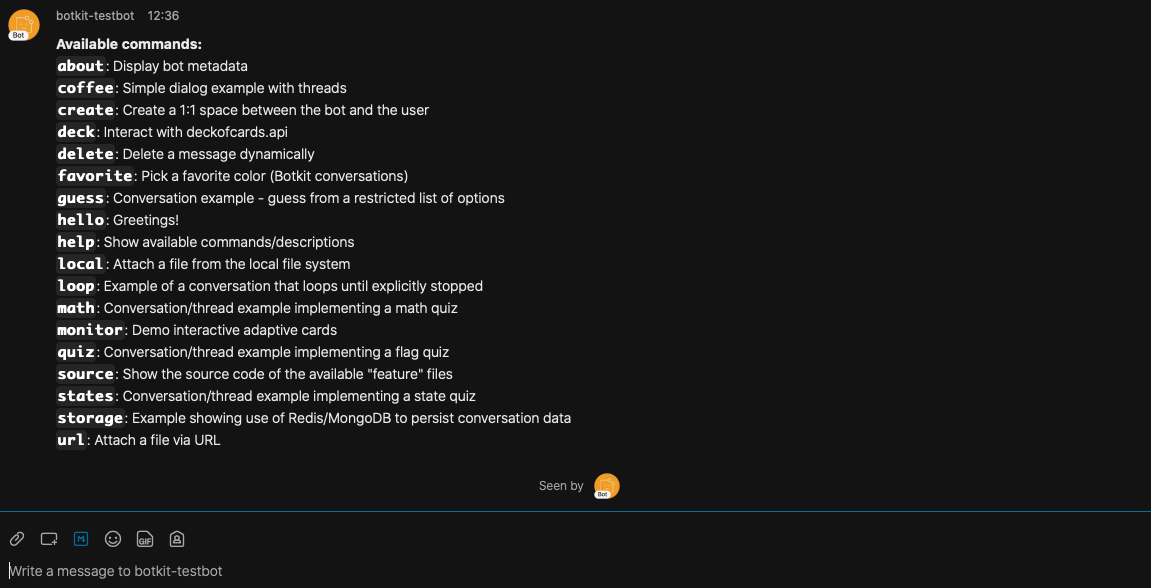
Best way to get started is by typing help in your Webex Teams space. If all works well, your bot (yes, running on your local MAC/PC) will answer with a list of examples that are available for you to try out.
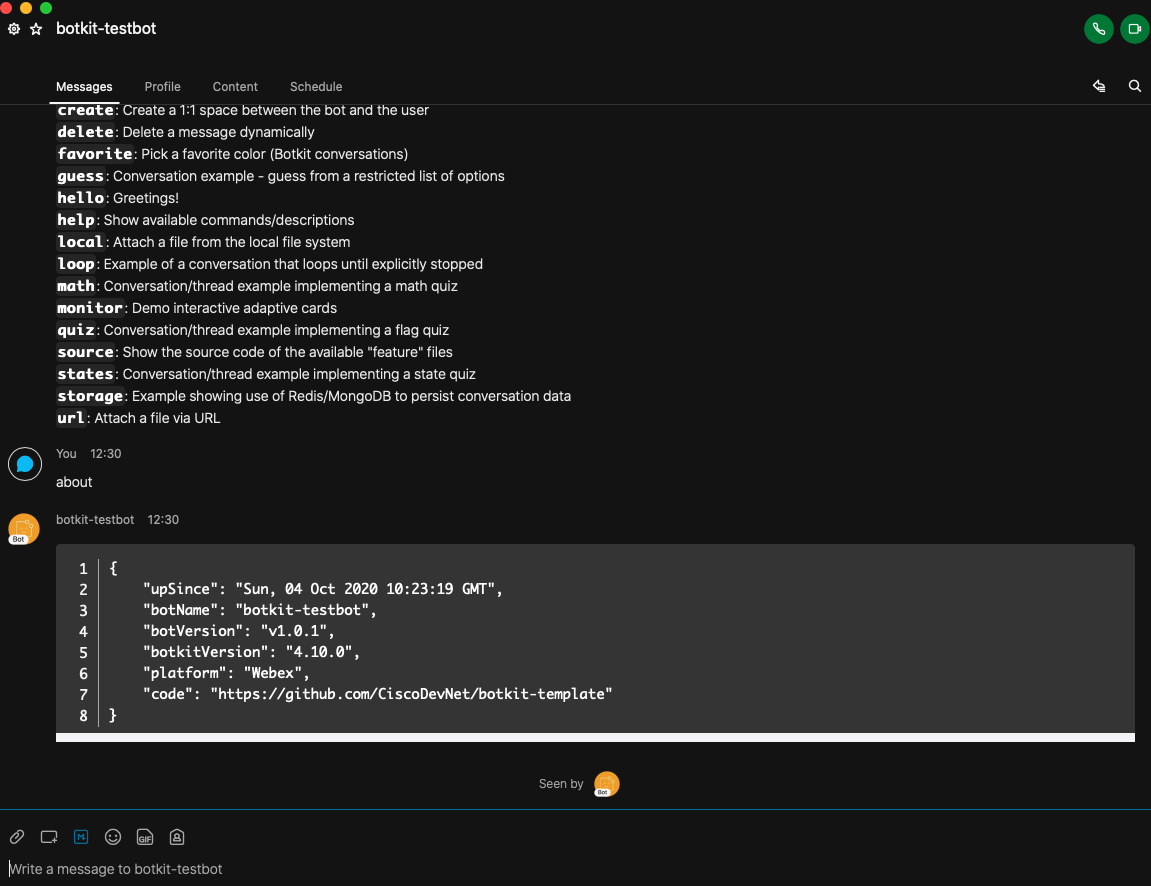
Let’s try out the about example. You will see this returns some information on our botkit.
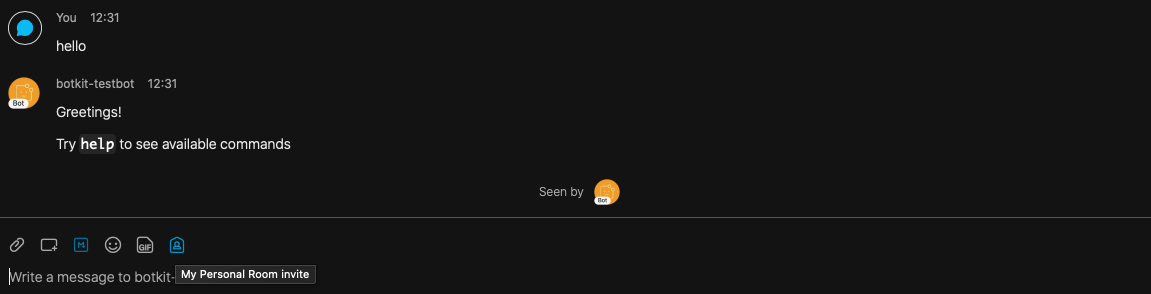
Next, let’s see what hello does…As you will see, it just returns a greetings response.
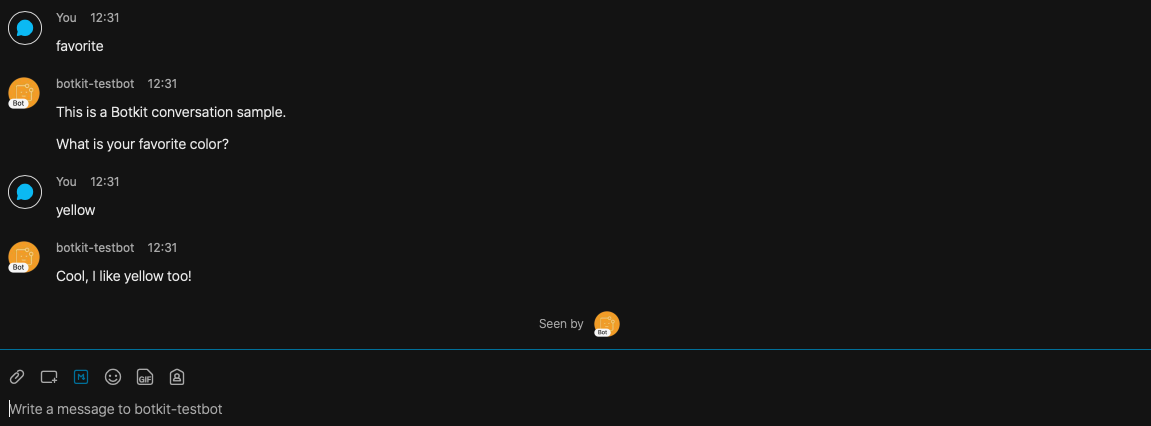
Let’s do a bit more interaction by launching the favorite command. As you will see, this asks you for your favorite color and just returns your choice.
You now have a chatbot up and running that is fully integrated with your Webex teams client. It’s now up to us to give our bot a bit more ‘meaning’.
Creating our own feature
All the examples we have seen above (help, hello, favorite) are referred to as features within botkit. In other words, if we want to create a not conversation, we will need to create a new feature. That’s what we will do next.
In this section, we will create our own feature. To do so, go to the folder called feature and create a new file. Call it whatever you want. I called mine deckofcards.js.
In the deckofcards.js file, add the following code. I believe the code is fairly self-explanatory but here are some items to pay attention to:
- I always start with ensuring that we add our feature to the
helpcommand. This can be done withcontroller.commandHelp.push() - Ensure your bot listens to a keyword. This can be done with
controller.hears(). Once the chatbot hears the worddeck(in below example), it will execute the code in the chat controller (e.g. bot.beginDialog( ‘chat’)) - The convo.before() function will execute a REST api call to the deckofcards API. convo.before is registering a handler function that will fire before a given thread begins. In other words, the deckofcards API will be called before the thread happens.
- The convo.setVar() function will essentially save the deck id (returned form the API) in a variable called
deck_id - In the convo.addMessage() function will will then return this value. You can call it through
{{vars.deck_id}}
const { BotkitConversation } = require("botkit");
const axios = require("axios");

module.exports = function(controller) {
    const convo = new BotkitConversation('chat', controller);

    convo.before('default', async(convo, bot) => {
        axios.get('https://deckofcardsapi.com/api/deck/new/shuffle/?deck_count=1')
            .then(function (response) {
                convo.setVar('deck_id', response.data.deck_id);
                console.log(response.data.deck_id);

            })
        .catch(function (error) {
            console.log(error);
        })
    });

    convo.ask('What is your name?', async(response, convo, bot) => {
        console.log(`The name is ${ response }`);
      }, 'name');
    convo.addAction('msg');
    convo.addMessage('Hi {{vars.name}}! Let us play a small card game', 'msg');
    convo.addMessage('Your deck is shuffled and has id {{vars.deck_id}}', 'msg');

    controller.addDialog( convo );

    controller.hears( 'deck', 'message,direct_message', async ( bot, message ) => {
        await bot.beginDialog( 'chat' );
    });

    controller.commandHelp.push( { command: 'deck', text: 'Interact with deckofcards.api' } );

}
Let’s try it out. First issue the help command.
You will see our deck keyword is listed there. Let’s give it a try:
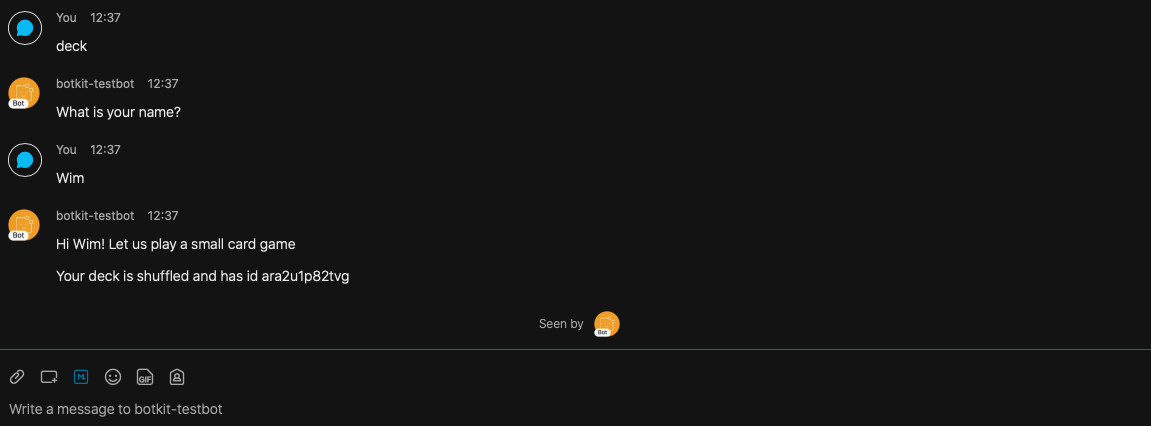
As you can see, it will first ask us our name and next it will send us back the deck_id that was returned by the deckofcards API.
Rewriting our function
If you are following along with this blog post, you will have a chatbot completely up and running. So you can stop here if you want. Yet, I wanted to have a bit more flexibility in our chatbot code. I wanted to be able to launch a REST call whenever I wanted and not just before the main thread was started.
So we can rewrite our code a little bit to accomplish that.
- We ensure our feature is available with the
helpcommand. See the controller.commandHelp.push() section - We ensure we register a keyword
deck_functionthrough the controller.hears() function - We create an interaction with convo.ask() method and in that method we call the performCall() function
- The performCall() function is simply executing the REST call and returns the deck_id to the result variable
const { BotkitConversation } = require("botkit");
const axios = require("axios");

module.exports = function(controller) {
    const convo = new BotkitConversation('deck_function', controller);

    convo.ask('What is your name?', async(response, convo, bot) => {
        const result = await(performCall(response));
        await bot.say( 'The deck id is ' + result );
        await convo.stop();
    }, 'name');


    controller.addDialog( convo );

    controller.hears( 'deck_function', 'message,direct_message', async ( bot, message ) => {
        await bot.beginDialog( 'deck_function' );
    });

    controller.commandHelp.push( { command: 'deck_function', text: 'Interact with deckofcards.api' } );

    async function performCall( selection ) {
        let response = await(axios.get('https://deckofcardsapi.com/api/deck/new/shuffle/?deck_count=1'));
        let deck_id = response.data.deck_id;
        return deck_id;
    }
}
We keep things simple here as I just want to show a simple prototype but in this way, we could easily extend our bot to call other APIs if we wanted to. Let’s now see if things are working.
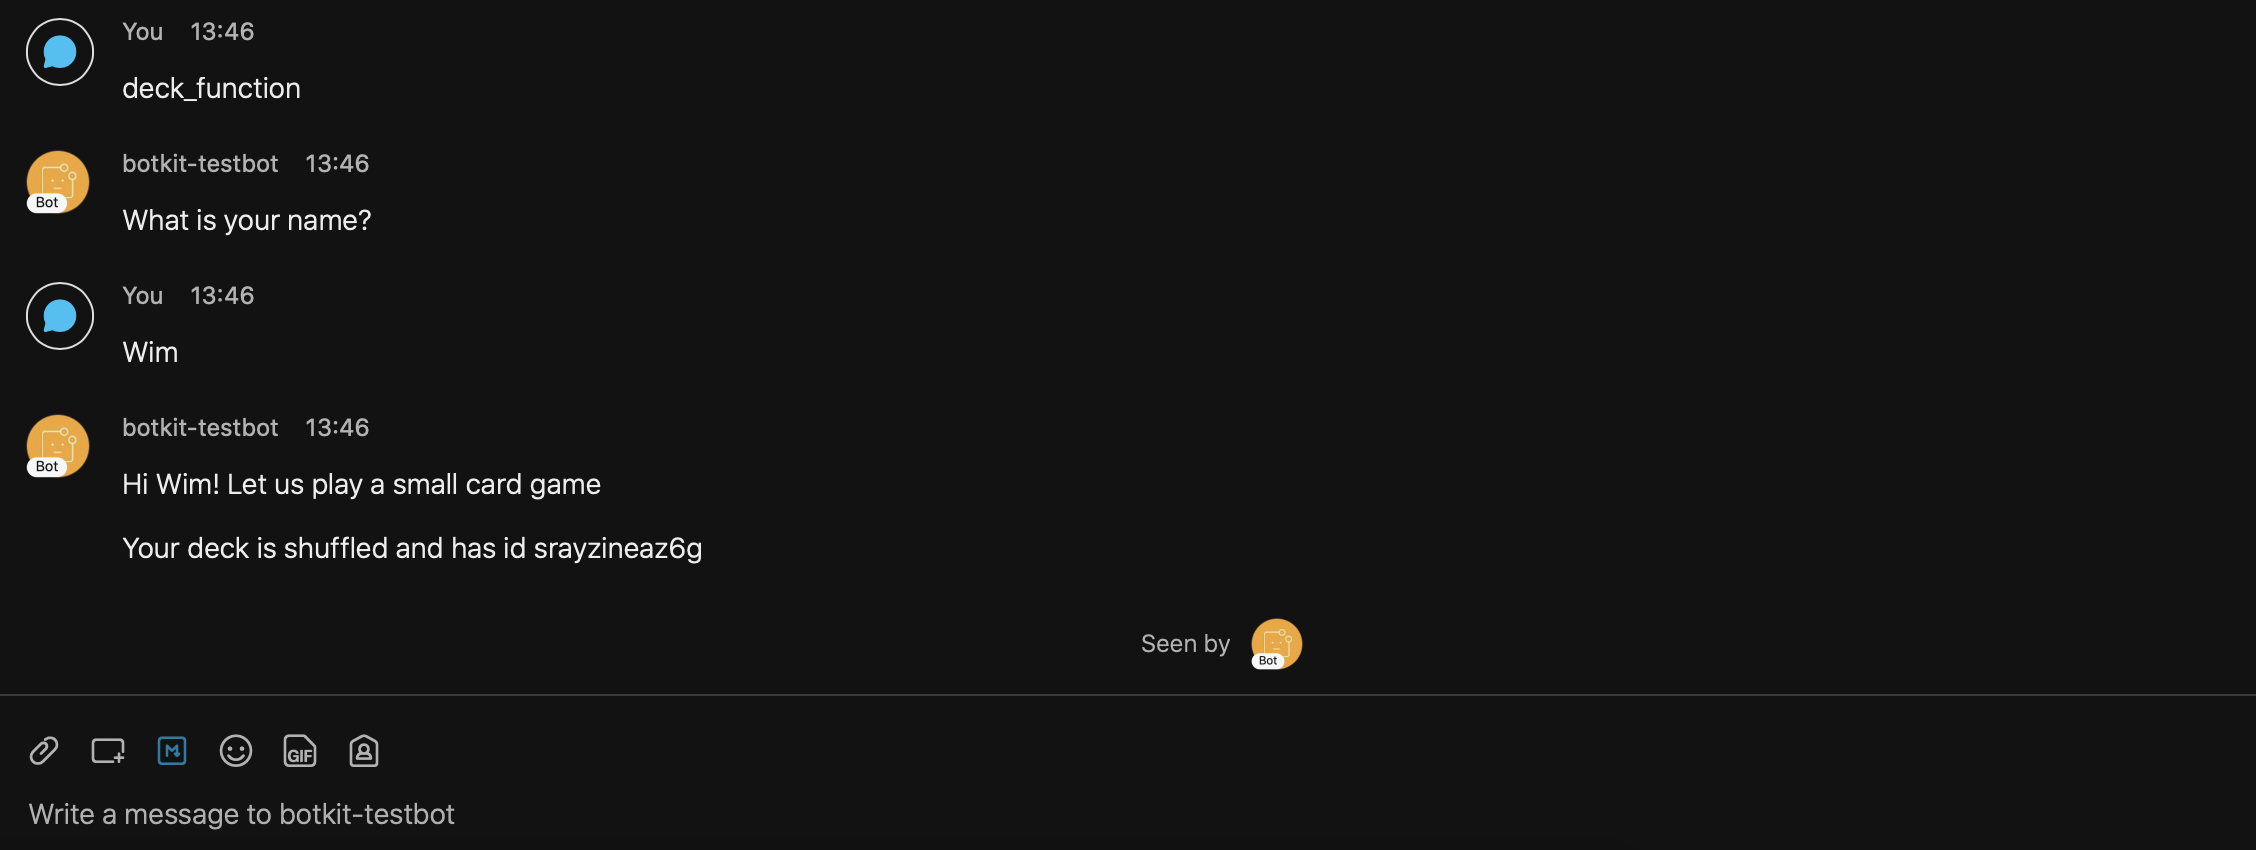
Seems like everything is working as before. Good job!
Code can be found on my Github repo.