Pulumi - Create AWS EC2 instance (new VPC)
Introduction
In this post, we used Pulumi to create an EC2 instance in the default VPC. Then, in this post, we created a small variation in which we launched an EC2 instance in a pre-existing VPC and subnet. In this post, we will create yet another variant in which we will launch an EC2 instance in a VPC and subnet that we will also create through Pulumi.
Begin situation
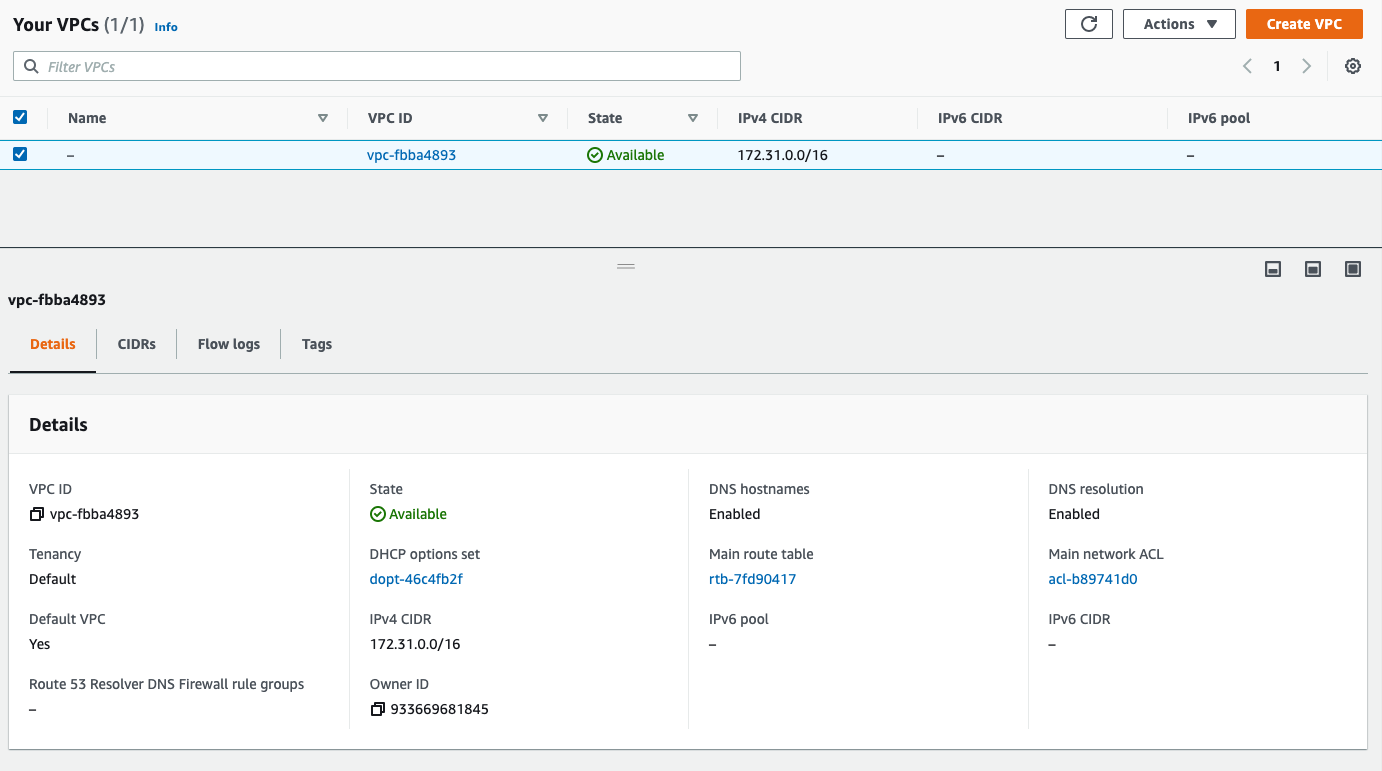
Let’s have a look at the begin situation. In the AWS console, you see the current configured VPC’s and subnets:
VPCs:
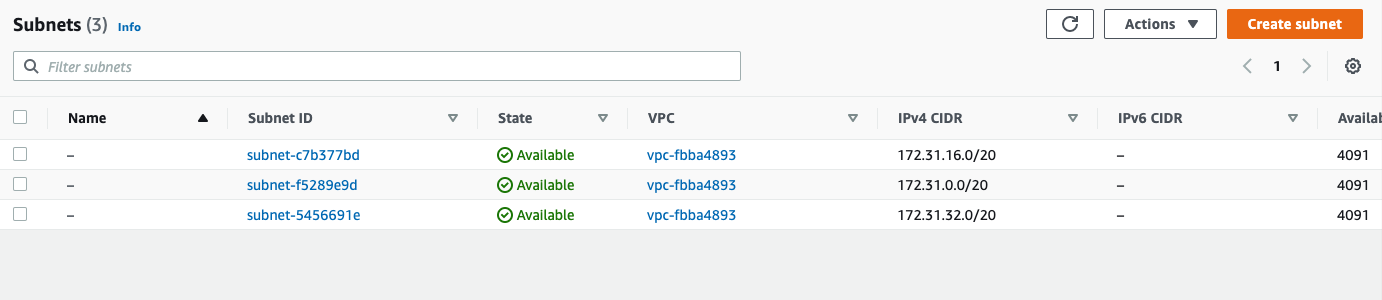
Subnets:
Pulumi Code
Next, let’s have a look at the code. It’s fairly similar to the previous posts, see here and here. Few things are different though:
- We create a new VPC through the
aws.ec2.Vpcfunction (see documentation here) - We create a subnet under that VPC using the
aws.ec2.Subnetfunction (see documentation here) - To ensure the EC2 instance is created under that subnet, we need to pass the
subnet_idin theaws.ec2.Instancefunction.
import pulumi
import pulumi_aws as aws

size = 't3.micro'

user_data = """#!/bin/bash
echo "Hello, World!" > index.html
nohup python -m SimpleHTTPServer 8080 &
"""

ami = aws.ec2.get_ami(most_recent="true",
                  owners=["137112412989"],
                  filters=[{"name":"name","values":["amzn-ami-hvm-*"]}])

my_vpc = aws.ec2.Vpc("myVpc",
    cidr_block="172.16.0.0/16",
    tags={
        "Name": "pulumi-new-vpc",
    })

my_subnet = aws.ec2.Subnet("mySubnet",
    vpc_id=my_vpc.id,
    cidr_block="172.16.10.0/24",
    availability_zone="eu-central-1a",
    map_public_ip_on_launch=True,
    tags={
        "Name": "pulumi-new-subnet",
    })

group = aws.ec2.SecurityGroup('pulumi_allow_8080',
            vpc_id=my_vpc.id,
            description='Enable access to port 8080',
            ingress=[
                { 'protocol': 'tcp', 'from_port': 8080, 'to_port': 8080, 'cidr_blocks': ['0.0.0.0/0'] },
                { 'protocol': 'tcp', 'from_port': 22, 'to_port': 22, 'cidr_blocks': ['0.0.0.0/0'] }
            ])

server = aws.ec2.Instance('webserver',
    instance_type=size,
    vpc_security_group_ids=[group.id],
    ami=ami.id,
    subnet_id=my_subnet.id,
    user_data = user_data,
    tags = { "Name": "Pulumi" },
    )


pulumi.export('publicIp', server.public_ip)
pulumi.export('publicHostName', server.public_dns)
Deployment
Next, let’s deploy our resources using the pulumi up command.
/Webserver/Pulumi_newVPC❯ pulumi up
Please choose a stack, or create a new one: dev
Previewing update (dev)

View Live: https://app.pulumi.com/wiwa1978/aws_ec2_wim/dev/previews/67108f93-f157-48b3-888c-d402fa23c6b3

     Type                      Name               Plan
 +   pulumi:pulumi:Stack       aws_ec2_wim-dev    create
 +   ├─ aws:ec2:Vpc            myVpc              create
 +   ├─ aws:ec2:Subnet         mySubnet           create
 +   ├─ aws:ec2:SecurityGroup  pulumi_allow_8080  create
 +   └─ aws:ec2:Instance       webserver          create

Resources:
    + 5 to create

Do you want to perform this update? yes
Updating (dev)

View Live: https://app.pulumi.com/wiwa1978/aws_ec2_wim/dev/updates/1

     Type                      Name               Status
 +   pulumi:pulumi:Stack       aws_ec2_wim-dev    created
 +   ├─ aws:ec2:Vpc            myVpc              created
 +   ├─ aws:ec2:Subnet         mySubnet           created
 +   ├─ aws:ec2:SecurityGroup  pulumi_allow_8080  created
 +   └─ aws:ec2:Instance       webserver          created

Outputs:
    publicIp      : "3.126.120.156"

Resources:
    + 5 created

Duration: 34s
In the next screenshot, you will see that the VPC has been created:
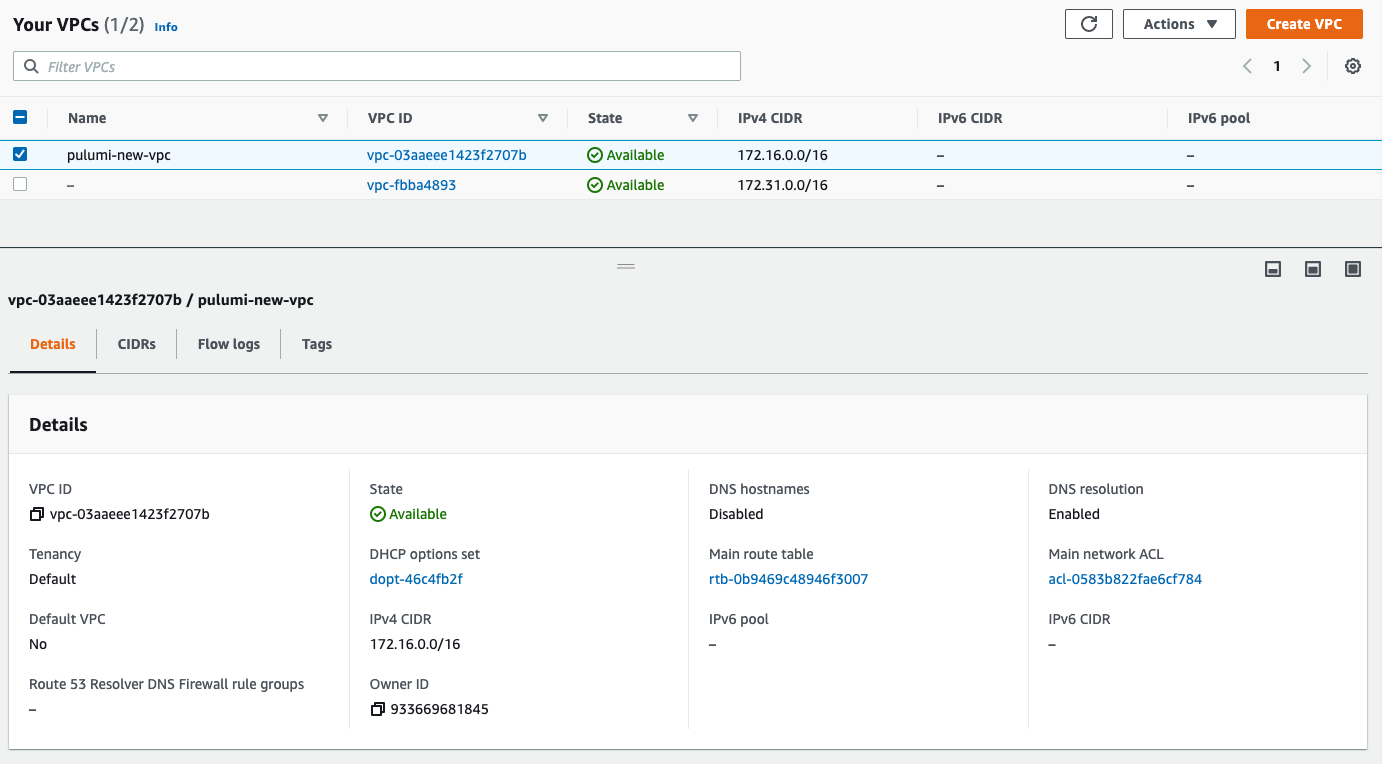
Also the subnet has been created successfully:
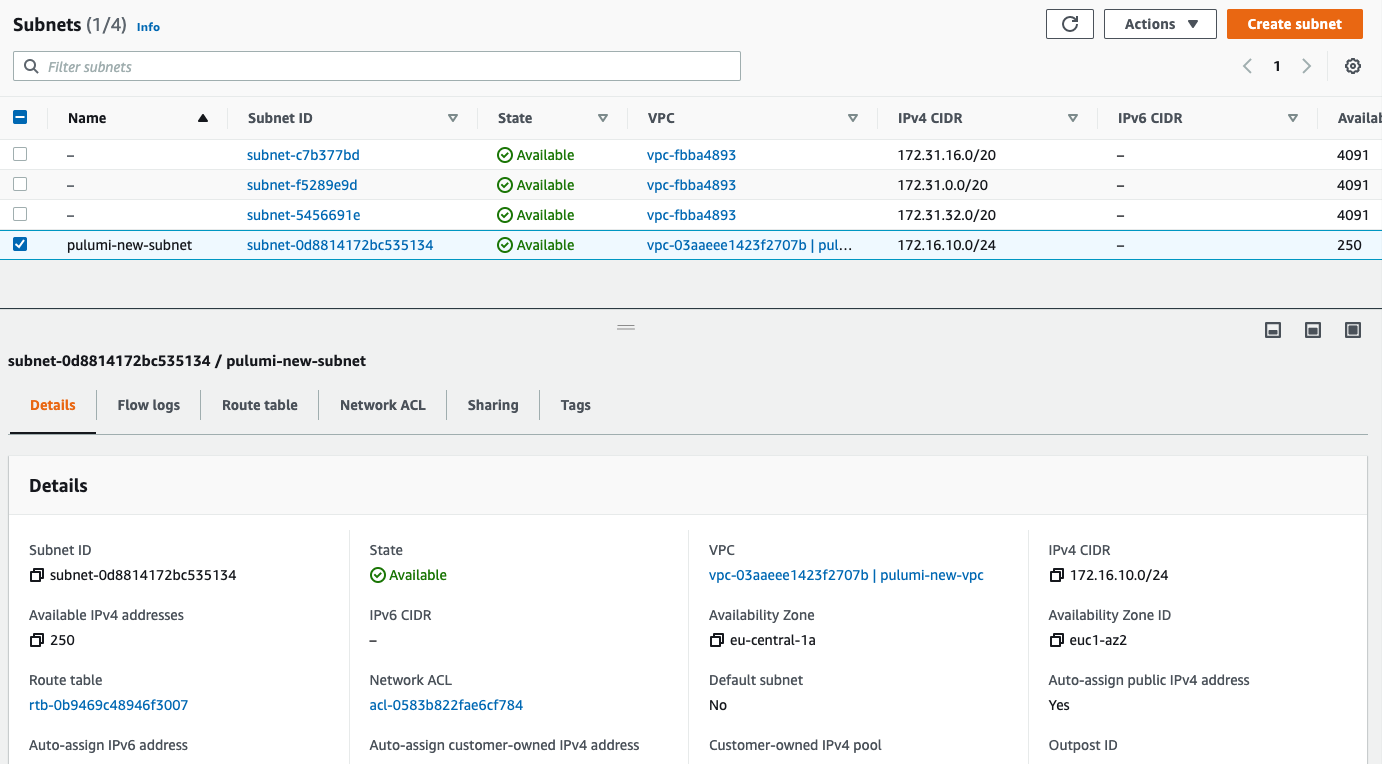
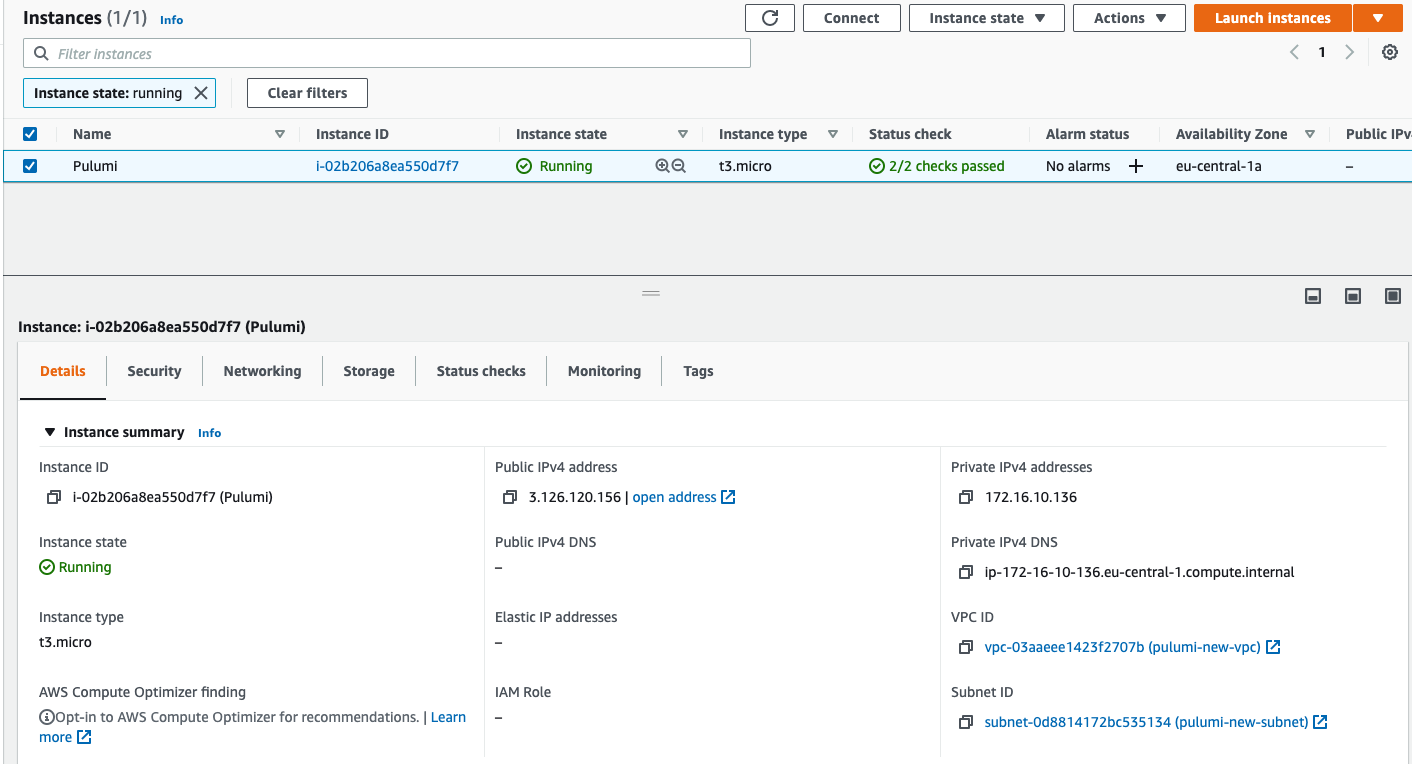
And finally the EC2 instance is created and is located in the correct subnet and VPC.
Hope you enjoyed this little blog post. You can find the code here.