Pulumi - Create AWS EC2 instance (default VPC)
Introduction
People who follow this blog probably know I’m a big fan of Infrastructure as Code. So far though, I only worked with Terraform quite extensively. Playing around with Pulumi has been on my to do list for a long time.
Unlike Terraform, which has its own language (Hashicorp Configuration Language) and syntax for defining infrastructure as code, Pulumi uses real programming languages. This means that you can write your configuration languages in languages like Python, Javascript, Typescript, Go or .NET languages like C# and F#.
So let’s try out some fairly simple examples to get familiar with Pulumi in the first place. In this post, we will be creating a couple of AWS resources, update them and delete them again, all using Python. We will not touch on the installation process for Pulumi as it’s fairly well documented on their website, see here. Also, as we are going to work with AWS, ensure you have an Access Key and a Secret Key and make them available using environment variables (see here).
Create new project
The pulumi new command creates a new Pulumi project. It provides essentially some scaffolding based on the language you want to use. In our case we will use Python but not that other languages are also supported (e.g. Typescript, Go…)
~/Pulumi_defaultVPC❯ pulumi new aws-python --name aws_ec2
This command will walk you through creating a new Pulumi project.

Enter a value or leave blank to accept the (default), and press <ENTER>.
Press ^C at any time to quit.

project description: (A minimal AWS Python Pulumi program) A simple AWS EC2 instance
Created project 'aws_ec2'

Please enter your desired stack name.
To create a stack in an organization, use the format <org-name>/<stack-name> (e.g. `acmecorp/dev`).
stack name: (dev) dev
Created stack 'dev'

Creating virtual environment...
Finished creating virtual environment
Updating pip, setuptools, and wheel in virtual environment...
Collecting pip
  Using cached pip-21.1.2-py3-none-any.whl (1.5 MB)
Collecting setuptools
  Using cached setuptools-57.0.0-py3-none-any.whl (821 kB)
Collecting wheel

<TRUNCATED>

Finished installing dependencies
Your new project is ready to go! ✨

To perform an initial deployment, run 'pulumi up'
Create EC2 instance
Note that in this post we will create an EC2 instance in the default VPC. In other posts, we will show you how to create an EC2 instance in an existing (non-default) VPC or even to create an EC2 instance in an entirely new VPC.
You will see there is a file called __main___.py. That file contains some scaffolded code to create an S3 bucket. We will replace the contents of that file in order to create an EC2 instance.
First, we will search an AMI image based on some criteria. We can use the aws.ec2.get_ami command for that (see documentation here). In our example code, we want to find the latest Amazon image.
Next, we will create a security group using the aws.ec2.SecurityGroup command (see documentation here). As we want to create a small webserver, we will open poirt 8080 to the world.
And then finally, we will create an EC2 instance using the aws.ec2.Instance command. You’ll see in the documentation (here) that it takes some parameters such as the instance_type, the ami images, the security group and some more. It also takes a user_data attribute so that’s the reason why on line 6 we created a user_data variable that essentially runs a webserver using SimpleHTTPServer.
Open __main__.py
import pulumi
import pulumi_aws as aws

size = 't3.micro'

user_data = """#!/bin/bash
echo "Hello, World!" > index.html
nohup python -m SimpleHTTPServer 8080 &
"""

ami = aws.ec2.get_ami(most_recent="true",
                  owners=["137112412989"],
                  filters=[{"name":"name","values":["amzn-ami-hvm-*"]}])


group = aws.ec2.SecurityGroup('pulumi_allow_8080',
            description='Enable access to port 8080',
            ingress=[
                { 'protocol': 'tcp', 'from_port': 8080, 'to_port': 8080, 'cidr_blocks': ['0.0.0.0/0'] }
            ])

server = aws.ec2.Instance('webserver',
    instance_type=size,
    vpc_security_group_ids=[group.id],
    ami=ami.id,
    user_data = user_data,
    tags = { "Name": "Pulumi" },
    )

pulumi.export('publicIp', server.public_ip)
pulumi.export('publicHostName', server.public_dns)
Deploy resources
Once you have finalized your code, Pulumi makes it very straigthforward to run it. Just use pulumi up to provision the resources on AWS.
/Webserver/Pulumi_defaultVPC❯ pulumi up
Previewing update (dev)

View Live: https://app.pulumi.com/wiwa1978/aws_ec2/dev/previews/13148a28-5857-41ef-b018-73e7b81b7860

     Type                      Name               Plan
 +   pulumi:pulumi:Stack       aws_ec2-dev        create
 +   ├─ aws:ec2:SecurityGroup  pulumi_allow_8080  create
 +   └─ aws:ec2:Instance       webserver          create

Resources:
    + 3 to create

Do you want to perform this update? yes
Updating (dev)

View Live: https://app.pulumi.com/wiwa1978/aws_ec2/dev/updates/3

     Type                      Name               Status
 +   pulumi:pulumi:Stack       aws_ec2-dev        created
 +   ├─ aws:ec2:SecurityGroup  pulumi_allow_8080  created
 +   └─ aws:ec2:Instance       webserver          created

Outputs:
    publicHostName: "ec2-3-123-142-84.eu-central-1.compute.amazonaws.com"
    publicIp      : "3.123.142.84"

Resources:
    + 3 created

Duration: 22s
View resources
Every Pulumi program is deployed to a stack, commonly used to denote different environments (e.g. development, staging, production…). Pulumi allows us to view details of the currently selected stack (we only have one at the moment) by using the pulumi stack command.
In our case, we see the two AWS constructs we defined in our Python file:
- Security Group
- Instance
~/Pulumi_defaultVPC❯ pulumi stack
Current stack is dev:
Owner: wiwa1978
Last updated: 5 minutes ago (2021-06-21 10:14:19.250068 +0200 CEST)
Pulumi version: v3.5.1
Current stack resources (5):
TYPE NAME
pulumi:pulumi:Stack aws_ec2-dev
├─ aws:ec2/securityGroup:SecurityGroup pulumi_allow_8080
├─ aws:ec2/instance:Instance webserver
├─ pulumi:providers:aws default
└─ pulumi:providers:aws default_4_8_0
Current stack outputs (2):
OUTPUT VALUE
publicHostName ec2-3-123-142-84.eu-central-1.compute.amazonaws.com
publicIp 3.123.142.84
More information at: https://app.pulumi.com/wiwa1978/aws_ec2/dev
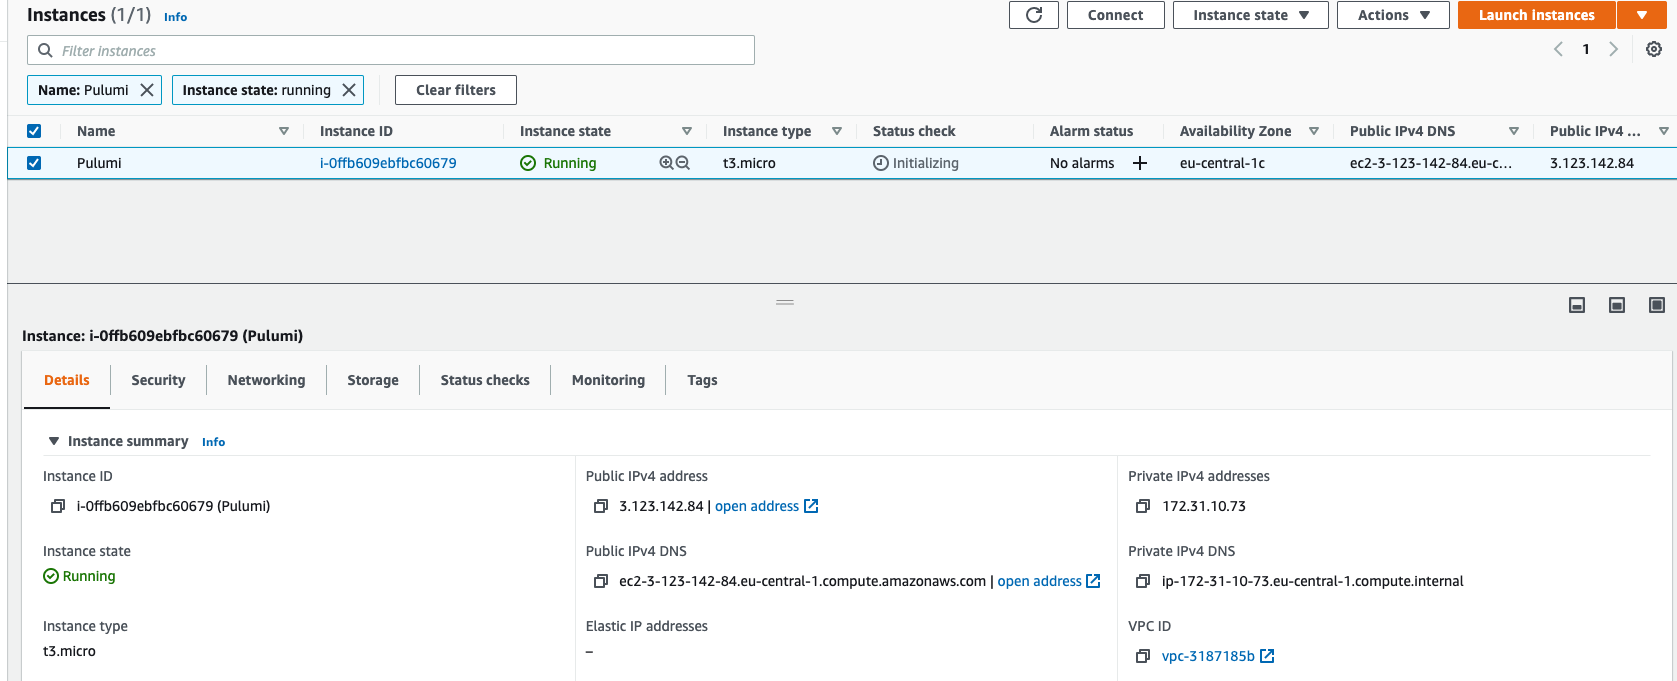
Use `pulumi stack select` to change stack; `pulumi stack ls` lists known onesIn the AWS console, you’ll see the EC2 instance created successfully:
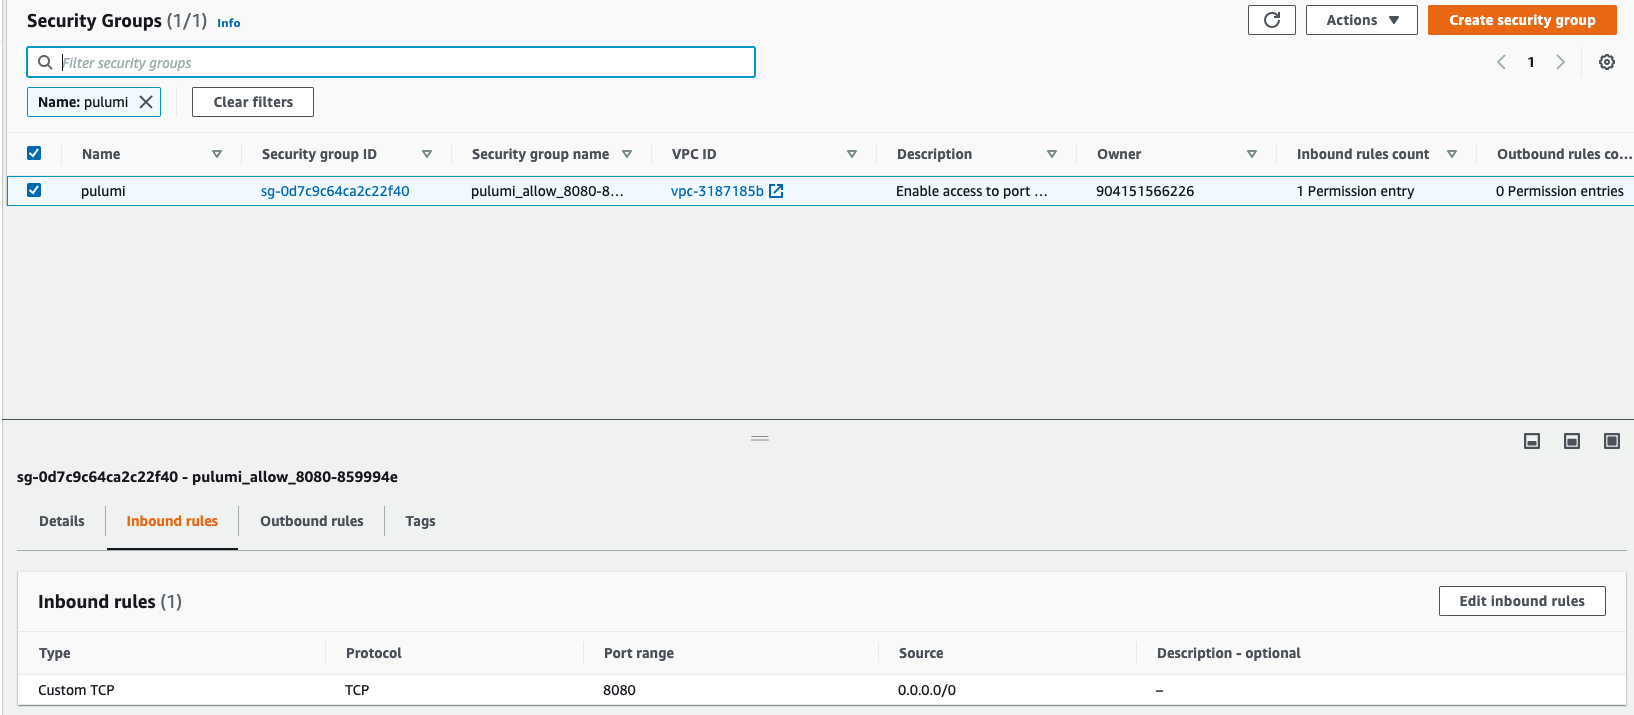
Also, the security group is available:
And finally, let’s test whether the webserver is indeed working well:

Update the resources
Pulumi also allows us to update the provisioned resources as well. In the below snippet, we are adding port 22 to the security group and we are also renaming the server from Pulumi to Pulumi-updated
import pulumi
import pulumi_aws as aws

size = 't3.micro'

user_data = """#!/bin/bash
echo "Hello, World!" > index.html
nohup python -m SimpleHTTPServer 8080 &
"""

ami = aws.ec2.get_ami(most_recent="true",
                  owners=["137112412989"],
                  filters=[{"name":"name","values":["amzn-ami-hvm-*"]}])


group = aws.ec2.SecurityGroup('pulumi_allow_8080',
            description='Enable access to port 8080',
            ingress=[
                { 'protocol': 'tcp', 'from_port': 8080, 'to_port': 8080, 'cidr_blocks': ['0.0.0.0/0'] },
                { 'protocol': 'tcp', 'from_port': 22, 'to_port': 22, 'cidr_blocks': ['0.0.0.0/0'] }
            ])

server = aws.ec2.Instance('webserver',
    instance_type=size,
    vpc_security_group_ids=[group.id],
    ami=ami.id,
    user_data = user_data,
    tags = { "Name": "Pulumi-updated" },
    )

pulumi.export('publicIp', server.public_ip)
pulumi.export('publicHostName', server.public_dns)
Next, we’ll run the pulumi up command once again. You will notice that Pulumi recognized this is an update.
~/Pulumi_defaultVPC❯ pulumi up
Previewing update (dev)
View Live: https://app.pulumi.com/wiwa1978/aws_ec2/dev/previews/973c470c-5c75-4146-bf89-ab66f8ba81e9
Type Name Plan Info
pulumi:pulumi:Stack aws_ec2-dev
~ ├─ aws:ec2:SecurityGroup pulumi_allow_8080 update [diff: ~ingress]
~ └─ aws:ec2:Instance webserver update [diff: ~tags]
Resources:
~ 2 to update
1 unchanged
Do you want to perform this update? yes
Updating (dev)
View Live: https://app.pulumi.com/wiwa1978/aws_ec2/dev/updates/4
Type Name Status Info
pulumi:pulumi:Stack aws_ec2-dev
~ ├─ aws:ec2:SecurityGroup pulumi_allow_8080 updated [diff: ~ingress]
~ └─ aws:ec2:Instance webserver updated [diff: ~tags]
Outputs:
publicHostName: "ec2-3-123-142-84.eu-central-1.compute.amazonaws.com"
publicIp : "3.123.142.84"
Resources:
~ 2 updated
1 unchanged
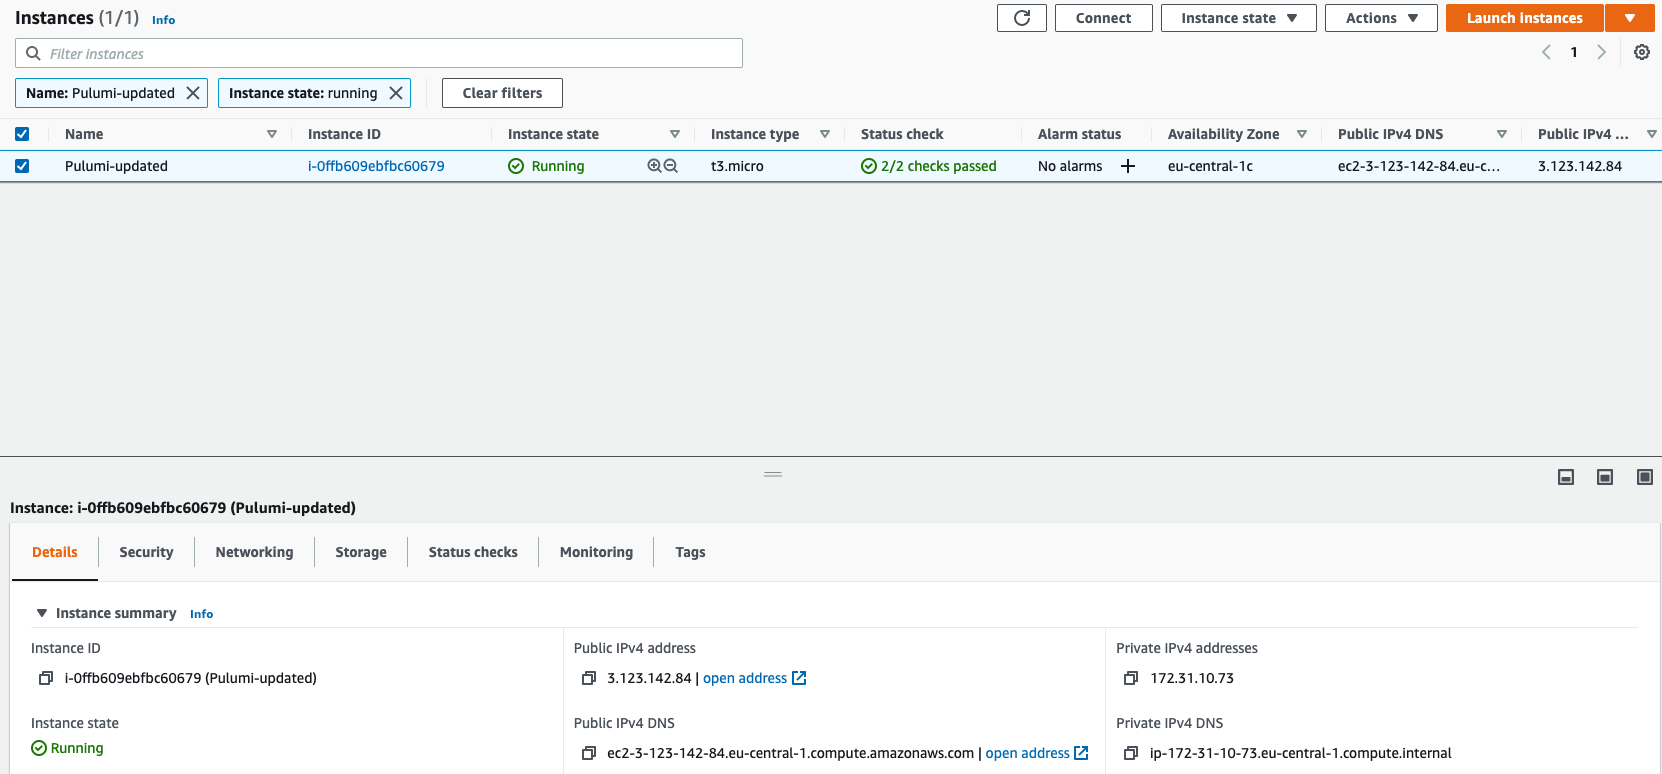
Duration: 6sAnd let’s check again in the AWS console. You’ll see the EC2 instance being renamed.
And also the security group we provisioned earlier now has port 22 open as well.

Destroy the resources
We can run pulumi destroy to tear down all the provisioned resources. You’ll be prompted to make sure you really want to delete these resources. A destroy operation may take some time, since Pulumi waits for the resources to finish shutting down before it considers the destroy operation to be complete.
~/Pulumi_defaultVPC❯ pulumi destroy
Previewing destroy (dev)

View Live: https://app.pulumi.com/wiwa1978/aws_ec2/dev/previews/9e172e03-9650-41fb-a851-fbdc51f5f453

     Type                      Name               Plan
 -   pulumi:pulumi:Stack       aws_ec2-dev        delete
 -   ├─ aws:ec2:Instance       webserver          delete
 -   └─ aws:ec2:SecurityGroup  pulumi_allow_8080  delete

Outputs:
  - publicHostName: "ec2-3-123-142-84.eu-central-1.compute.amazonaws.com"
  - publicIp      : "3.123.142.84"

Resources:
    - 3 to delete

Do you want to perform this destroy? yes
Destroying (dev)

View Live: https://app.pulumi.com/wiwa1978/aws_ec2/dev/updates/5

     Type                      Name               Status
 -   pulumi:pulumi:Stack       aws_ec2-dev        deleted
 -   ├─ aws:ec2:Instance       webserver          deleted
 -   └─ aws:ec2:SecurityGroup  pulumi_allow_8080  deleted

Outputs:
  - publicHostName: "ec2-3-123-142-84.eu-central-1.compute.amazonaws.com"
  - publicIp      : "3.123.142.84"

Resources:
    - 3 deleted

Duration: 36s

The resources in the stack have been deleted, but the history and configuration associated with the stack are still maintained.
If you want to remove the stack completely, run 'pulumi stack rm dev'.
To delete the stack itself, run pulumi stack rm. Note that this command deletes all deployment history from the Pulumi Console.
~/Pulumi_defaultVPC❯ pulumi stack rm dev
This will permanently remove the 'dev' stack!
Please confirm that this is what you'd like to do by typing ("dev"): dev
Stack 'dev' has been removed!
This was of course only a very first exploration of Pulumi but we’ll experiment a bit more in upcoming posts. The code for this blog post can be found here.