Deploy Flask App to Heroku using Github Actions
Introduction
In some earlier blogposts, we experimented a bit with deploying the same Flask app to various different platforms. We deployed the app to Docker directly or to Docker via Hashicorp Waypoint or even to Elastic Beanstalk. We also deployed the app to Heroku before using the built in GIT functionality within Heroku.
In this post, we will focus again on deployment of our app to Heroku but rather through making use of Github Actions instead of using the Heroku git implementation.
Running the application locally
I always like to make sure my application works on my local dev environment. No point in deploying an app that is failing already locally. If you have been following along earlier posts, you know the drill. In case you are new, just clone the code (here). Then create a Python virtual environment and install the requirements as follows:
~/Flask-Basic-CICD-GithubActions-Heroku ❯ python3 -m venv venv
~/Flask-Basic-CICD-GithubActions-Heroku ❯ source venv/bin/activate
(venv) ~/Flask-Basic-CICD-GithubActions-Heroku ❯ pip3 install -r requirements.txt
(venv) ~/Flask-Basic-CICD-GithubActions-Heroku ❯ gunicorn --bind 0.0.0.0:5000 wsgi:app -w 1
[2021-10-28 08:48:36 +0200] [83787] [INFO] Starting gunicorn 20.0.4
[2021-10-28 08:48:36 +0200] [83787] [INFO] Listening at: http://0.0.0.0:5000 (83787)
[2021-10-28 08:48:36 +0200] [83787] [INFO] Using worker: sync
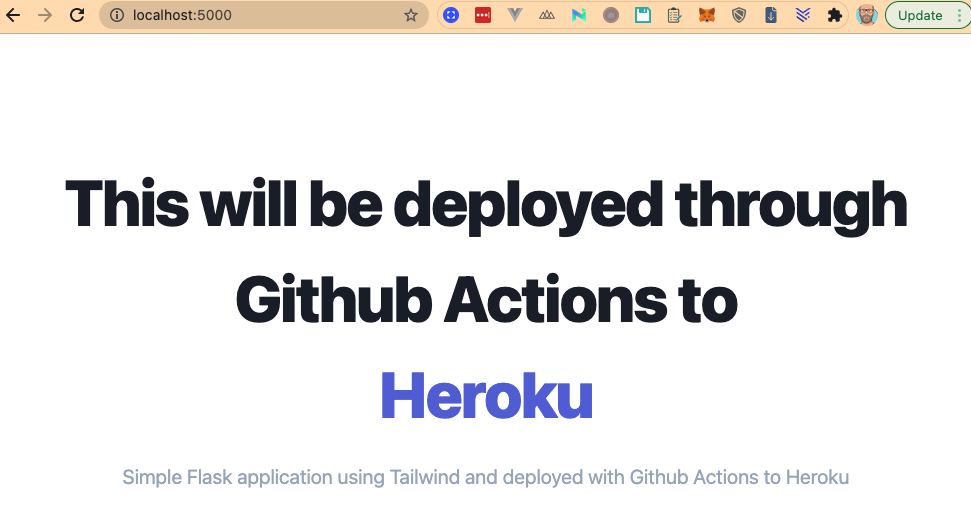
[2021-10-28 08:48:36 +0200] [83788] [INFO] Booting worker with pid: 83788If all is well, you should see our application on http://localhost:5000
Uploading to Github
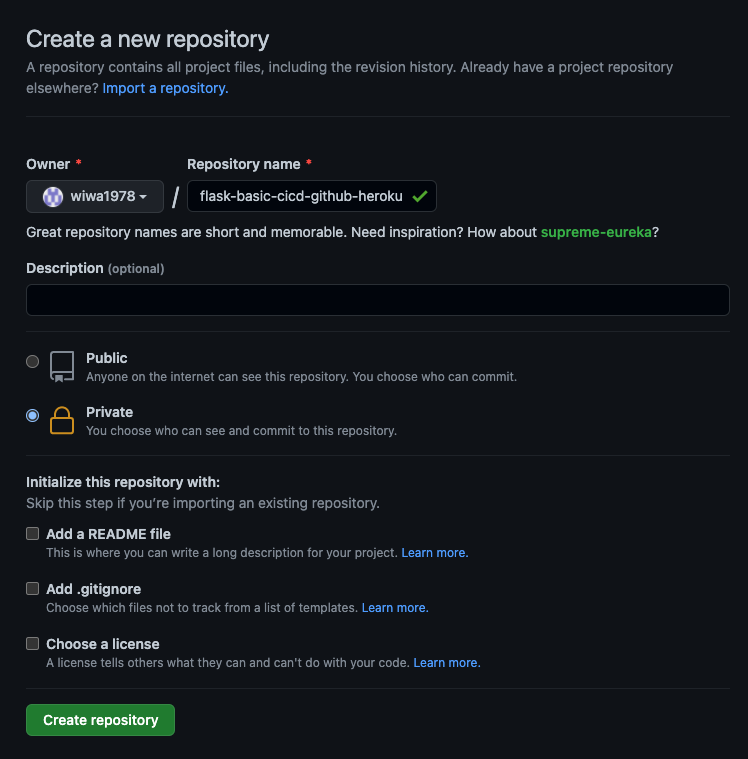
Next we will create a Github repository for our application. In my case, it’s called flask-basic-cicd-github-heroku.
You will find also some instructions to configure git and upload the code to the repository.

(venv) ~/Flask-Basic-CICD-GithubActions-Heroku ❯ git init
Initialized empty Git repository in Flask/Flask-Basic-CICD-GithubActions-Heroku/.git/
(venv) ~/Flask-Basic-CICD-GithubActions-Heroku ❯ git branch -m main
(venv) ~/Flask-Basic-CICD-GithubActions-Heroku ❯ git add .
(venv) ~/Flask-Basic-CICD-GithubActions-Heroku ❯ git commit -m "Initial commit"
[main (root-commit) 5dba779] Initial commit
 9 files changed, 71 insertions(+)
 create mode 100644 .gitignore
 create mode 100644 Dockerfile
 create mode 100644 Procfile
 create mode 100644 __pycache__/wsgi.cpython-39.pyc
 create mode 100644 app/__pycache__/app.cpython-39.pyc
 create mode 100644 app/app.py
 create mode 100644 app/templates/index.html
 create mode 100644 requirements.txt
 create mode 100644 wsgi.py
(venv) ~/Flask-Basic-CICD-GithubActions-Heroku ❯ git remote add origin https://github.com/wiwa1978/flask-basic-cicd-github-heroku.git
(venv) ~/Flask-Basic-CICD-GithubActions-Heroku ❯ push origin main
Enumerating objects: 15, done.
Counting objects: 100% (15/15), done.
Delta compression using up to 12 threads
Compressing objects: 100% (10/10), done.
Writing objects: 100% (15/15), 2.37 KiB | 1.19 MiB/s, done.
Total 15 (delta 0), reused 0 (delta 0), pack-reused 0
To https://github.com/wiwa1978/flask-basic-cicd-github-heroku.git
 * [new branch]      main -> main
Github Actions
Next, let’s focus on the Github Actions part a bit.
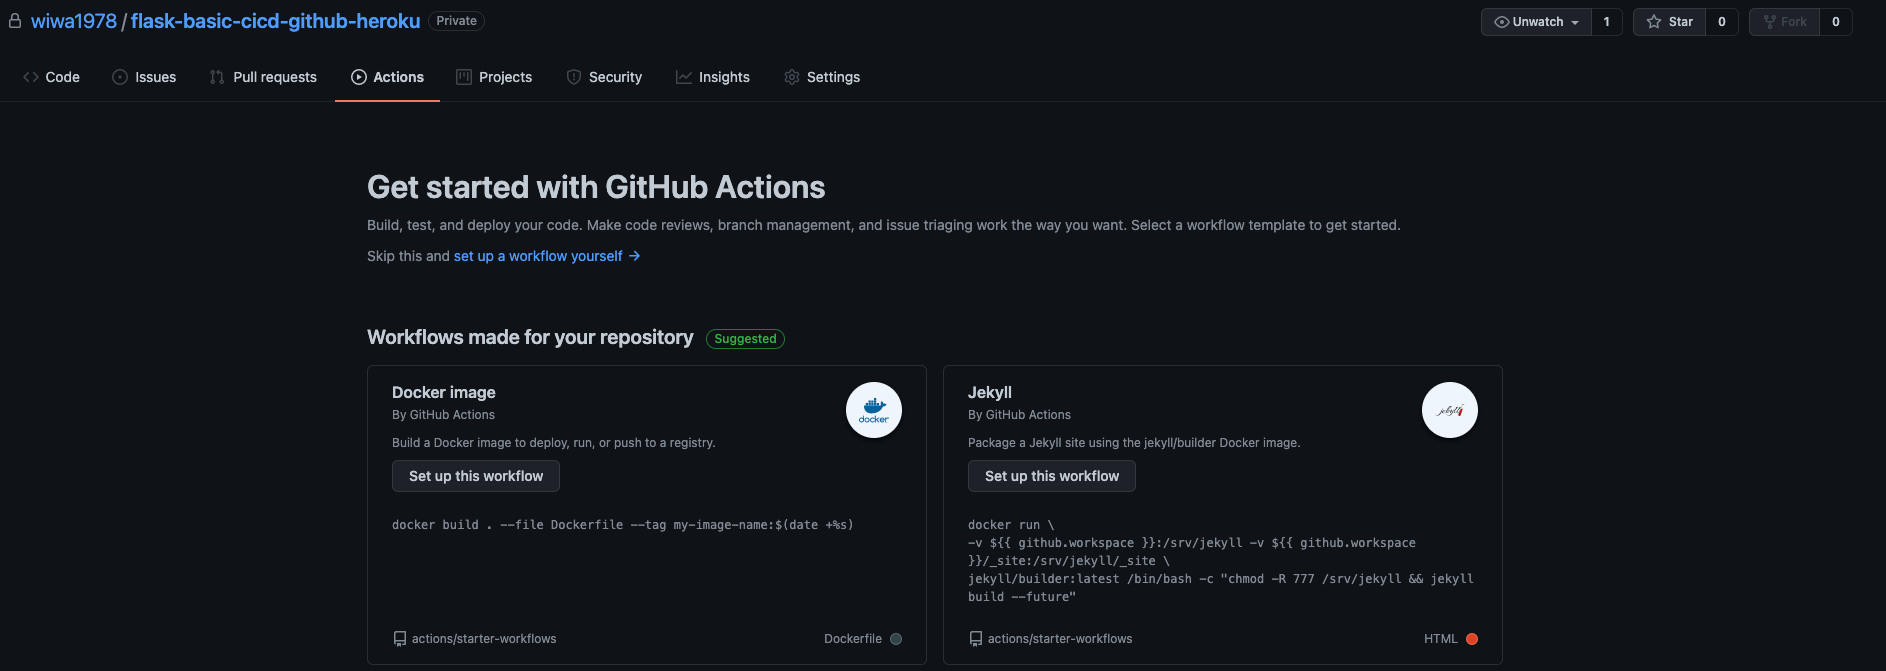
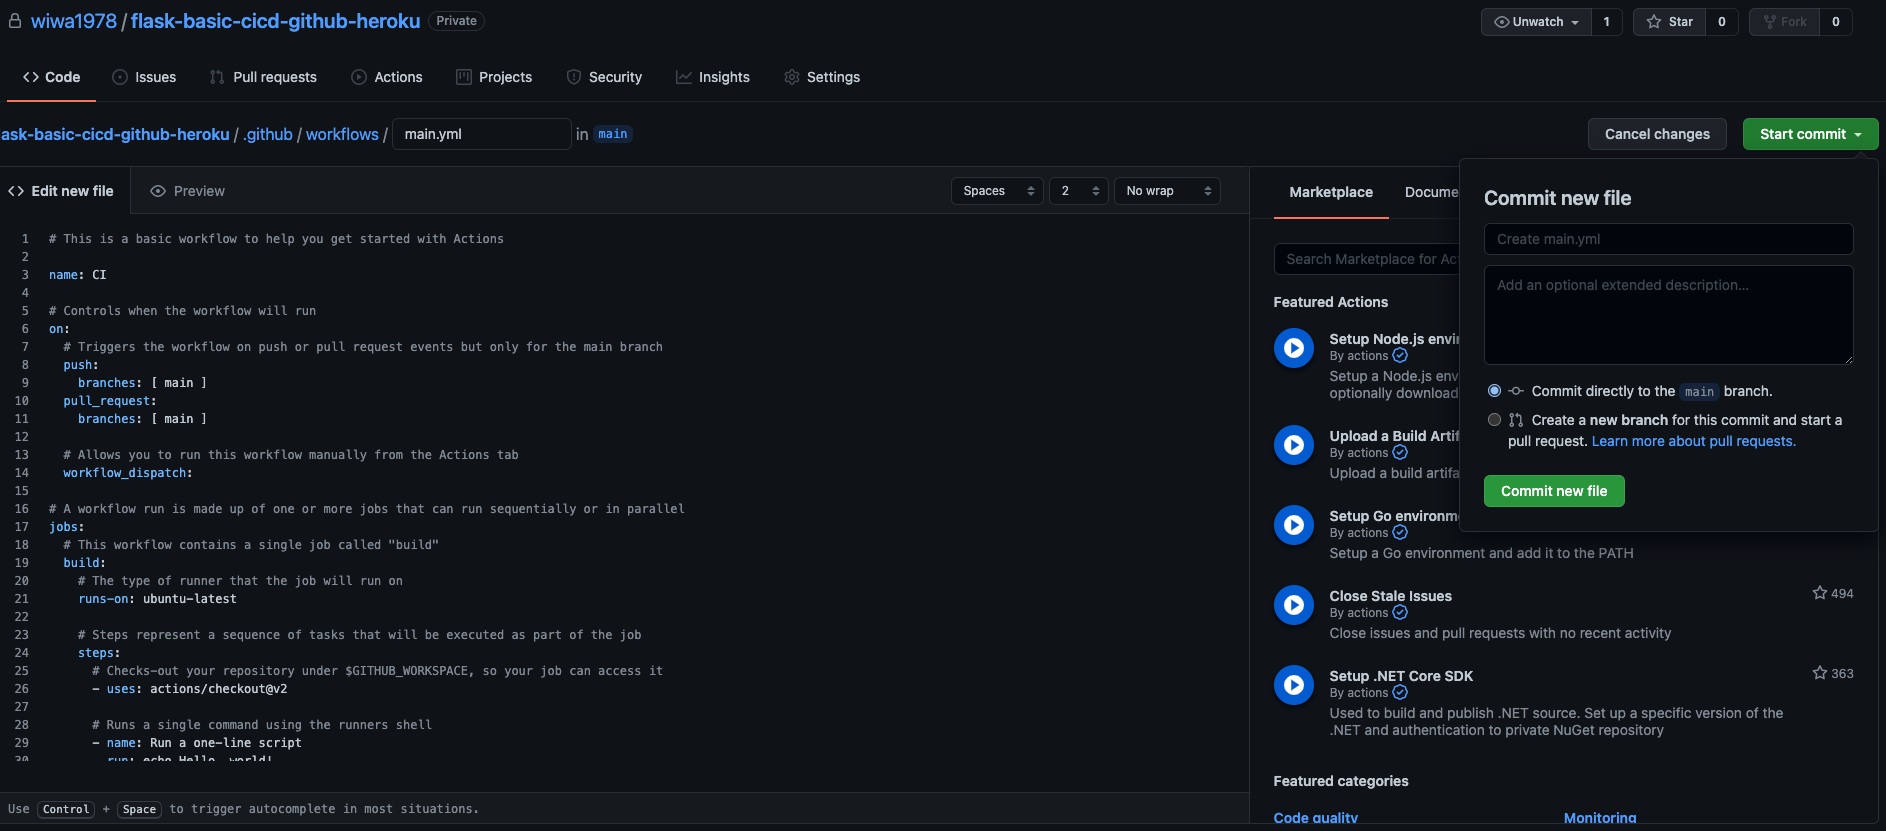
Click on setup a workflow yourself. Next you will see a proposal main.yml file from Github Actions. Go ahead and commit that file to the main repository. You will see that this file is being put in a .github/workflows folder.
As a next step, you need to pull the latest changes from Github to your local git repository.
(venv) ~/Flask-Basic-CICD-GithubActions-Heroku ❯ git pull origin main
remote: Enumerating objects: 6, done.
remote: Counting objects: 100% (6/6), done.
remote: Compressing objects: 100% (3/3), done.
remote: Total 5 (delta 1), reused 0 (delta 0), pack-reused 0
Unpacking objects: 100% (5/5), 1.25 KiB | 213.00 KiB/s, done.
From https://github.com/wiwa1978/flask-basic-cicd-github-heroku
 * branch            main       -> FETCH_HEAD
   5dba779..59d309e  main       -> origin/main
Updating 5dba779..59d309e
Fast-forward
 .github/workflows/main.yml | 36 ++++++++++++++++++++++++++++++++++++
 1 file changed, 36 insertions(+)
 create mode 100644 .github/workflows/main.yml
Now the file is available locally and we can edit it.
Changing the Github actions workflow
As we mentioned in a previous post we can just edit the main.yml and add the instructions we want to see executed. This sometimes can be a bit cumbersome. Luckily there is Github Marketplace. Essentially it allows you to broiwse through prepared workflows build by other developers. You could then use these as a basis and/or extend them.
In our case, we will be using a specific Github Actions workflow to deploy easily to Heroku. More info about this plugin can be found here. In the documentation, you’ll notice that all we need to provide is:
- heroku_api_key
- heroku_app_name
- heroku_email
These parameters/secrets will be configuered in one of the next sections.
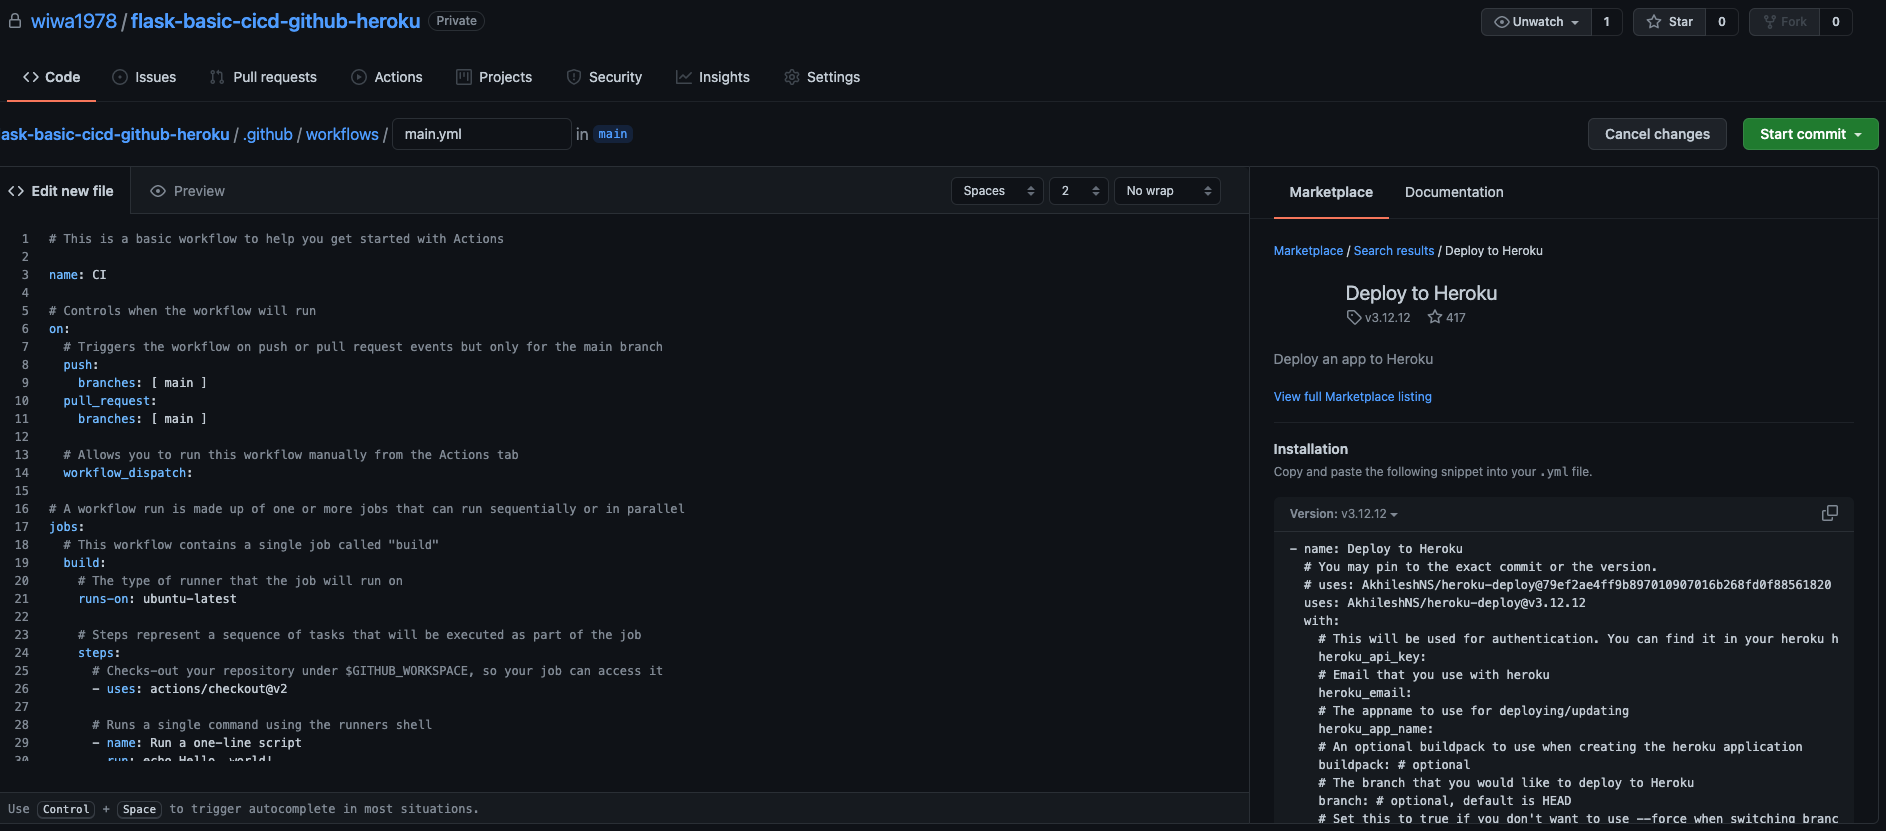
Below is the entire Github Actions workflow file.
# This is a basic workflow to help you get started with Actions

name: CI

# Controls when the workflow will run
on:
  # Triggers the workflow on push or pull request events but only for the main branch
  push:
    branches: [main]

  # Allows you to run this workflow manually from the Actions tab
  workflow_dispatch:

# A workflow run is made up of one or more jobs that can run sequentially or in parallel
jobs:
  # This workflow contains a single job called "build"
  build:
    # The type of runner that the job will run on
    runs-on: ubuntu-latest

    # Steps represent a sequence of tasks that will be executed as part of the job
    steps:
      # Checks-out your repository under $GITHUB_WORKSPACE, so your job can access it
      - uses: actions/checkout@v2

      - uses: akhileshns/heroku-deploy@v3.12.12 #
        with:
          heroku_api_key: ${{secrets.HEROKU_API_KEY}}
          heroku_app_name: ${{secrets.HEROKU_APP_NAME}}
          heroku_email: ${{secrets.HEROKU_EMAIL}}
Setting up Heroku
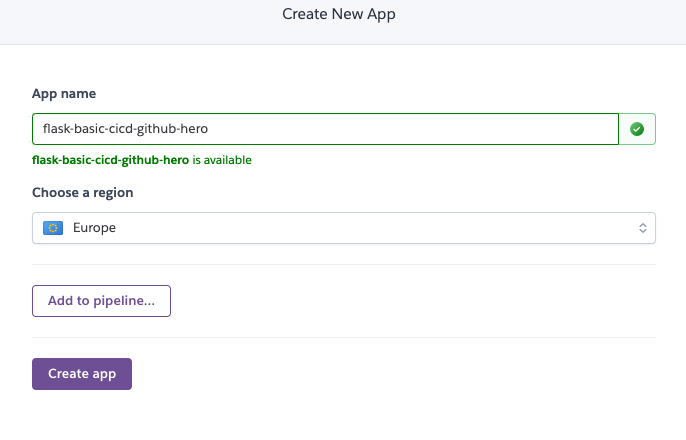
Let’s create an application on Heroku and retrieve the correct values for each of the above mentioned parameters.
Next, go to Account Settings and scroll down to API Key and generate a new key:

Configuring Github Actions
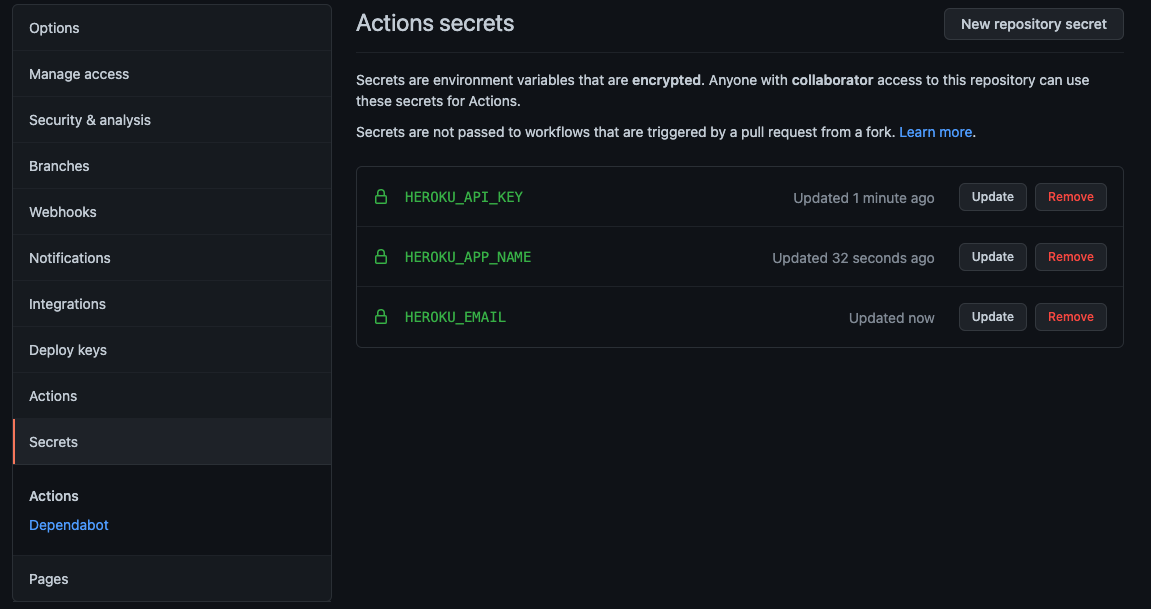
As we mentioned above, we need to supply these parameters/secrets to our Github Actions workflow in the form of environment variables. Therefore, go to Settings > Secrets and add the parameters we mentioned in the previous section.
Deploy application
Now it’s time to finally deploy our application. We will just sync our local Git repo with the repository on Github.
(venv) ~/Flask-Basic-CICD-GithubActions-Heroku ❯ git add .
(venv) ~/Flask-Basic-CICD-GithubActions-Heroku ❯ git commit -m "Changing workflow"
[main 3e93db3] Changing workflow
1 file changed, 6 insertions(+), 12 deletions(-)
(venv) ~/Flask-Basic-CICD-GithubActions-Heroku ❯ git push origin main
Enumerating objects: 9, done.
Counting objects: 100% (9/9), done.
Delta compression using up to 12 threads
Compressing objects: 100% (3/3), done.
Writing objects: 100% (5/5), 529 bytes | 529.00 KiB/s, done.
Total 5 (delta 2), reused 0 (delta 0), pack-reused 0
remote: Resolving deltas: 100% (2/2), completed with 2 local objects.
To https://github.com/wiwa1978/flask-basic-cicd-github-heroku.git
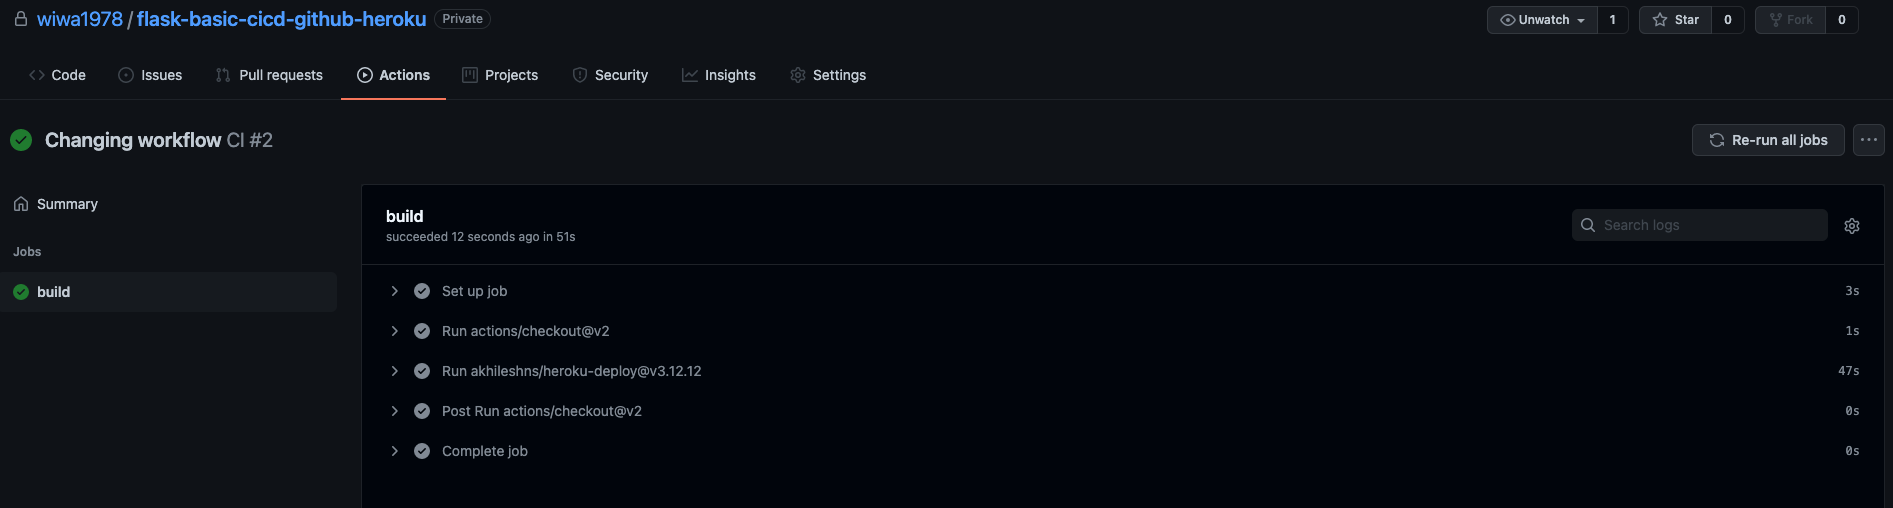
59d309e..3e93db3 main -> mainAs it contains a .workflows/main.yml file, we expect Github Actions to trigger that automatically.
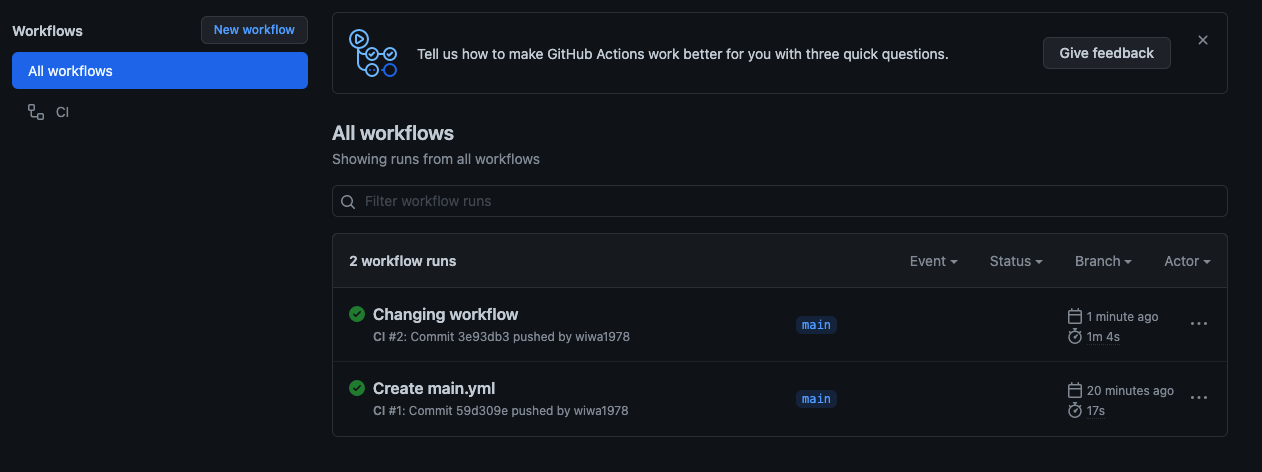
And in the detailed view you see exactly an overview of the tasks that were executed.
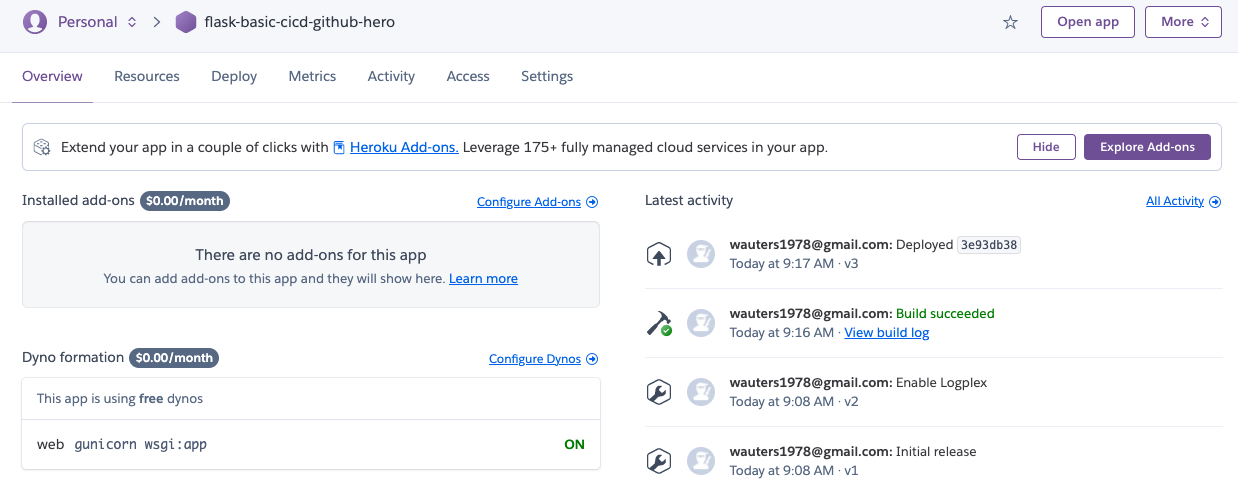
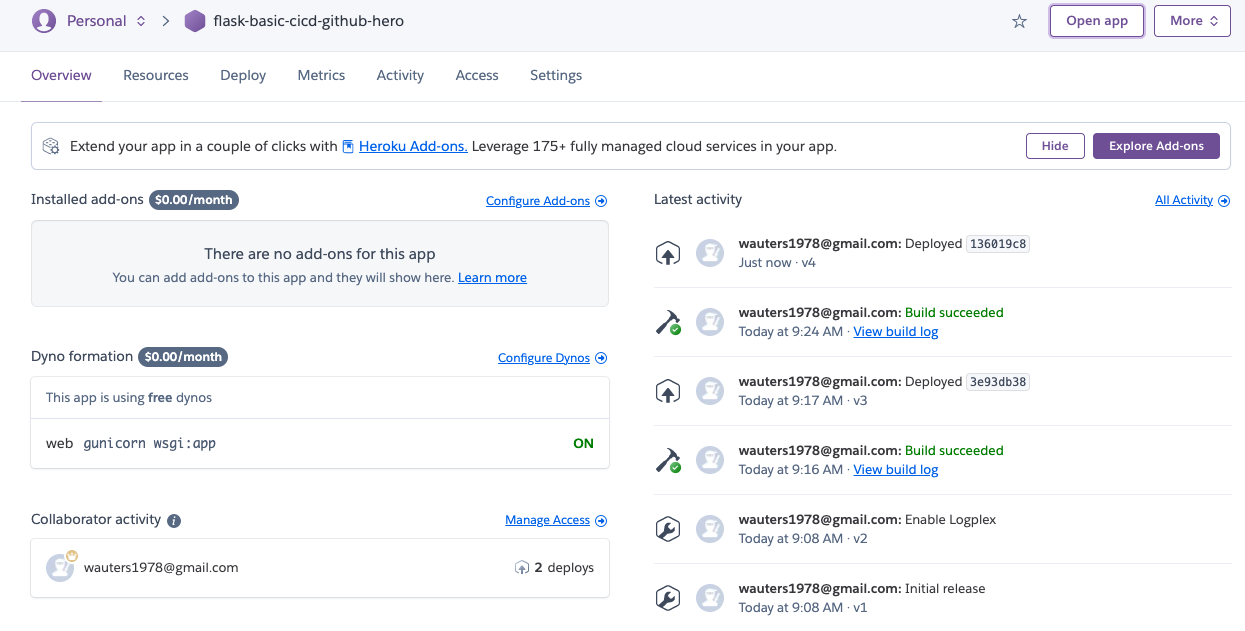
Also in your Heroku account, you will get an overview of what has happened:
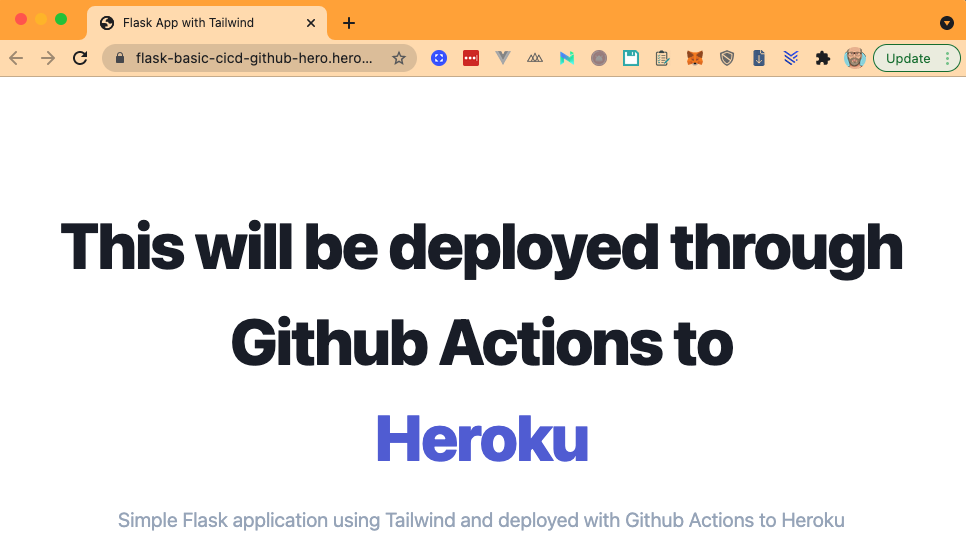
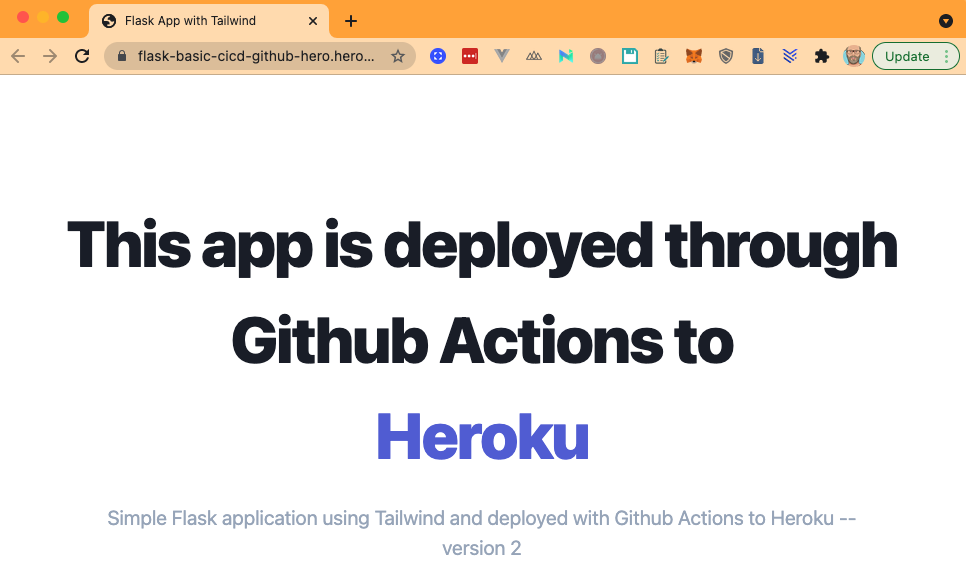
And finally, after the application has been deployed at Heroku, you can open the browser directly from Heroku. It will show our application.
Update application
Update the index.html file. It really doesn’t matter what change you make as we just want to see that an update is also handled properly by our workflow. In my case, I have changed the titel to This app is deployed through Github Actions to Heroku (instead of This *will* be deployed...) and I added version 2 to the tagline under the title.
(venv) ~/Flask-Basic-CICD-GithubActions-Heroku ❯ git add .
(venv) ~/Flask-Basic-CICD-GithubActions-Heroku ❯ git commit -m "Update index.html"
[main 136019c] Update index.html
2 files changed, 4 insertions(+), 4 deletions(-)
(venv) ~/Flask-Basic-CICD-GithubActions-Heroku ❯ git push origin main
Enumerating objects: 15, done.
Counting objects: 100% (15/15), done.
Delta compression using up to 12 threads
Compressing objects: 100% (5/5), done.
Writing objects: 100% (8/8), 590 bytes | 295.00 KiB/s, done.
Total 8 (delta 4), reused 0 (delta 0), pack-reused 0
remote: Resolving deltas: 100% (4/4), completed with 4 local objects.
To https://github.com/wiwa1978/flask-basic-cicd-github-heroku.git
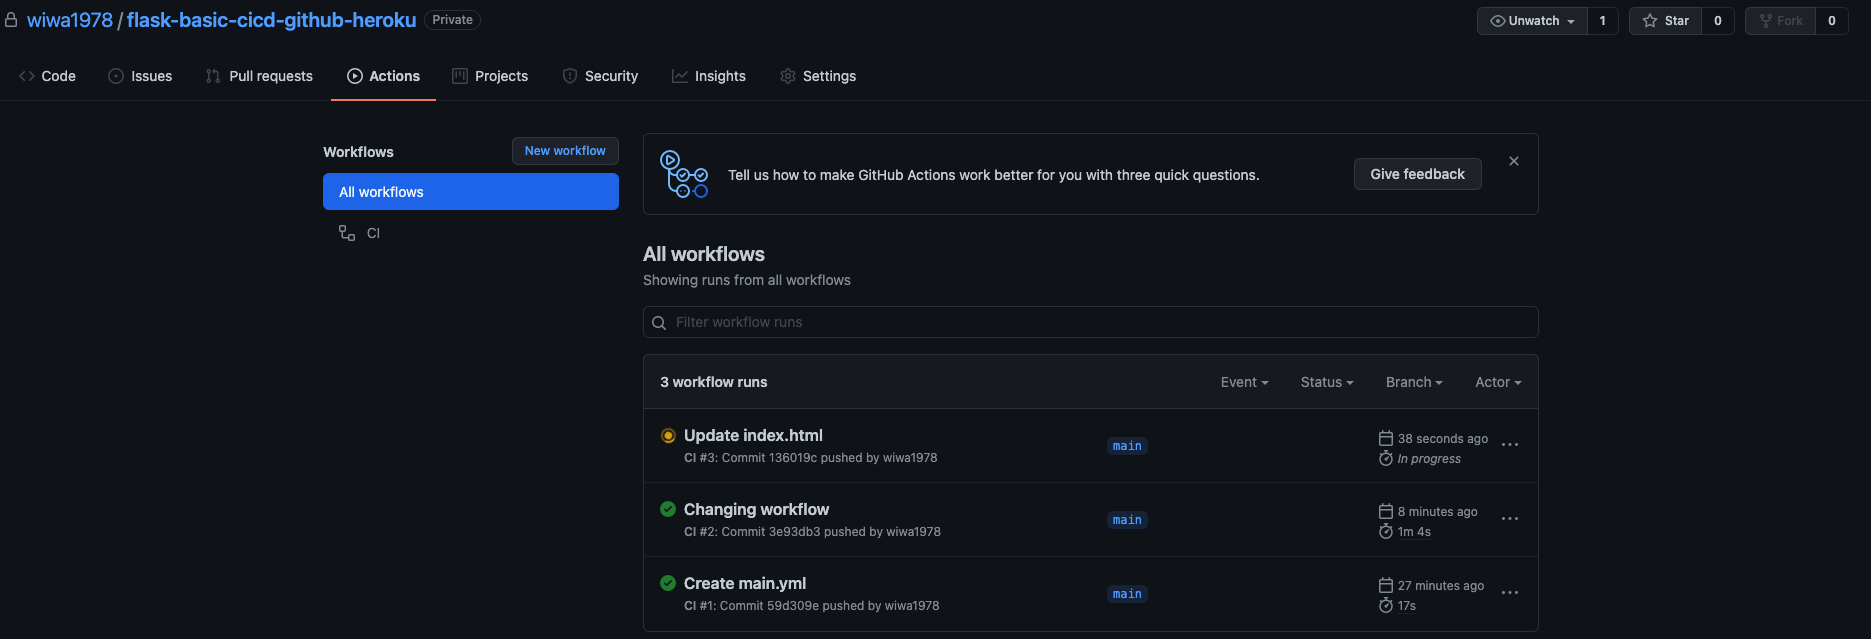
3e93db3..136019c main -> mainAgain, our workflow will be executed automatically as indicated in below screenshot.
And verify one again in your Heroku account that the app is currently being deployed.
And when finished…indeed you will see an updated version of the application.
Heroku is a really powerful platform, I like it a lot. And also the close integration with Github makes it very straightforward to deploy applications. As always, hope you enjoyed this post. The code can be found here.