Deploy Flask App with Waypoint to Docker
Introduction
On 15th October 2020, Hashicorp announced Hashicorp Waypoint. A promising platform to say the least. Since then it has been on my list to explore further. Who’s not looking for tools to deploy applications quicker and easier. In this post, we will explore the basics of Hashicorp Waypoint through deployment of our basic Flask application we build in this post.
What is Hashicorp Waypoint
But first, what is Hashicorp Waypoint exactly doing? As per the press release:
Waypoint is a new open source project that provides developers a consistent workflow to build, deploy, and release applications across any platform. Waypoint enables developers to get their applications from development to production in a single file and deploy using a single command: waypoint up.
Let’s just try it out.
Installing Hashicorp Waypoint CLI
First, install Hashicorp Waypoint. For more detailed instructions, refer to the Hashicorp documentation here.
~ ❯ brew install hashicorp/tap/waypoint
==> Installing waypoint from hashicorp/tap
==> Downloading https://releases.hashicorp.com/waypoint/0.2.0/waypoint_0.2.0_darwin_amd64.zip
######################################################################## 100.0%
🍺  /usr/local/Cellar/waypoint/0.2.0: 3 files, 135.3MB, built in 4 seconds
Check whether waypoint is working correctly.
~Hashicorp_Waypoint master ❯ waypoint version
Waypoint v0.2.0 (360b2b3a)
Installing Hashicorp Waypoint Server
As a next step, we need to install the Hashicorp Waypoint Server. This will essentially launch a container on your local PC. Here’s how to do it:
~/S/Programming/blog-hugo-netlify-code/Flask/Flask-Basic-Waypoint main ❯ waypoint install --platform=docker -accept-tos
✓ Pulling image: hashicorp/waypoint:latest
<TRUNCATED>
✓ Installing Waypoint server to docker
✓ Server container started!
✓ Configuring server...
Waypoint server successfully installed and configured!

The CLI has been configured to connect to the server automatically. This
connection information is saved in the CLI context named "install-1612168931".
Use the "waypoint context" CLI to manage CLI contexts.

The server has been configured to advertise the following address for
entrypoint communications. This must be a reachable address for all your
deployments. If this is incorrect, manually set it using the CLI command
"waypoint server config-set".

Advertise Address: waypoint-server:9701
Web UI Address: https://localhost:9702
Check your Docker environment, you should see a running Waypoint server:
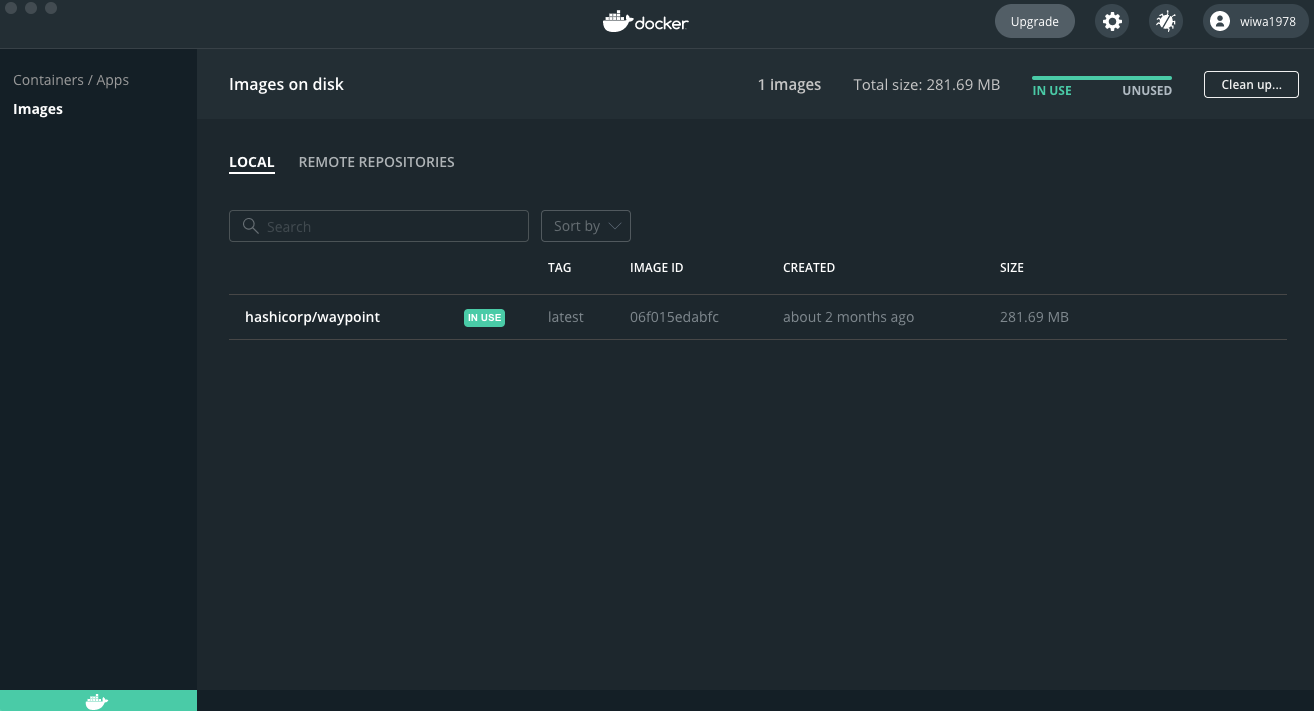
~Flask/Flask-Basic-Waypoint main ❯ docker ps                                                                                                   40s 09:42:51
CONTAINER ID   IMAGE                       COMMAND                  CREATED         STATUS         PORTS                              NAMES
b466ef9752de   hashicorp/waypoint:latest   "/usr/bin/waypoint s…"   8 minutes ago   Up 8 minutes   0.0.0.0:9701-9702->9701-9702/tcp   waypoint-server
or obviously also in your Docker Desktop environment:
If all went well, you can go to https://localhost:9702 and you will be greeted with the following page:
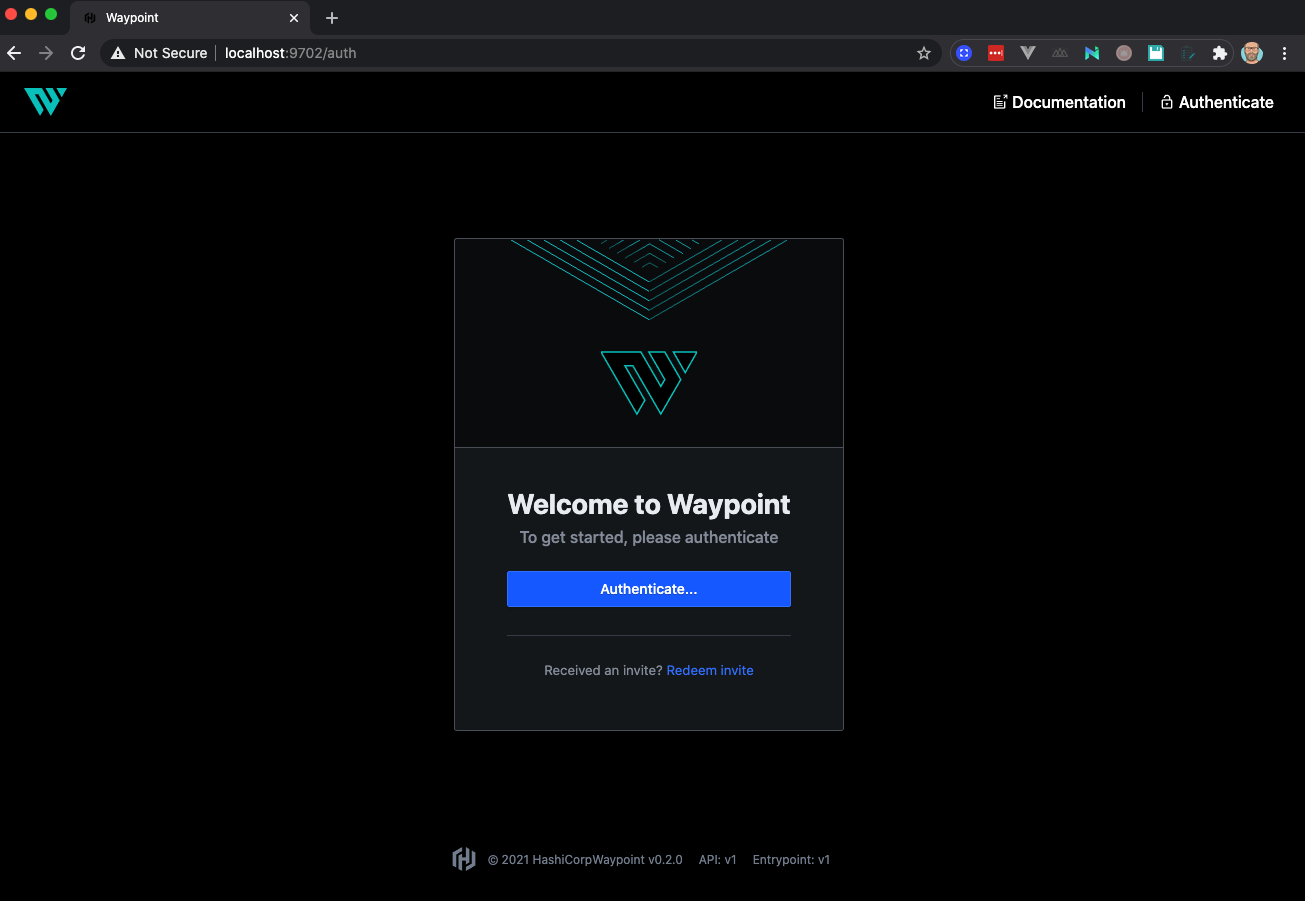
Next step is to authenticate to Hashicorp Waypoint. To achieve this, you need to login through a token. Luckily, Hashicorp Waypoint
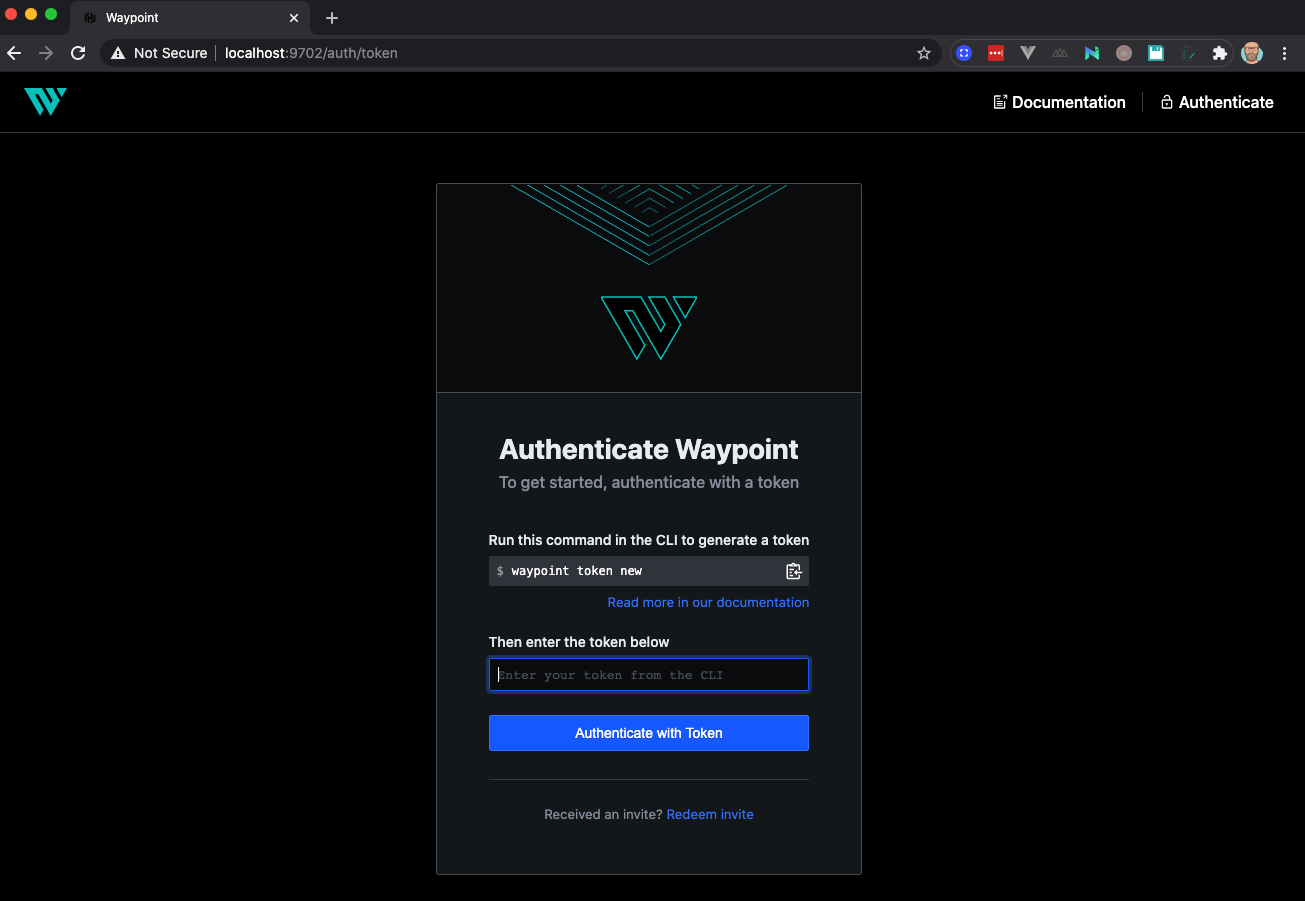
Hence, let’s generate a new token through the Waypoint CLI:
~Flask/Flask-Basic-Waypoint main ❯ waypoint token new
bM152PWkXxfoy4vA51JFhR7Lpg7vWC9xW2TVPhK8ZgC4uNHJMJuigncPwRDLWAUhxfjcw9o67mBwh2vE3oENeKResfrHDpttweoo6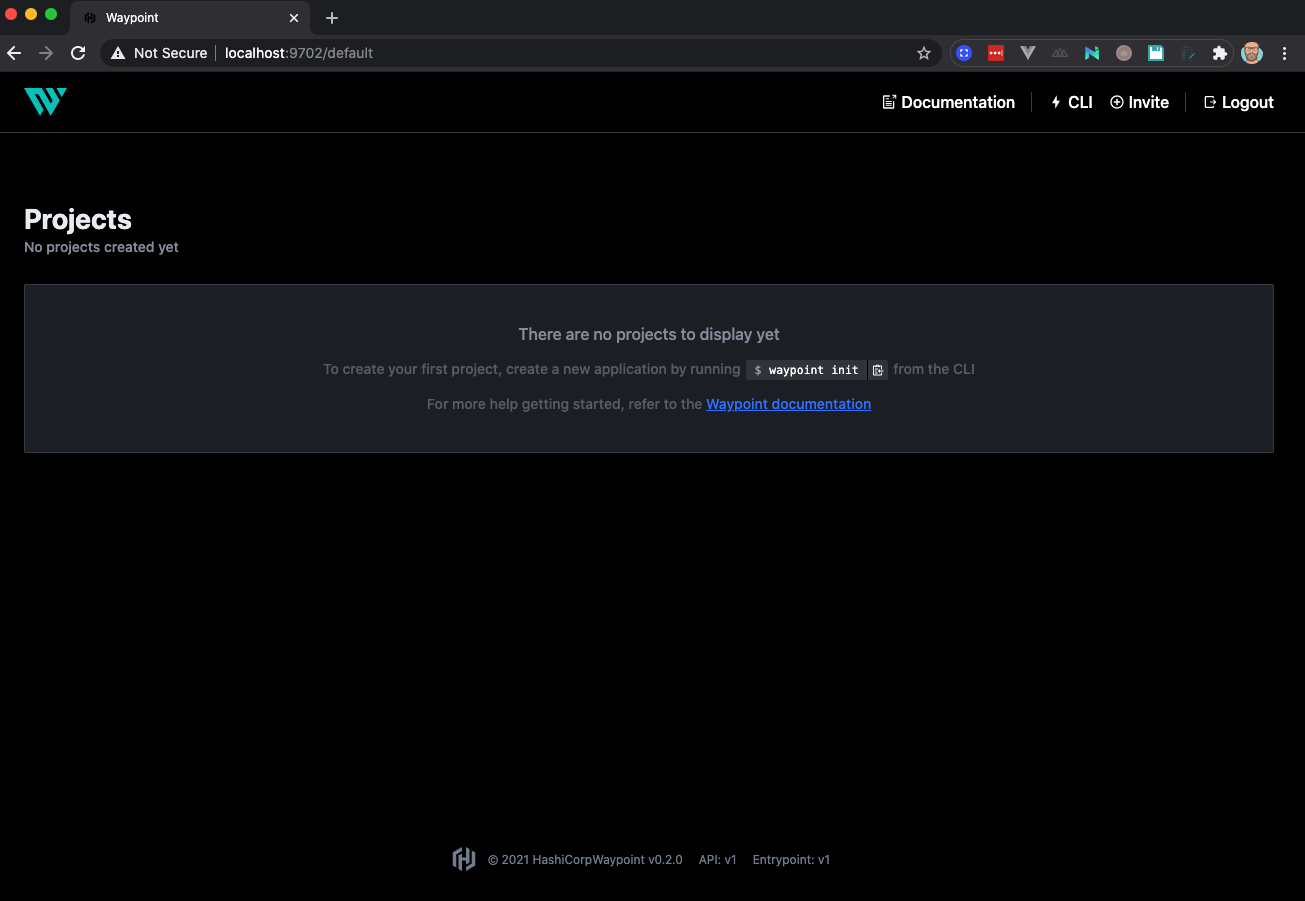
Deploying Flask application
~Flask/Flask-Basic-Waypoint main ❯ waypoint init
Initial Waypoint configuration created!
No Waypoint configuration was found in this directory.

A sample configuration has been created in the file "waypoint.hcl". This
file is heavily commented to help you get started.

Once you've setup your initial configuration, run "waypoint init" again to
validate the configuration and initialize your project.
This will create a waypoint.hcl file in your current directory. Note: I removed the comments for display purposes.
project = "my-project"

app "web" {
    build {
        use "docker" {}
    }

    deploy {
        use "docker" {}
    }
}
Change the file to:
project = "Flask Todo application"

app "flask_todo_app" {
    labels = {
    "service" = "flask-todo",
    "env"     = "dev"
  }
    build {
        use "docker" {
        }

    }

    deploy {
        use "docker" {
            service_port = 8081
        }
    }
}
Now we need to run waypoint init again:
~Flask/Flask-Basic-Waypoint main ❯ waypoint init
✓ Configuration file appears valid
✓ Connection to Waypoint server was successful
✓ Project "Flask Todo application" and all apps are registered with the server.
✓ Plugins loaded and configured successfully

Project initialized!

You may now call 'waypoint up' to deploy your project or
commands such as 'waypoint build' to perform steps individually.
Check the Waypoint page again and you will see your project just got initialized:
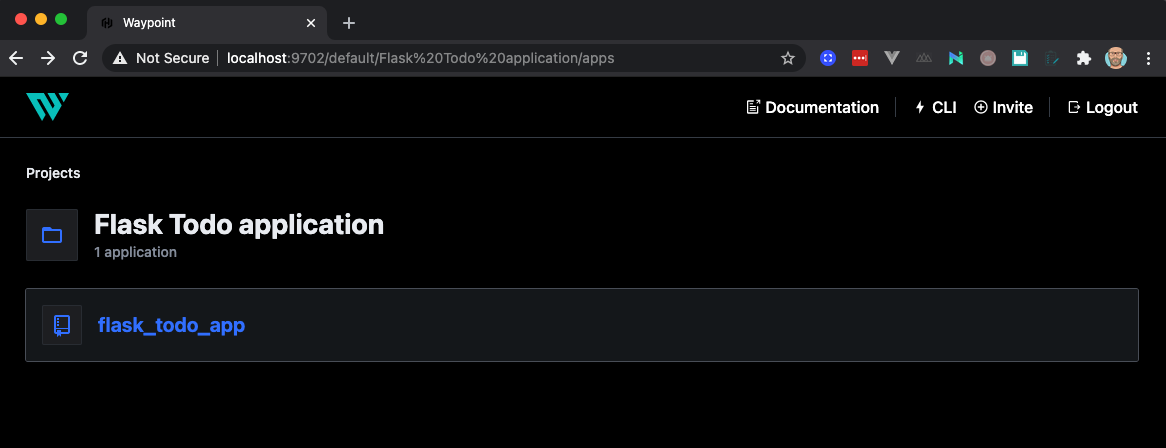
Zooming into the project, you will see a more detailed page with builds, deployment and release related information.
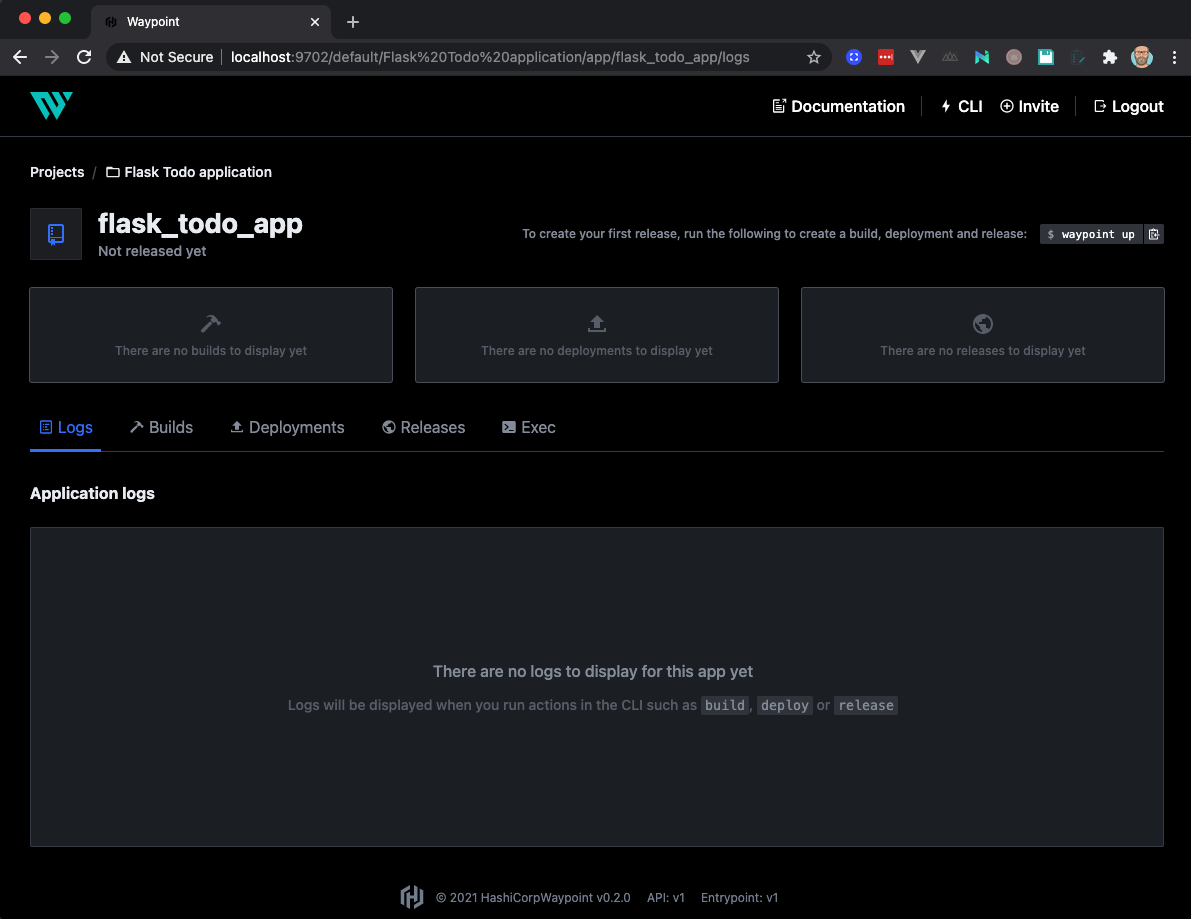
Obviously, as we did not yet deploy our application yet, it’s still empty. Let’s change that.
~Flask/Flask-Basic-Waypoint main ❯ waypoint up
» Building...
✓ Initializing Docker client...
✓ Building image...
<TRUNCATED>
» Deploying...
✓ Setting up waypoint network
✓ Starting container
✓ App deployed as container: flask_todo_app-01EXED9XTJ7TYPB8B7MSQJRAMP
» Releasing...
The deploy was successful! A Waypoint deployment URL is shown below. This
can be used internally to check your deployment and is not meant for external
traffic. You can manage this hostname using "waypoint hostname."
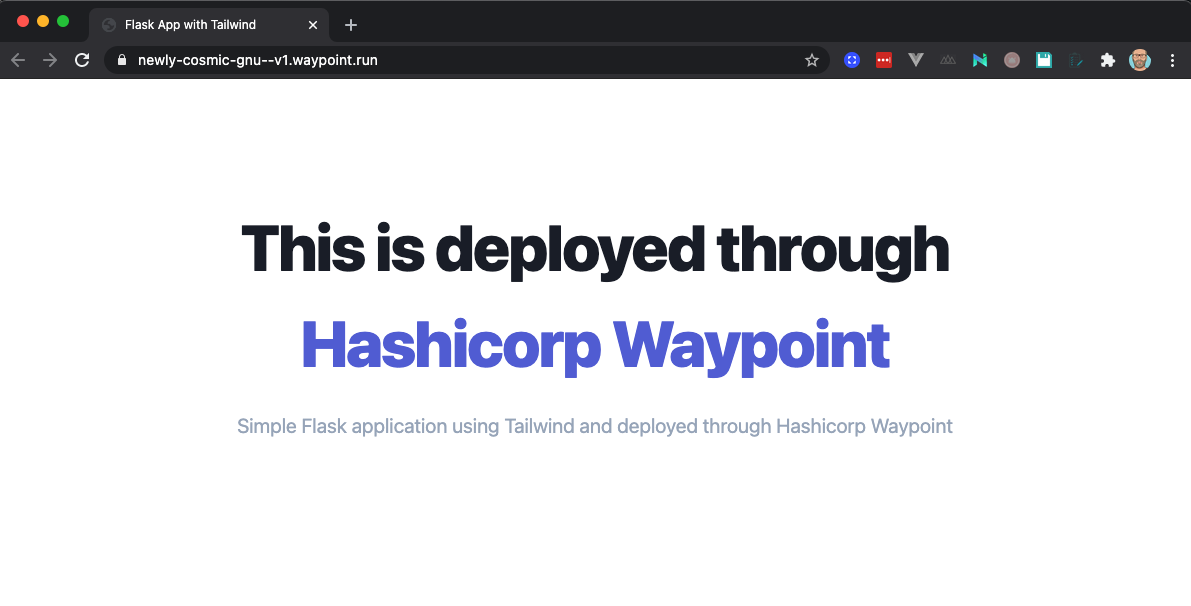
URL: https://newly-cosmic-gnu.waypoint.run
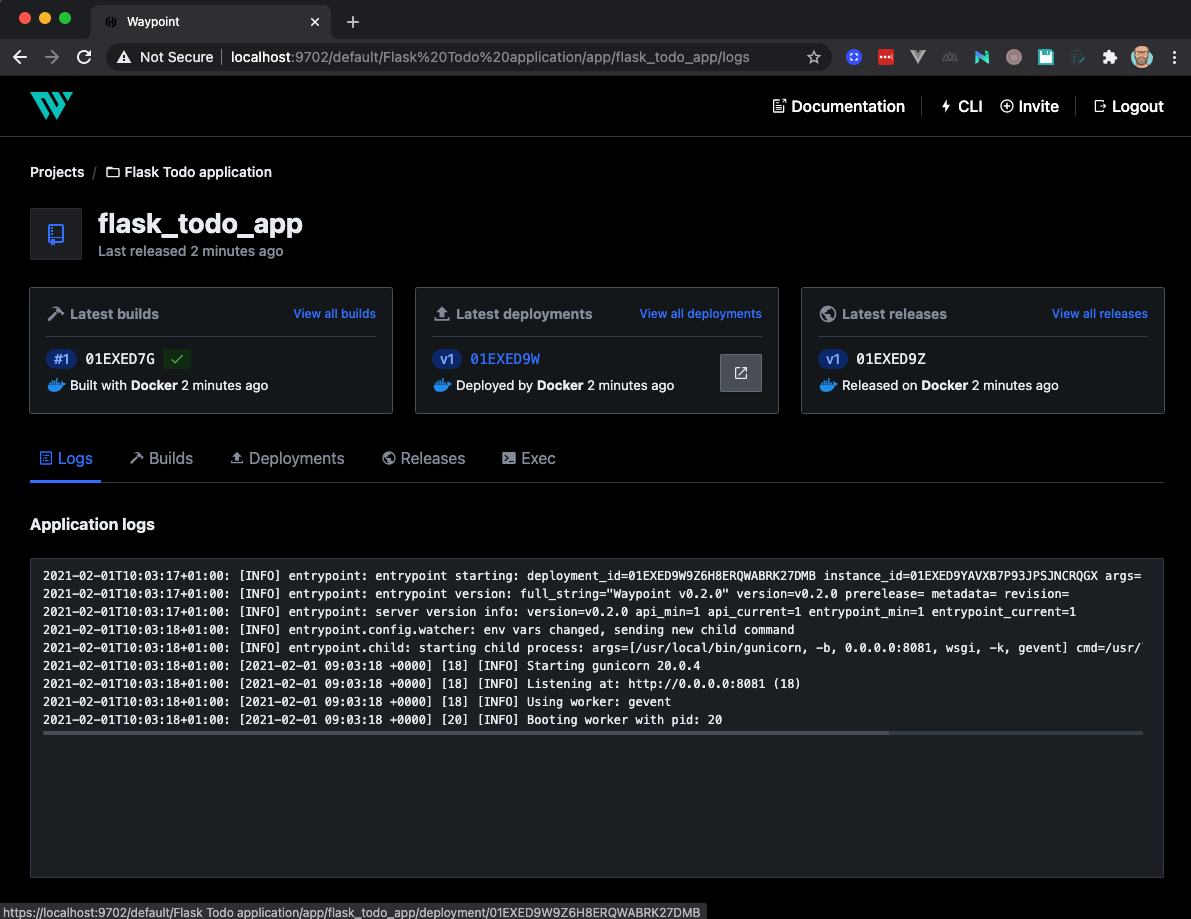
Deployment URL: https://newly-cosmic-gnu--v1.waypoint.runOnce finished, check the Waypoint UI and you should see information related to the build, deployment and release of our Flask application.
Go to the URL mentioned in the output of the waypoint up command and you will be greeted by our application.

Updating Flask application
What if we wanted to change our application and redeploy it. Let’s try it out next.
For reference, we will update our index.html page with the following:
From:
<span class="block xl:inline">This is deployed through</span>
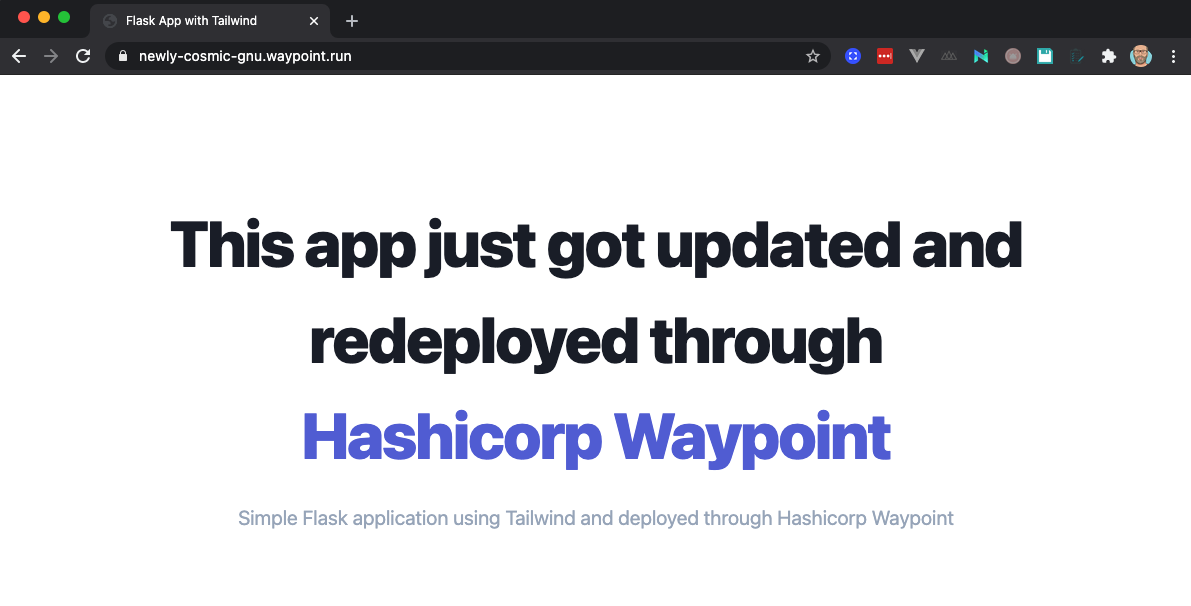
<span class="block text-indigo-600 xl:inline">Hashicorp Waypoint</span>To:
<span class="block xl:inline"
  >This app just got updated and redeployed through</span
>
<span class="block text-indigo-600 xl:inline">Hashicorp Waypoint</span>
Next, let’s run waypoint run again:
~/S/Programming/blog-hugo-netlify-code/Flask/Flask-Basic-Waypoint main ❯ waypoint up
» Building...
✓ Initializing Docker client...
✓ Building image...
<TRUNCATED>
» Deploying...
✓ Setting up waypoint network
✓ Starting container
✓ App deployed as container: flask_todo_app-01EXEDVF96MTPPE7QSA085T1SF
» Releasing...
The deploy was successful! A Waypoint deployment URL is shown below. This
can be used internally to check your deployment and is not meant for external
traffic. You can manage this hostname using "waypoint hostname."
URL: https://newly-cosmic-gnu.waypoint.run
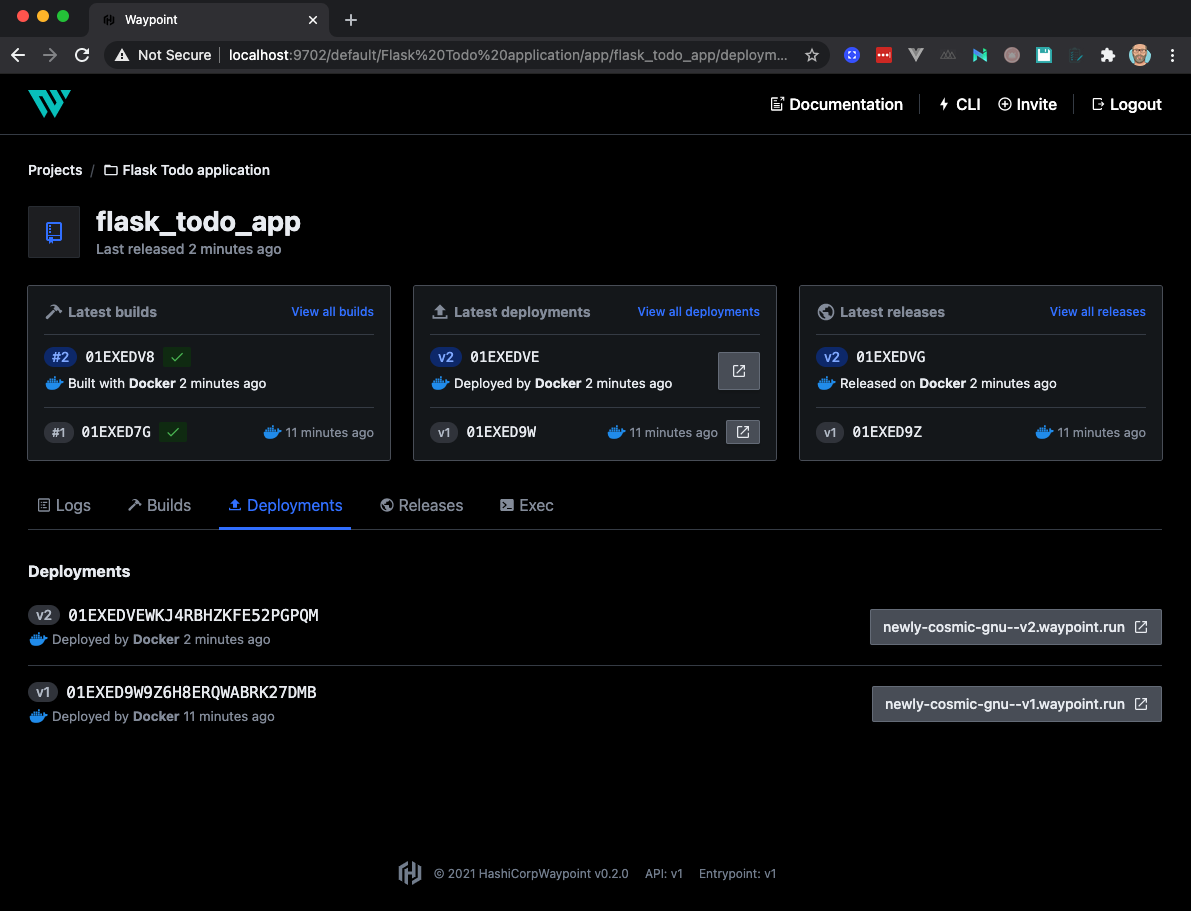
Deployment URL: https://newly-cosmic-gnu--v2.waypoint.runNote the new version (v2) in the deployment URL. Also you will notice that automatically a new docker image was used. Check your waypoint interface and you will indeed also notice here that we have a new build, a new deployment and a new release (v2). Also, Waypoint will automatically point the main URL to the latest deployment URL.
Visit again the URL that was mentioned in the output and you will see the updated application.
You want to see the previous version again, just go to the first version deployment (in my case: https://newly-cosmic-gnu--v1.waypoint.run)
Pretty impressed with Hashicorp Waypoint I must admit. Will definitely check out more features in the future. Will try to combine it with some CICD tools to fully absorb the benefits of this tool.
If you want to checkout the code, please check my Github repo here.