Deploy Flask App to EBS using Github Actions
Introduction
In the previous post, we deployed a very basic Flask application to AWS Elastic Beanstalk using the CLI. This is likely not the way you would want to deploy applications. So I’ve been messing around with Github Actions a bit. Find below how to deploy the same application using a CICD pipeline.
Running the application locally
First off, in case you did not follow along with the previous post, let’s verify our app works locally. So therefore clone the code you find here. Then create a Python virtual environment and install the requirements as follows:
~/Flask/Flask-Basic-CICD-GithubActions-Beanstalk ❯ python3 -m venv venv
~/Flask/Flask-Basic-CICD-GithubActions-Beanstalk ❯ source venv/bin/activate
~/Flask/Flask-Basic-CICD-GithubActions-Beanstalk ❯ pip3 install -r requirements.txt
Next, run the application using gunicorn.
(venv) ~/Flask/Flask-Basic-CICD-GithubActions-Beanstalk ❯ gunicorn --bind 0.0.0.0:5000 wsgi:application -w 1
[2021-10-27 16:19:19 +0200] [47651] [INFO] Starting gunicorn 20.0.4
[2021-10-27 16:19:19 +0200] [47651] [INFO] Listening at: http://0.0.0.0:5000 (47651)
[2021-10-27 16:19:19 +0200] [47651] [INFO] Using worker: sync
[2021-10-27 16:19:19 +0200] [47653] [INFO] Booting worker with pid: 47653
I hope you’ll trust me that our app is running just fine locally.
Uploading to Github
Next, let’s dive into Github a bit. First action is to create a Github repository for our application. In my case, it’s called flask-basic-cicd-github-beanstalk.
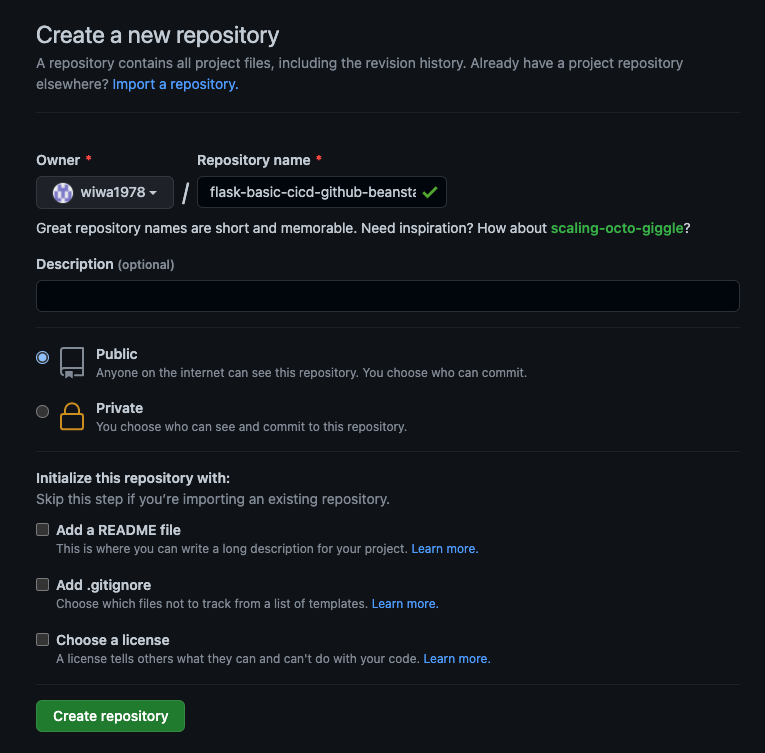
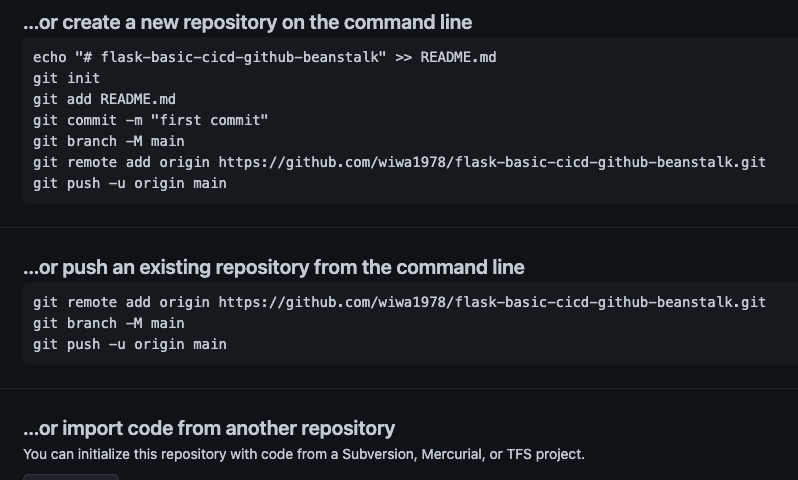
Once the repo has been created, you will receive some instructions to configure you’re local git repository. In the directory where you cloned the application, issue the following commands (note: since you cloned there will already be a .git folder, so you might want to remove that one first by issuing a rm -rfv .git command).
(venv) ~/Flask/Flask-Basic-CICD-GithubActions-Beanstalk ❯ git init
Initialized empty Git repository in ...Flask/Flask-Basic-CICD-GithubActions-Beanstalk/.git/
(venv) ~/Flask/Flask-Basic-CICD-GithubActions-Beanstalk ❯ git branch -m main
(venv) ~/Flask/Flask-Basic-CICD-GithubActions-Beanstalk ❯ git add .
(venv) ~/Flask/Flask-Basic-CICD-GithubActions-Beanstalk ❯ git commit -m "Initial commit"
[main (root-commit) cee8310] Initial commit
...
...
Compressing objects: 100% (8/8), done.
Writing objects: 100% (9/9), 1.47 KiB | 500.00 KiB/s, done.
Total 9 (delta 0), reused 0 (delta 0), pack-reused 0
To https://github.com/wiwa1978/flask-basic-cicd-github-beanstalk.git
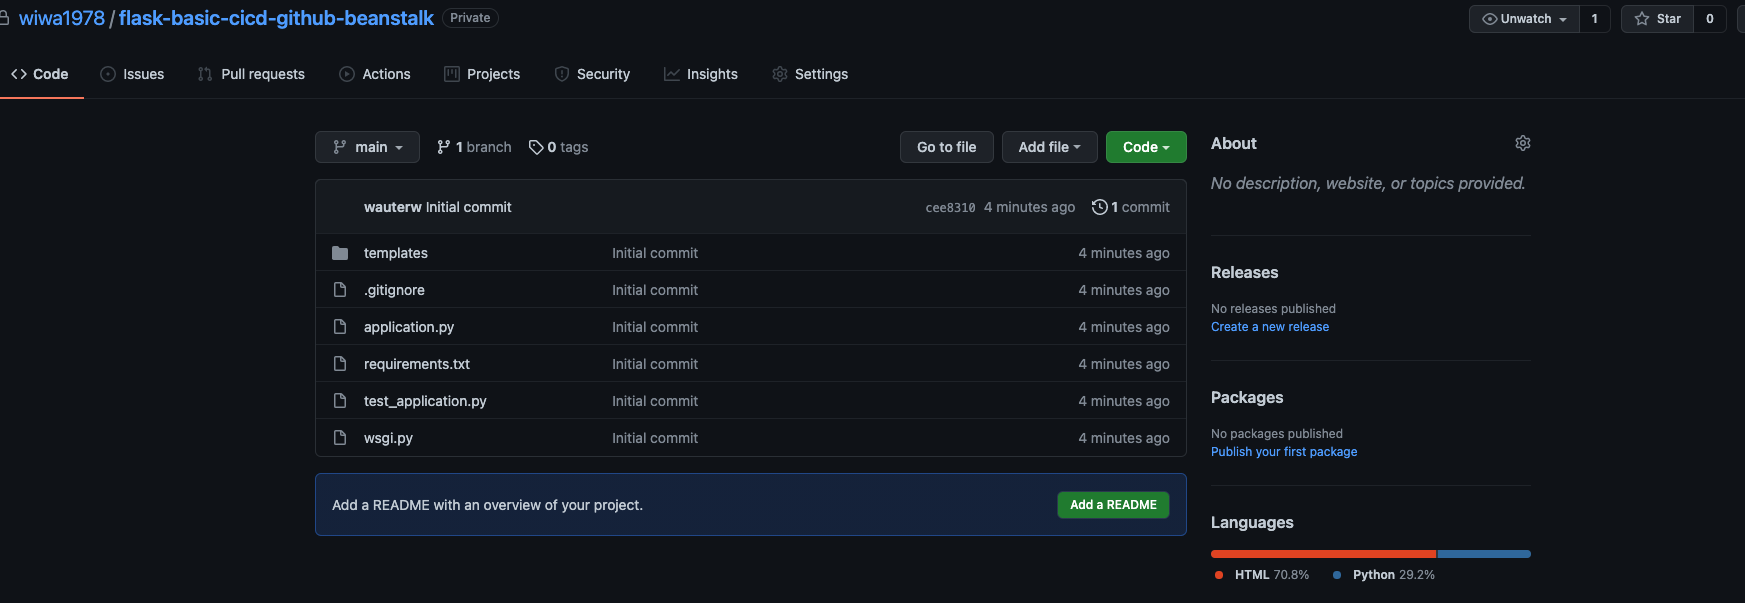
* [new branch] main -> mainYou will notice that your local application folder is now also available in the remote repo on Github:
Github Actions
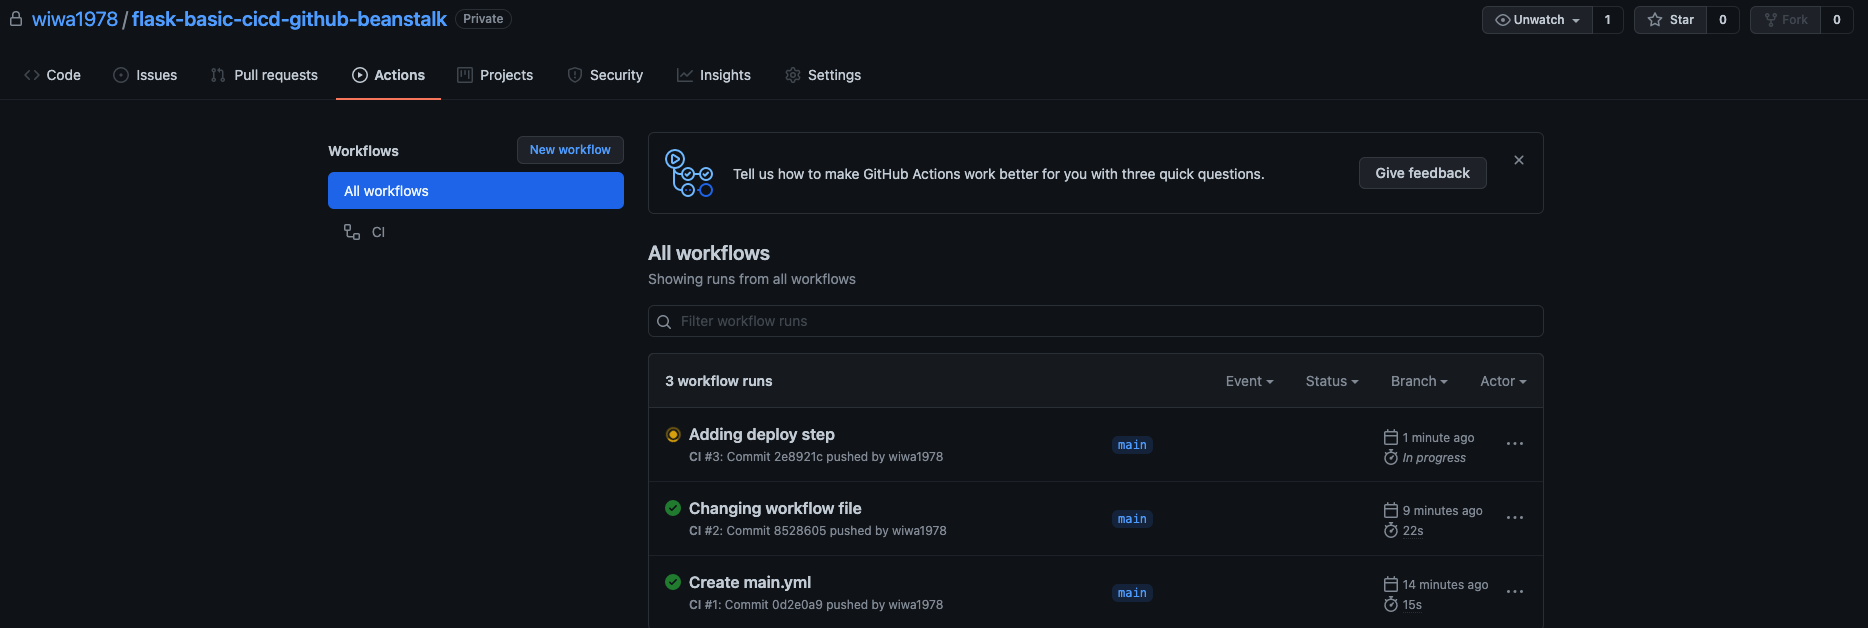
As a next step, let’s tackle the Github Actions part. Click on Actions tab and you should see the screen below:
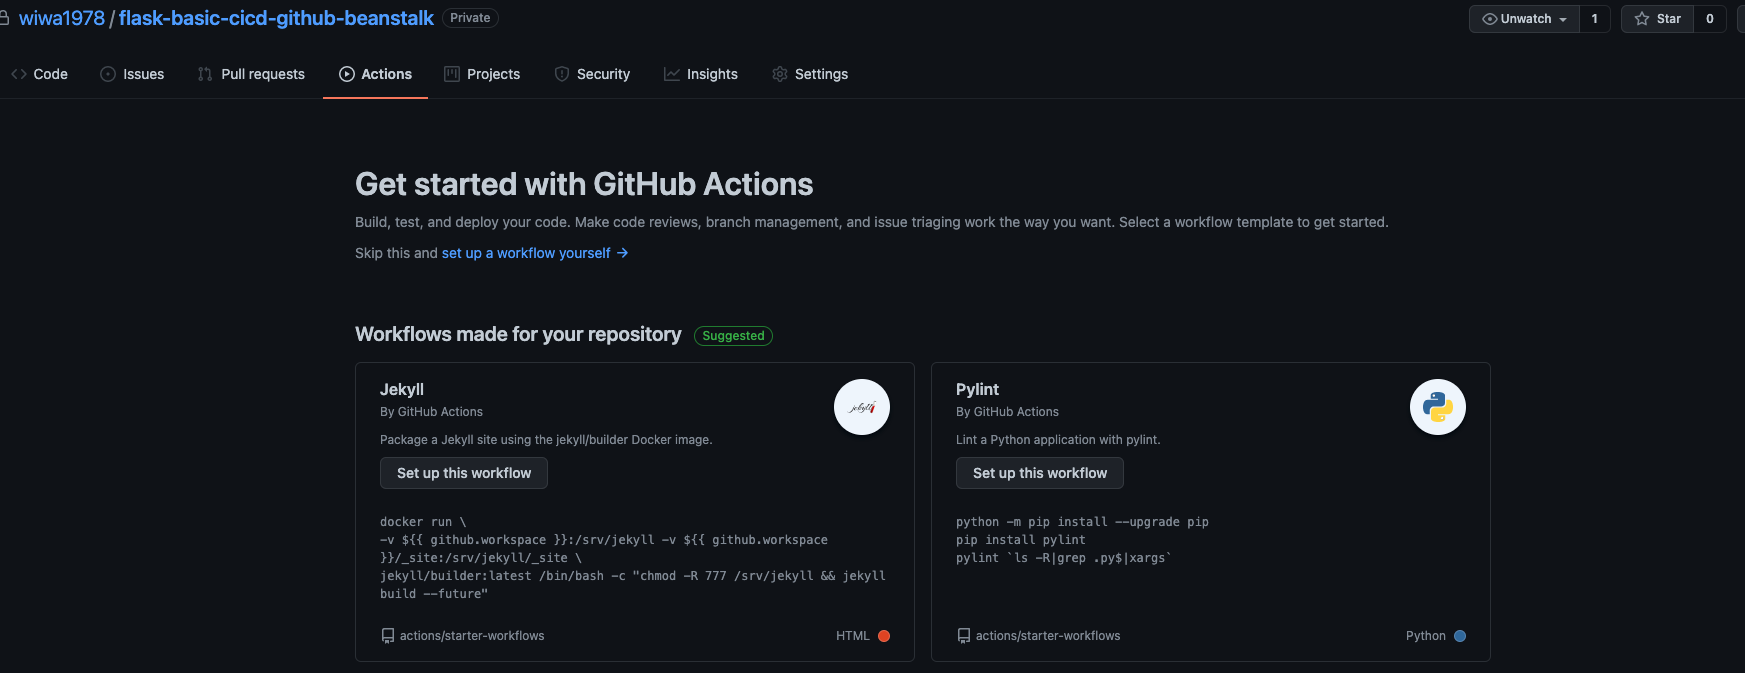
The idea is that Github Actions will look for a certain file (main.yml) in a particular folder (.github/workflows) in your repo. When it finds such a file, it will automatically go ahead and execute the actions that are described in that file. So how to get that main.yml file?
Click on setup a workflow yourself. Next you will see a proposal main.yml file from Github Actions. For now, it doesn’t really matter what is in that file. Go ahead and commit that file (using the Github webinterface) to the main repository. You will see that this file is being put in a .github/workflows folder.
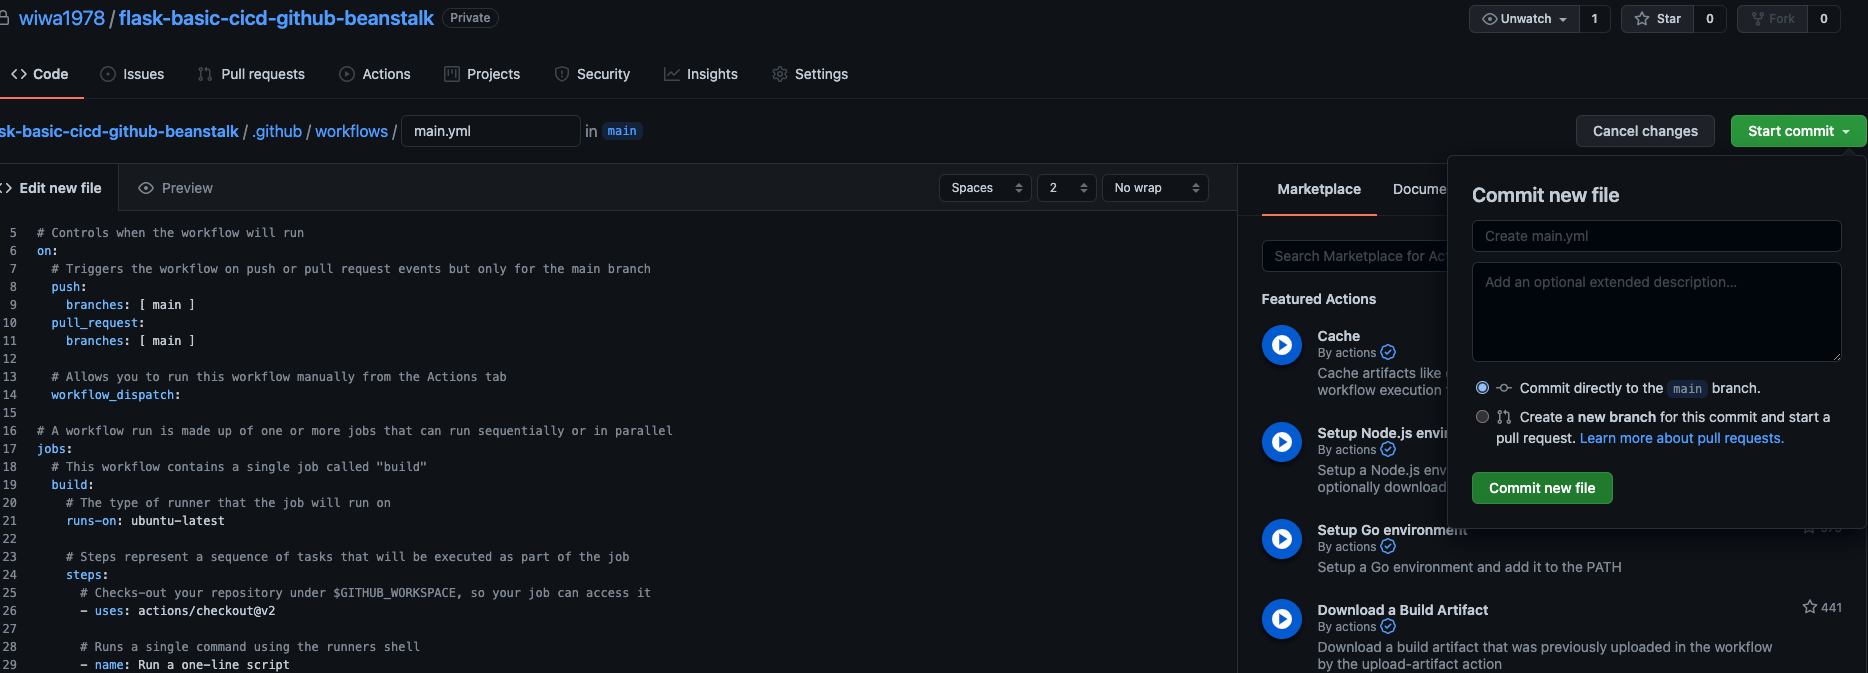
Right now, your remote git repository has a folder .github/worklflows that is not available in your local git repository. So as a next step, you need to pull the latest changes from Github to your local git repository. One way of doing this is as follows:
(venv) ~/Flask/Flask-Basic-CICD-GithubActions-Beanstalk ❯ git pull origin main
remote: Enumerating objects: 6, done.
remote: Counting objects: 100% (6/6), done.
remote: Compressing objects: 100% (3/3), done.
remote: Total 5 (delta 1), reused 0 (delta 0), pack-reused 0
Unpacking objects: 100% (5/5), 1.25 KiB | 213.00 KiB/s, done.
From https://github.com/wiwa1978/flask-basic-cicd-github-beanstalk
 * branch            main       -> FETCH_HEAD
   cee8310..0d2e0a9  main       -> origin/main
Updating cee8310..0d2e0a9
Fast-forward
 .github/workflows/main.yml | 36 ++++++++++++++++++++++++++++++++++++
 1 file changed, 36 insertions(+)
 create mode 100644 .github/workflows/main.yml
Now the file is available locally and we can edit it.
Changing the Github actions workflow
As this was just a generic main.yml file proposed by Github, we need to tweak it to do exactly that what we want it to do (which is deploying the application to Beanstalk of course).
To start off with, we will checkout the application in a certain workspace. Then we install the dependencies and test the application. You’ll surely notice that after each RUN command, we just provide a list of commands we want to execute.
# This is a basic workflow to help you get started with Actions

name: CI

# Controls when the workflow will run
on:
  # Triggers the workflow on push or pull request events but only for the main branch
  push:
    branches: [main]

  # Allows you to run this workflow manually from the Actions tab
  workflow_dispatch:

# A workflow run is made up of one or more jobs that can run sequentially or in parallel
jobs:
  # This workflow contains a single job called "build"
  build:
    # The type of runner that the job will run on
    runs-on: ubuntu-latest

    # Steps represent a sequence of tasks that will be executed as part of the job
    steps:
      # Checks-out your repository under $GITHUB_WORKSPACE, so your job can access it
      - uses: actions/checkout@v2

        # Set up Python 3.9 environment
      - name: Set up Python 3.9
        uses: actions/setup-python@v1
        with:
          python-version: "3.9"

      # Install dependencies
      - name: Install dependencies
        run: |
          python -m pip install --upgrade pip
          pip install -r requirements.txt
      # Run our unit tests using the test application
      - name: Run unit tests
        run: |
          python test_application.py
Next, as this file is now only available in our local repository, we need to upload it to Github:
(venv) ~/Flask/Flask-Basic-CICD-GithubActions-Beanstalk ❯ git add .
(venv) ~/Flask/Flask-Basic-CICD-GithubActions-Beanstalk ❯ git commit -m "Changing workflow file"
[main 8528605] Changing workflow file
3 files changed, 14 insertions(+), 10 deletions(-)
...
...
To https://github.com/wiwa1978/flask-basic-cicd-github-beanstalk.git
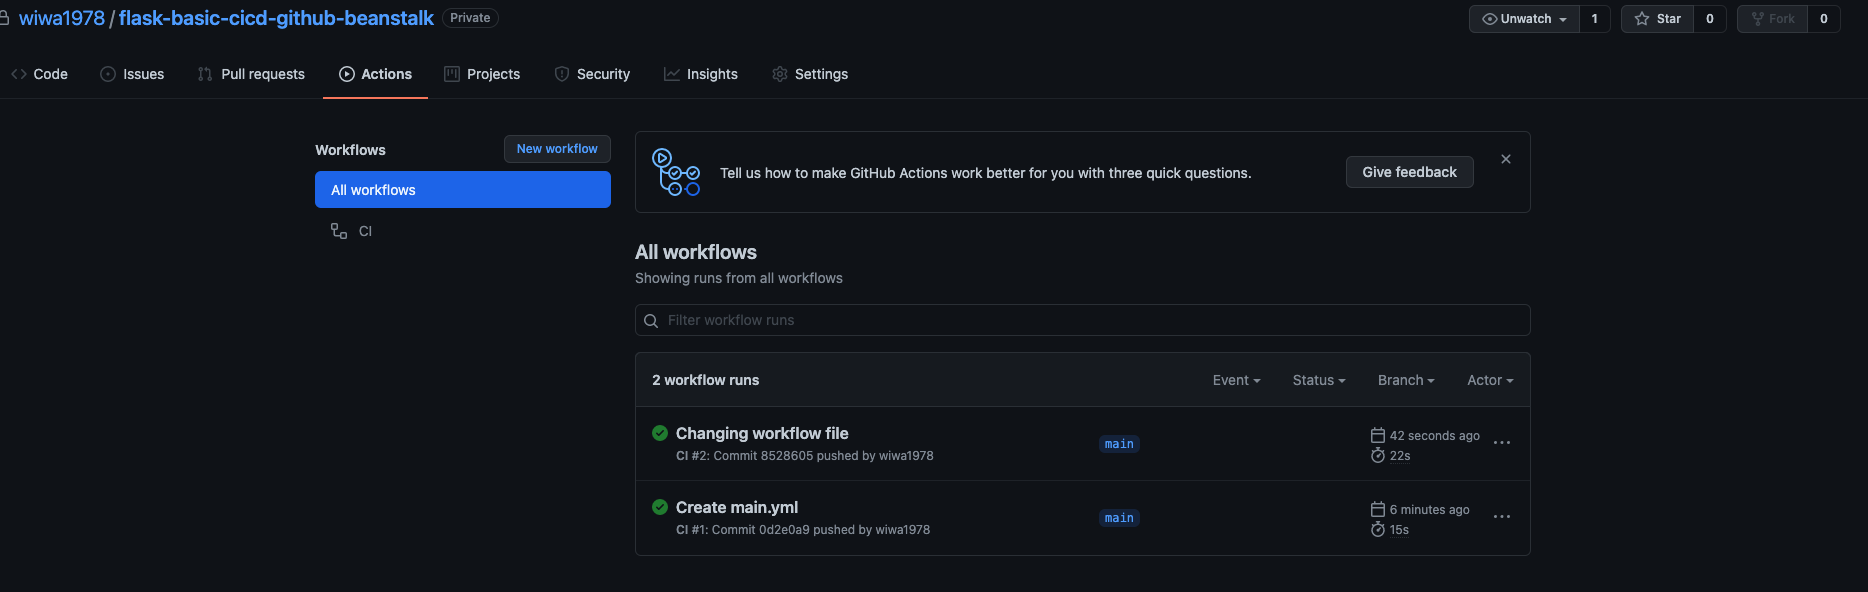
0d2e0a9..8528605 main -> mainAs we mentioned before, once Github detects this file, it will start automatically the Github workflow. After a while, if all went well, you will see that the workflow got executed successfully.
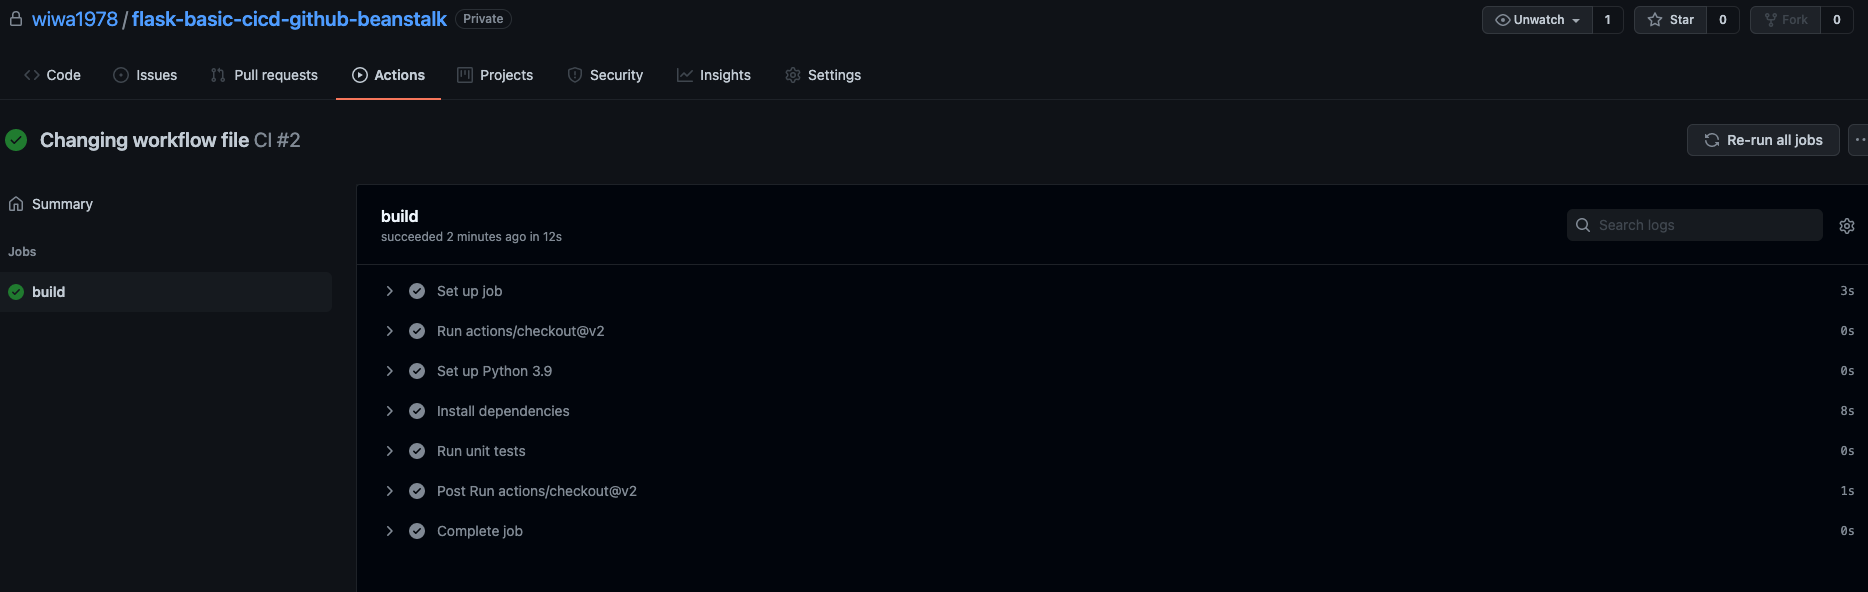
If you click on the workflow you will be able to see some details, exactly the steps that we defined in the workflow file.
Adding AWS secrets to Github
It’s about time now to focus on the deployment of the application to Elastic Beanstalk. We need to supply Github with our AWS credentials. Obviously it’s a bad idea to hardcode them into our application or into the Github workflow file. The proper way to achieve this is to create secret variables in Github. Go to settings and secrets and create the variables (see screenshot for the variable names).
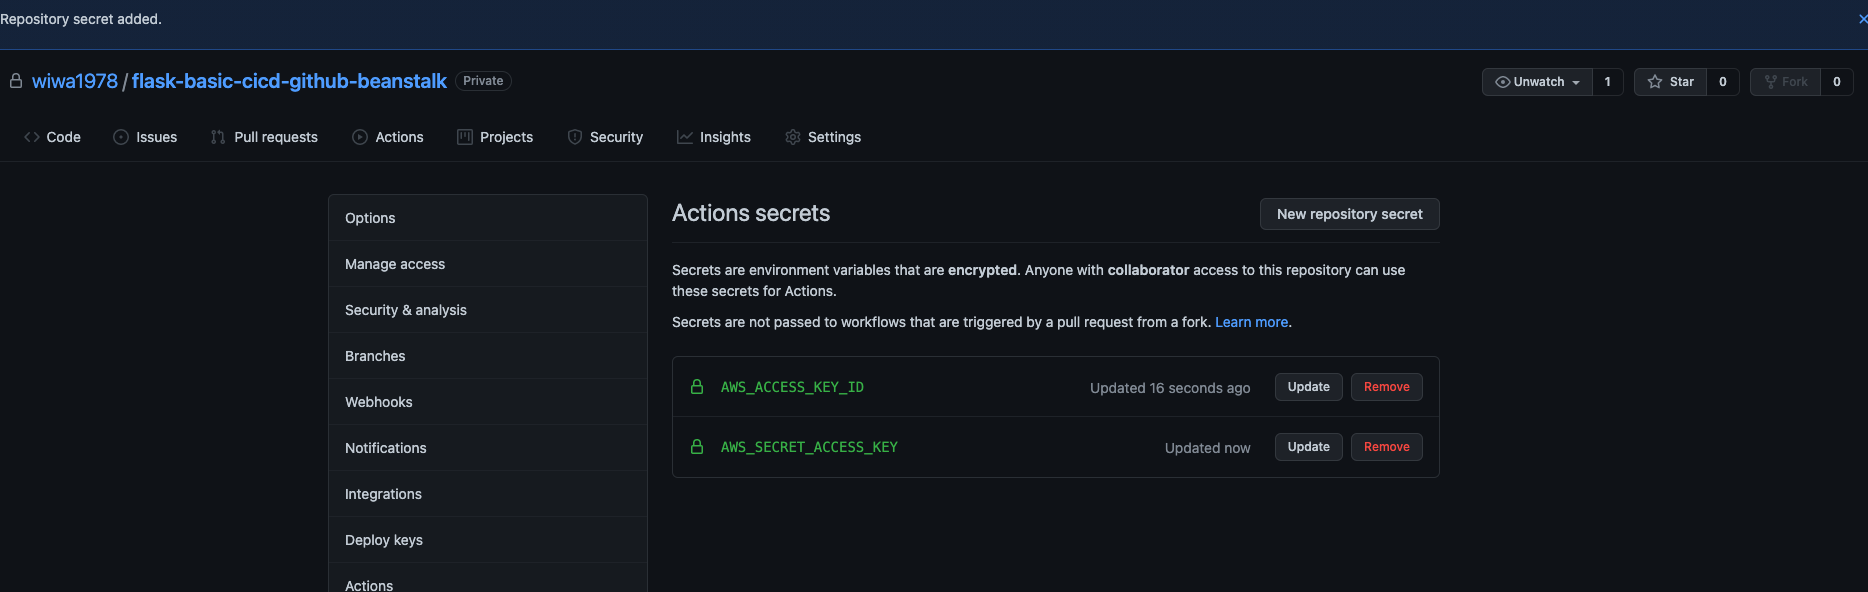
Note: in case you don’t have these AWS credentials, go to the AWS console and create a user in IAM and attach the AdministratorAccess-AWSElasticBeanstalk policy to the user you just created. Use these values as the secret (AWS_ACCESS_KEY_ID and AWS_SECRET_ACCESS_KEY)
Deploy the application
Next, we will deploy the application. To do so, we can modify the main.yml file by providing the commands that we want to execute. In below file you’ll notice we start off with an ubuntu image (running as a container). Obviously that image does not have the Elastic Beanstalk CLI installed by default so we start off with the installation of the CLI.
Next, we read out the AWS environment variables so they are available within our container. And then finally, we issue the EBS commands to deploy the application.
deploy:
  # Only run this job if "build" has ended successfully
  needs:
    - build

  runs-on: ubuntu-latest

  steps:
    # Checks-out your repository under $GITHUB_WORKSPACE
    - uses: actions/checkout@v2

    # Set up Python 3.9 environment
    - name: Set up Python 3.9
      uses: actions/setup-python@v1
      with:
        python-version: "3.9"

    # Elastic Beanstalk CLI version
    - name: Get EB CLI version
      run: |
        python -m pip install --upgrade pip
        pip install awsebcli --upgrade
        eb --version

        # Configure AWS Credentials

    # Configure AWS Credentials
    - name: Configure AWS Credentials
      uses: aws-actions/configure-aws-credentials@v1
      with:
        aws-access-key-id: ${{ secrets.AWS_ACCESS_KEY_ID }}
        aws-secret-access-key: ${{ secrets.AWS_SECRET_ACCESS_KEY }}
        aws-region: eu-central-1

    # Create the Elastic Beanstalk application
    - name: Create EBS application
      run: |
        eb init -p python-3.8 Flask_Basic --region eu-central-1

    # Deploy to (or Create) the Elastic Beanstalk environment
    - name: Create test environment & deploy
      run: |
        (eb use test-environment && eb status test-environment && eb deploy) || eb create test-environment
Once our workflow file is ready, add it to the Github repository as follows:
(venv) ~/Flask/Flask-Basic-CICD-GithubActions-Beanstalk ❯ git add .
(venv) ~/Flask/Flask-Basic-CICD-GithubActions-Beanstalk ❯ git commit -m "Adding deploy step"
[main 2e8921c] Adding deploy step
 1 file changed, 44 insertions(+), 1 deletion(-)
(venv) ~/Flask/Flask-Basic-CICD-GithubActions-Beanstalk ❯ git push origin main
Enumerating objects: 9, done.
Counting objects: 100% (9/9), done.
Delta compression using up to 12 threads
Compressing objects: 100% (3/3), done.
Writing objects: 100% (5/5), 1.27 KiB | 1.27 MiB/s, done.
Total 5 (delta 1), reused 0 (delta 0), pack-reused 0
remote: Resolving deltas: 100% (1/1), completed with 1 local object.
To https://github.com/wiwa1978/flask-basic-cicd-github-beanstalk.git
   8528605..2e8921c  main -> main
Again, you will see that Github automatically started executing the workflow:
Click on the workflow run to see more details:
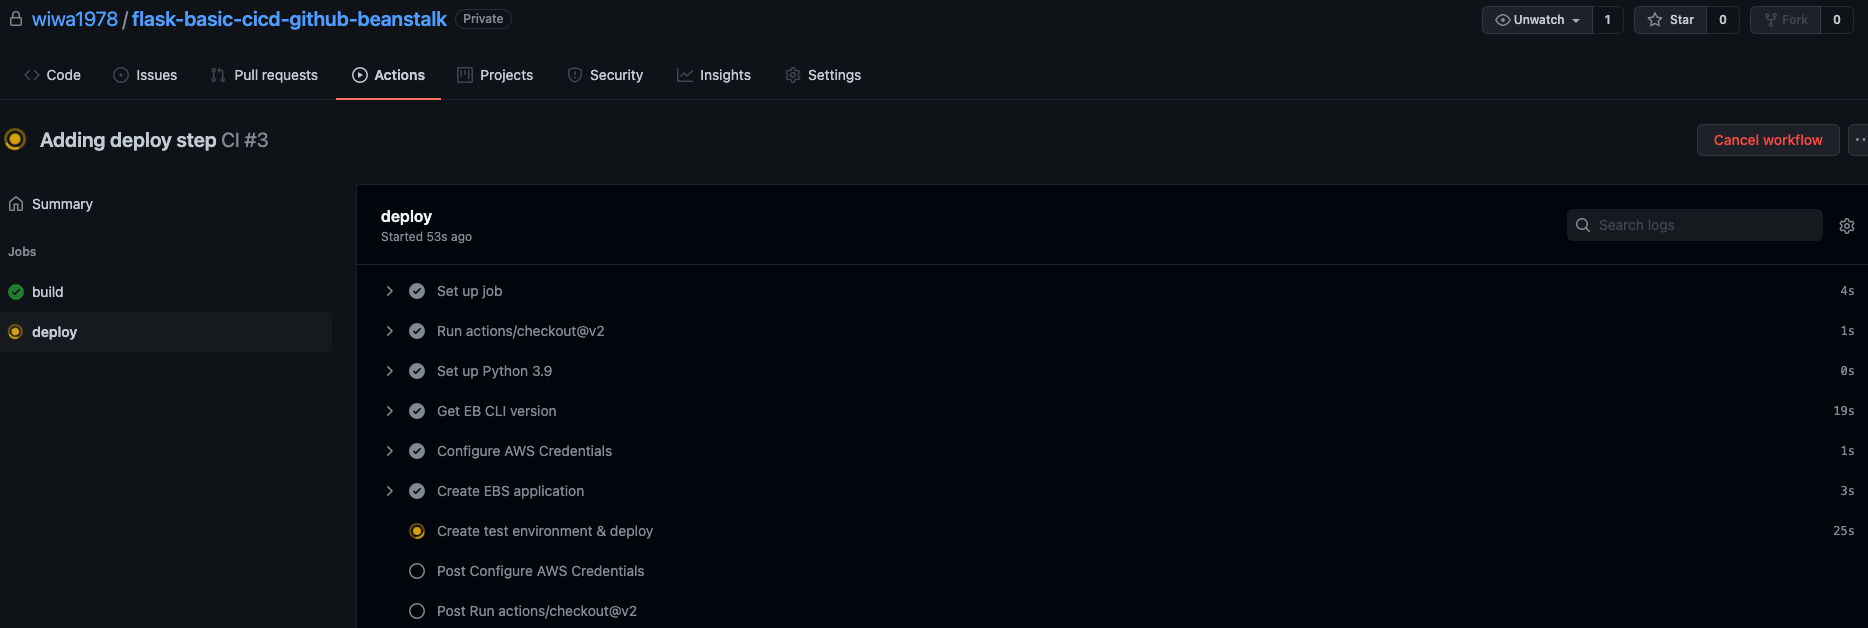
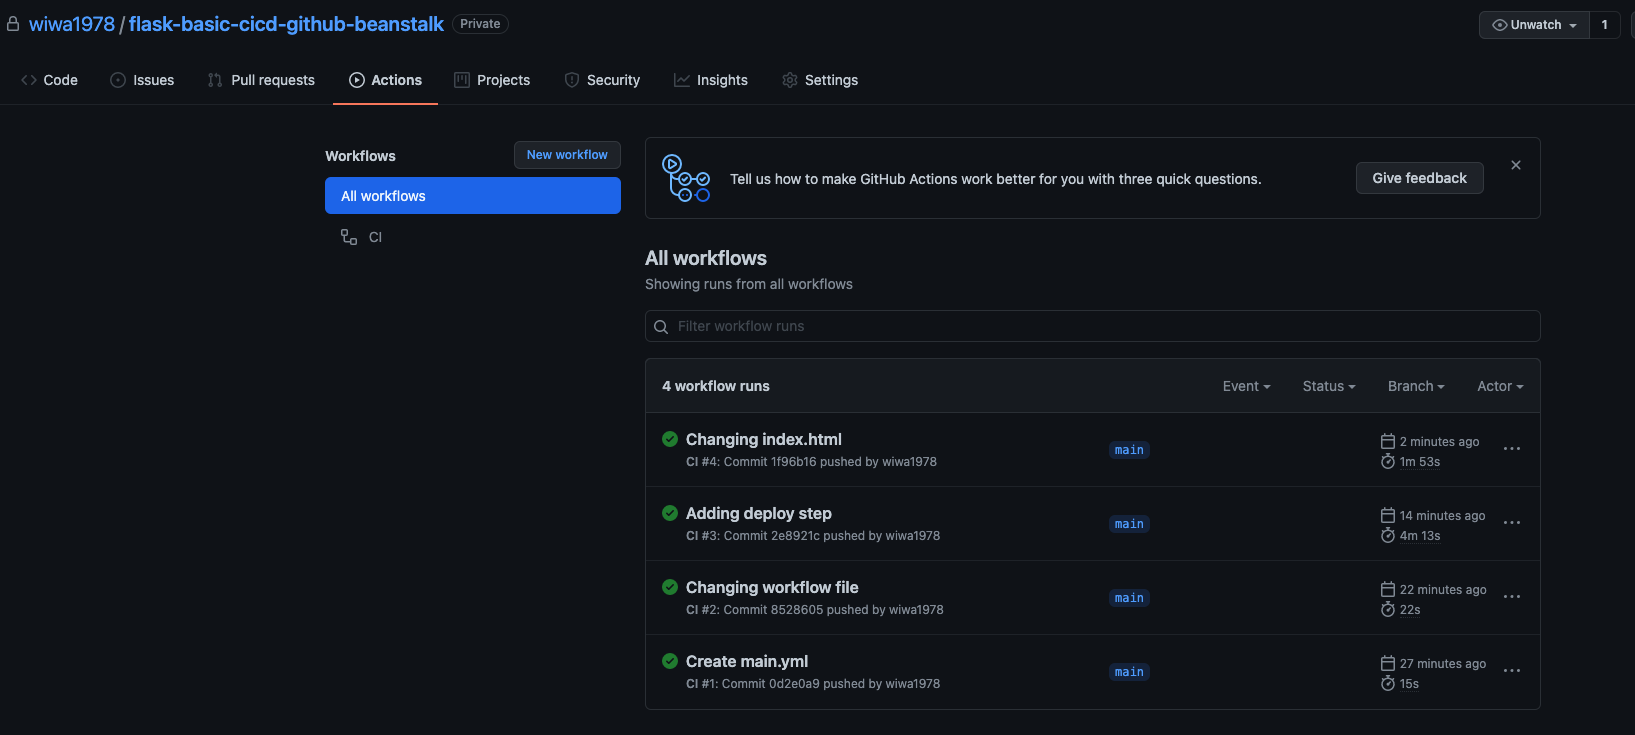
If all goes well, after some time you will see a green indication that everything went fine:

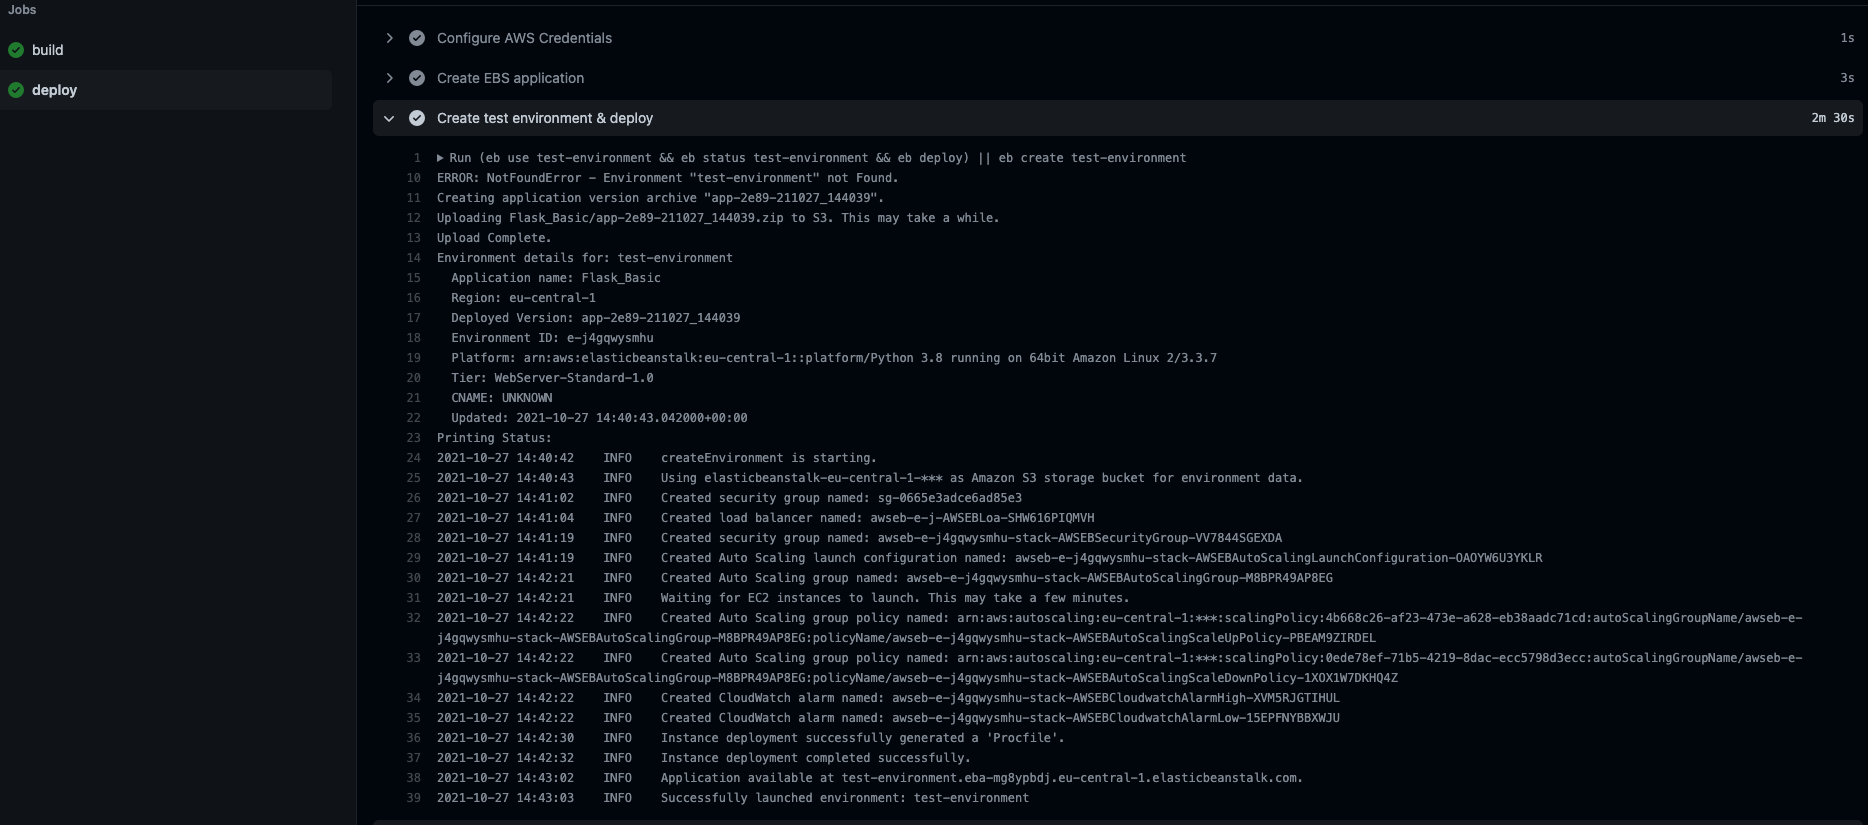
Our application is now deployed onto Elastic Beanstalk. But where to find it, what URL has been created for us?
You will find that in the details of the Create test environment & deploy step. In my case, it appears to be: http://test-environment.eba-mg8ypbdj.eu-central-1.elasticbeanstalk.com/.
See also the screenshot below. BTW: clicking on this URL will not work as I deleted the Beanstalk environment after creating this blog post).
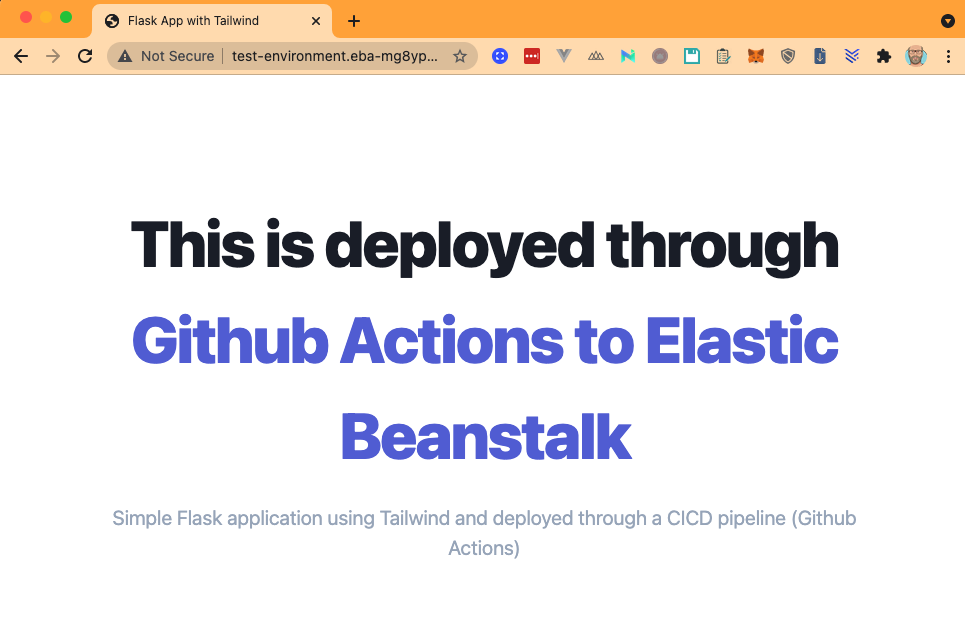
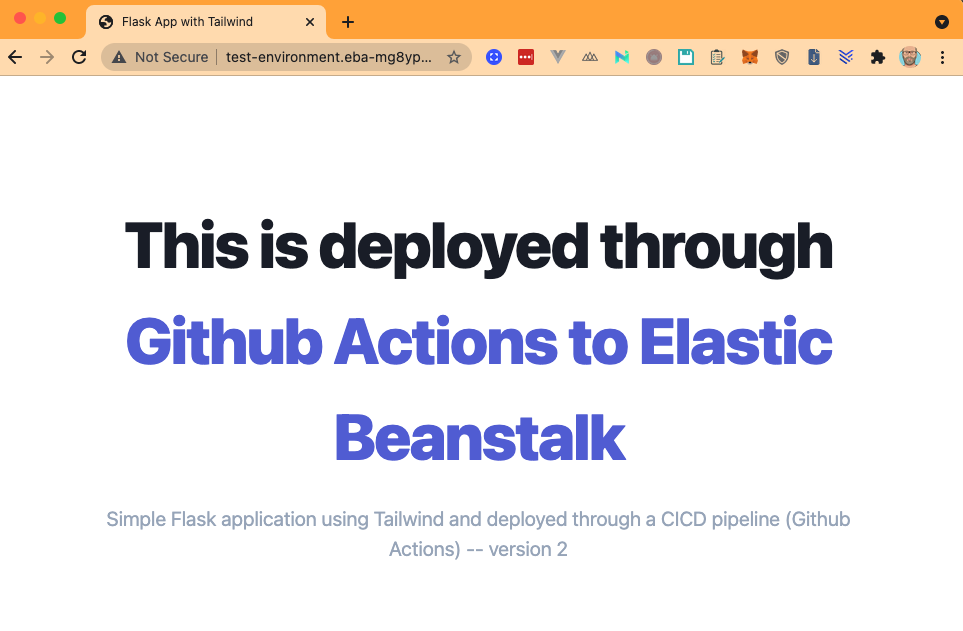
Visiting that link results in our application being shown:
Updating the application
As we did in previous posts, we will update our application. In my case, I updated the index.html file by adding the words version 2 to the tagline text under the title. As we made a change to our application, we need to sync it to our remote Git repo.
(venv) ~/Flask/Flask-Basic-CICD-GithubActions-Beanstalk ❯ git add .
(venv) ~/Flask/Flask-Basic-CICD-GithubActions-Beanstalk ❯ git commit -m "Changing index.html"
[main 1f96b16] Changing index.html
 1 file changed, 1 insertion(+), 1 deletion(-)
(venv) ~/Flask/Flask-Basic-CICD-GithubActions-Beanstalk ❯ git push origin main
Enumerating objects: 7, done.
Counting objects: 100% (7/7), done.
Delta compression using up to 12 threads
Compressing objects: 100% (3/3), done.
Writing objects: 100% (4/4), 351 bytes | 351.00 KiB/s, done.
Total 4 (delta 2), reused 0 (delta 0), pack-reused 0
remote: Resolving deltas: 100% (2/2), completed with 2 local objects.
To https://github.com/wiwa1978/flask-basic-cicd-github-beanstalk.git
   2e8921c..1f96b16  main -> main
Again, Github will immediately kick of a workflow run. After a while it should be successful.
And as expected, the application is updated:
Code can be found here!