REST API with Express and Mongo
Quick note: the original post dates from 02-07-2015 but got updated at 02-04-2020 with latest versions and it was essentially written from scratch again.
Introduction
In this post, we will create a very simple REST API for a simple todo application. Nodejs has been on my todo list for quite some time so I decided to get my hands dirty and try things out a bit. The result is a simple todo-application again in NodeJS (with the Express JS framework). Have fun following this tutorial.
Luckily, the Express framework allows us to use an Express generator, which basically will create a working Express application. Use the following command:
WAUTERW-M-65P7:MEAN-Todo-Application wauterw$ npm install -g express-generator
/usr/local/bin/express -> /usr/local/lib/node_modules/express-generator/bin/express-cli.js
+ express-generator@4.16.1
updated 1 package in 5.793s
WAUTERW-M-65P7:MEAN-Todo-Application wauterw$ express --view=pug

   create : public/
   create : public/javascripts/
   create : public/images/
   create : public/stylesheets/
   create : public/stylesheets/style.css
   create : routes/
   create : routes/index.js
   create : routes/users.js
   create : views/
   create : views/error.pug
   create : views/index.pug
   create : views/layout.pug
   create : app.js
   create : package.json
   create : bin/
   create : bin/www

   install dependencies:
     $ npm install

   run the app:
     $ DEBUG=mean-todo-application:* npm start
WAUTERW-M-65P7:MEAN-Todo-Application wauterw$ npm install
WAUTERW-M-65P7:MEAN-Todo-Application wauterw$ DEBUG=mean-todo-application:* npm start
Going to http://localhost:3000 will show you a welcome message from the Express installer. Perfect, we have generated an Express application upon which we can continue to build further.

Install Mongodb on MAC OSX (Catalina and onwards)
Let’s continue with the database section. As the database we will use is Mongo, we will need to install this first.
WAUTERW-M-65P7:MEAN-Todo-Application wauterw$ brew tap mongodb/brew WAUTERW-M-65P7:MEAN-Todo-Application wauterw$ brew install mongodb-community@4.2
For specific information related to the installation of Mongo, please refer to this documentation. As I’m running MACOS Catalina I had an issue with creating Mongo’s data directory which by default should be in /data/db folder. If you do so you will get an error:
WAUTERW-M-65P7:MEAN-Todo-Application wauterw$ sudo mkdir -p /data/db
Password:
mkdir: /data/db: Read-only file system
Therefor you need to create this data directory elsewhere which is what I do in below snippet.
WAUTERW-M-65P7:MEAN-Todo-Application wauterw$ sudo mkdir -p ~/mongo/data/db
WAUTERW-M-65P7:MEAN-Todo-Application wauterw$ sudo chown -R `id -un` ~/mongo/data/db
As a result, you need to run Mongo by specifying the data directory:
WAUTERW-M-65P7:MEAN-Todo-Application wauterw$ mongod --dbpath ~/mongo/data/dbInstall Mongoose
We also need to install a package to be able to work with Mongo. My preference goes to Mongoose, which is an object modeling tool which allows us to easily interact with Mongo from our Express code. Let’s install this package:
WAUTERW-M-65P7:MEAN-Todo-Application wauterw$ npm install mongooseAfter doing this, you will see that the mongoose package got added to the package.json file.
Modifying the app.js file
1) Adding the routes
You will see the following two routes in the app.js file.
app.use('/', indexRouter);
app.use('/users', usersRouter);
In order to have our application respond to /todos routes, we will need to add the following line:
app.use('/todos', todoRouter);Also make sure we import it by adding the following line to our app.js file:
var todoRouter = require('./routes/todo');2) Adding mongoose
We also need to tell our app where to find the mongoose library and make a connection to our database.
var database = require('./config/database');
var mongoose = require('mongoose');
mongoose.connect(database.url, { useNewUrlParser: true, useUnifiedTopology: true});
Defining the database model
The first thing to do is to define the Schema that we will be using. Our app basically needs to be told what the fields are to be used in the Mongo database. To achieve that, create a folder called models in the root of your application and make a file called todo.js in that folder.
var mongoose = require('mongoose');
var Schema = mongoose.Schema;

// todo model
var todoSchema = new Schema({
    content: String,
    description:String,
    completed: { type: Boolean, default: false },
    created_at: { type: Date, default: Date.now },
    updated_at: { type: Date, default: Date.now }
});

module.exports = mongoose.model('Todo', todoSchema);
Routes and Endpoints
In the boilerplate code generated by the Express generator, you will find a routes directory. There will be an index.js file and a user.js file. Let’s create a todo.js file here. This file will contain all the routes for our todo endpoint. In below snippet, we limit ourselves to the index route which allows us to receive all todo items from our database.
In below snippet you can see that we define an HTTP GET function that will retrieve all todo items from the Mongo database. We also return an HTML section and a JSON section. Strictly speaking, given the fact we are only developing the REST API server, we don’t need to return the HTML section. Having said that, we’ll leave it in for future use.
router.route('/')
    //GET all todos
    .get(function(req, res, next) {
      Todo.find({}, function (err, todos) {
         if (err) {
            return console.error(err);
         else {
            console.log("Showing all todo items");
            res.format({
               html: function(){
                  res.render('todos/index', {
                     title: 'All my todos',
                     "todos" : todos
               });
            },
            json: function(){
               res.json(todos);
            }
         });
        }
      });
    })
All the other endpoints can be consulted in my Github repository.
We have now created a complete CRUD application that exposes itself as a REST Server that will return Json objects. We are now completely ready for testing the API.
Testing the CRUD functionality
We have the following endpoints available
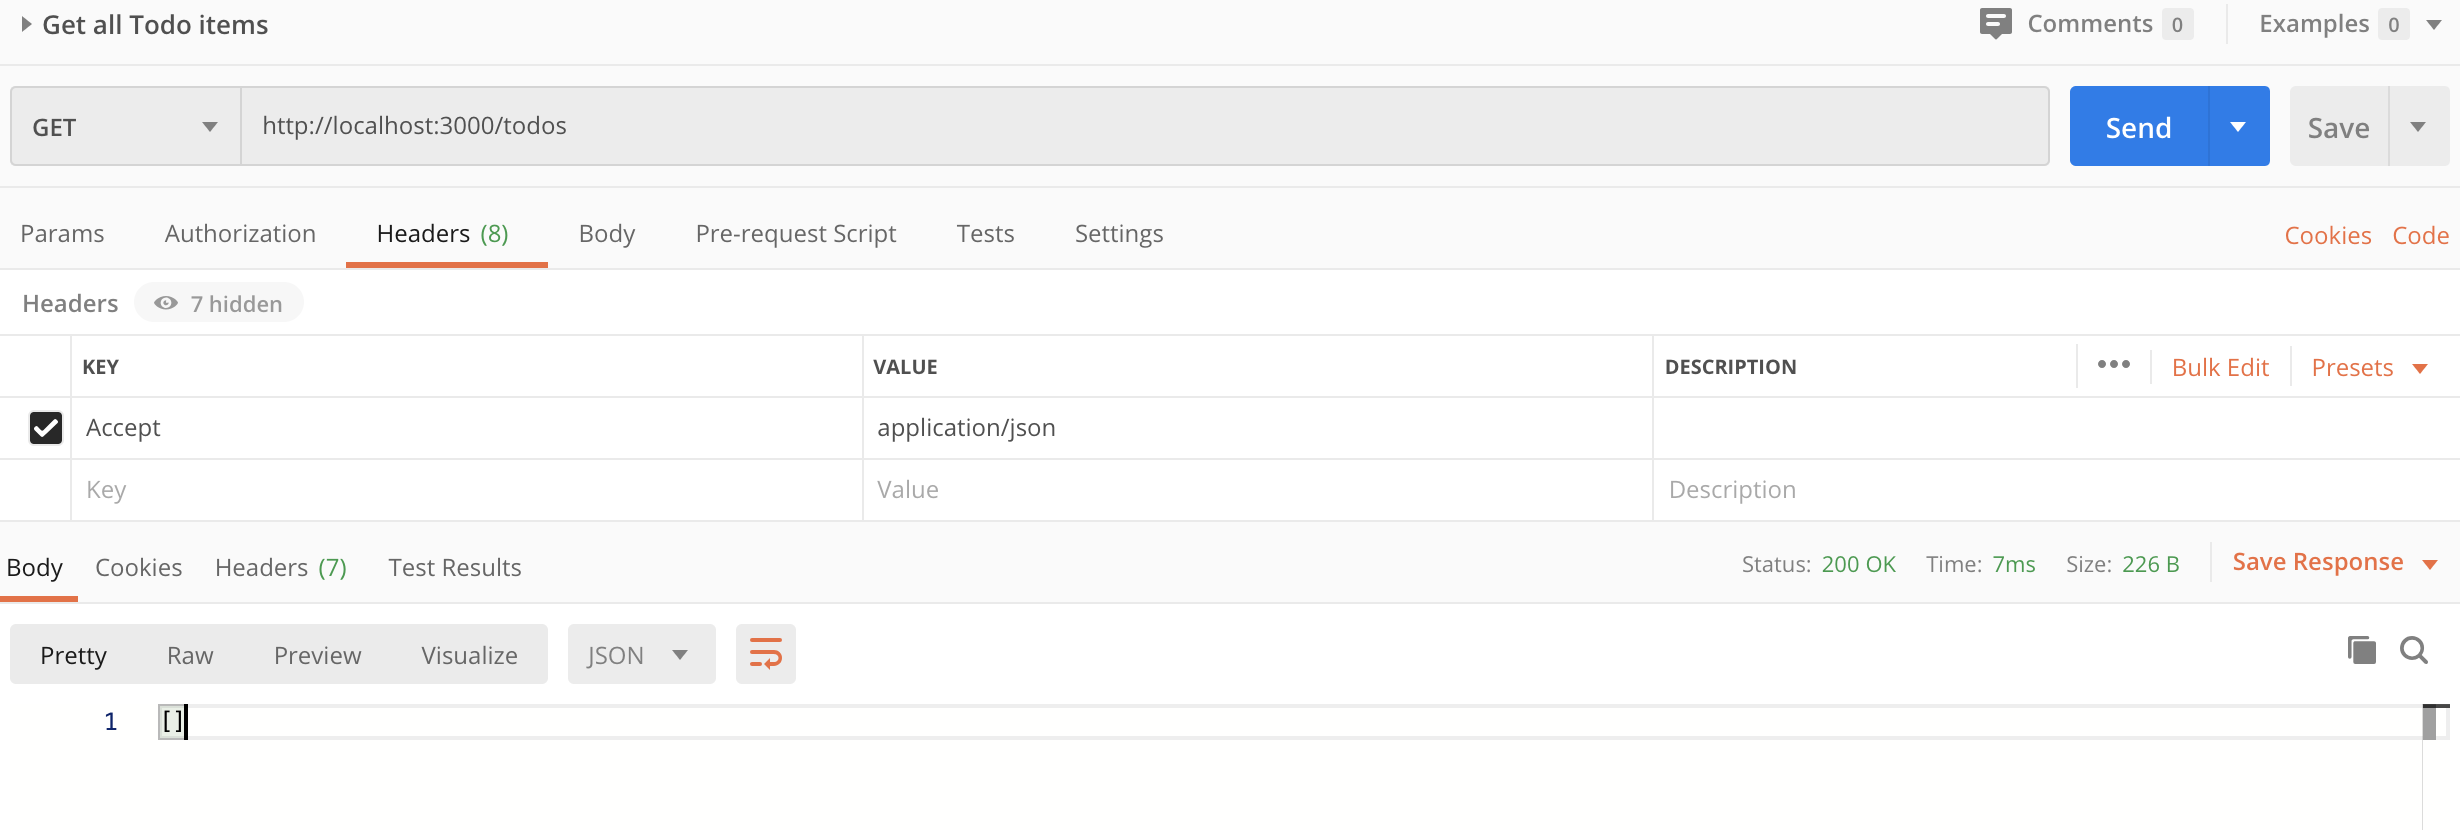
First off, we want to show all items currently in the Mongo database. Obviously, this should be empty as we’ve been developing from scratch:
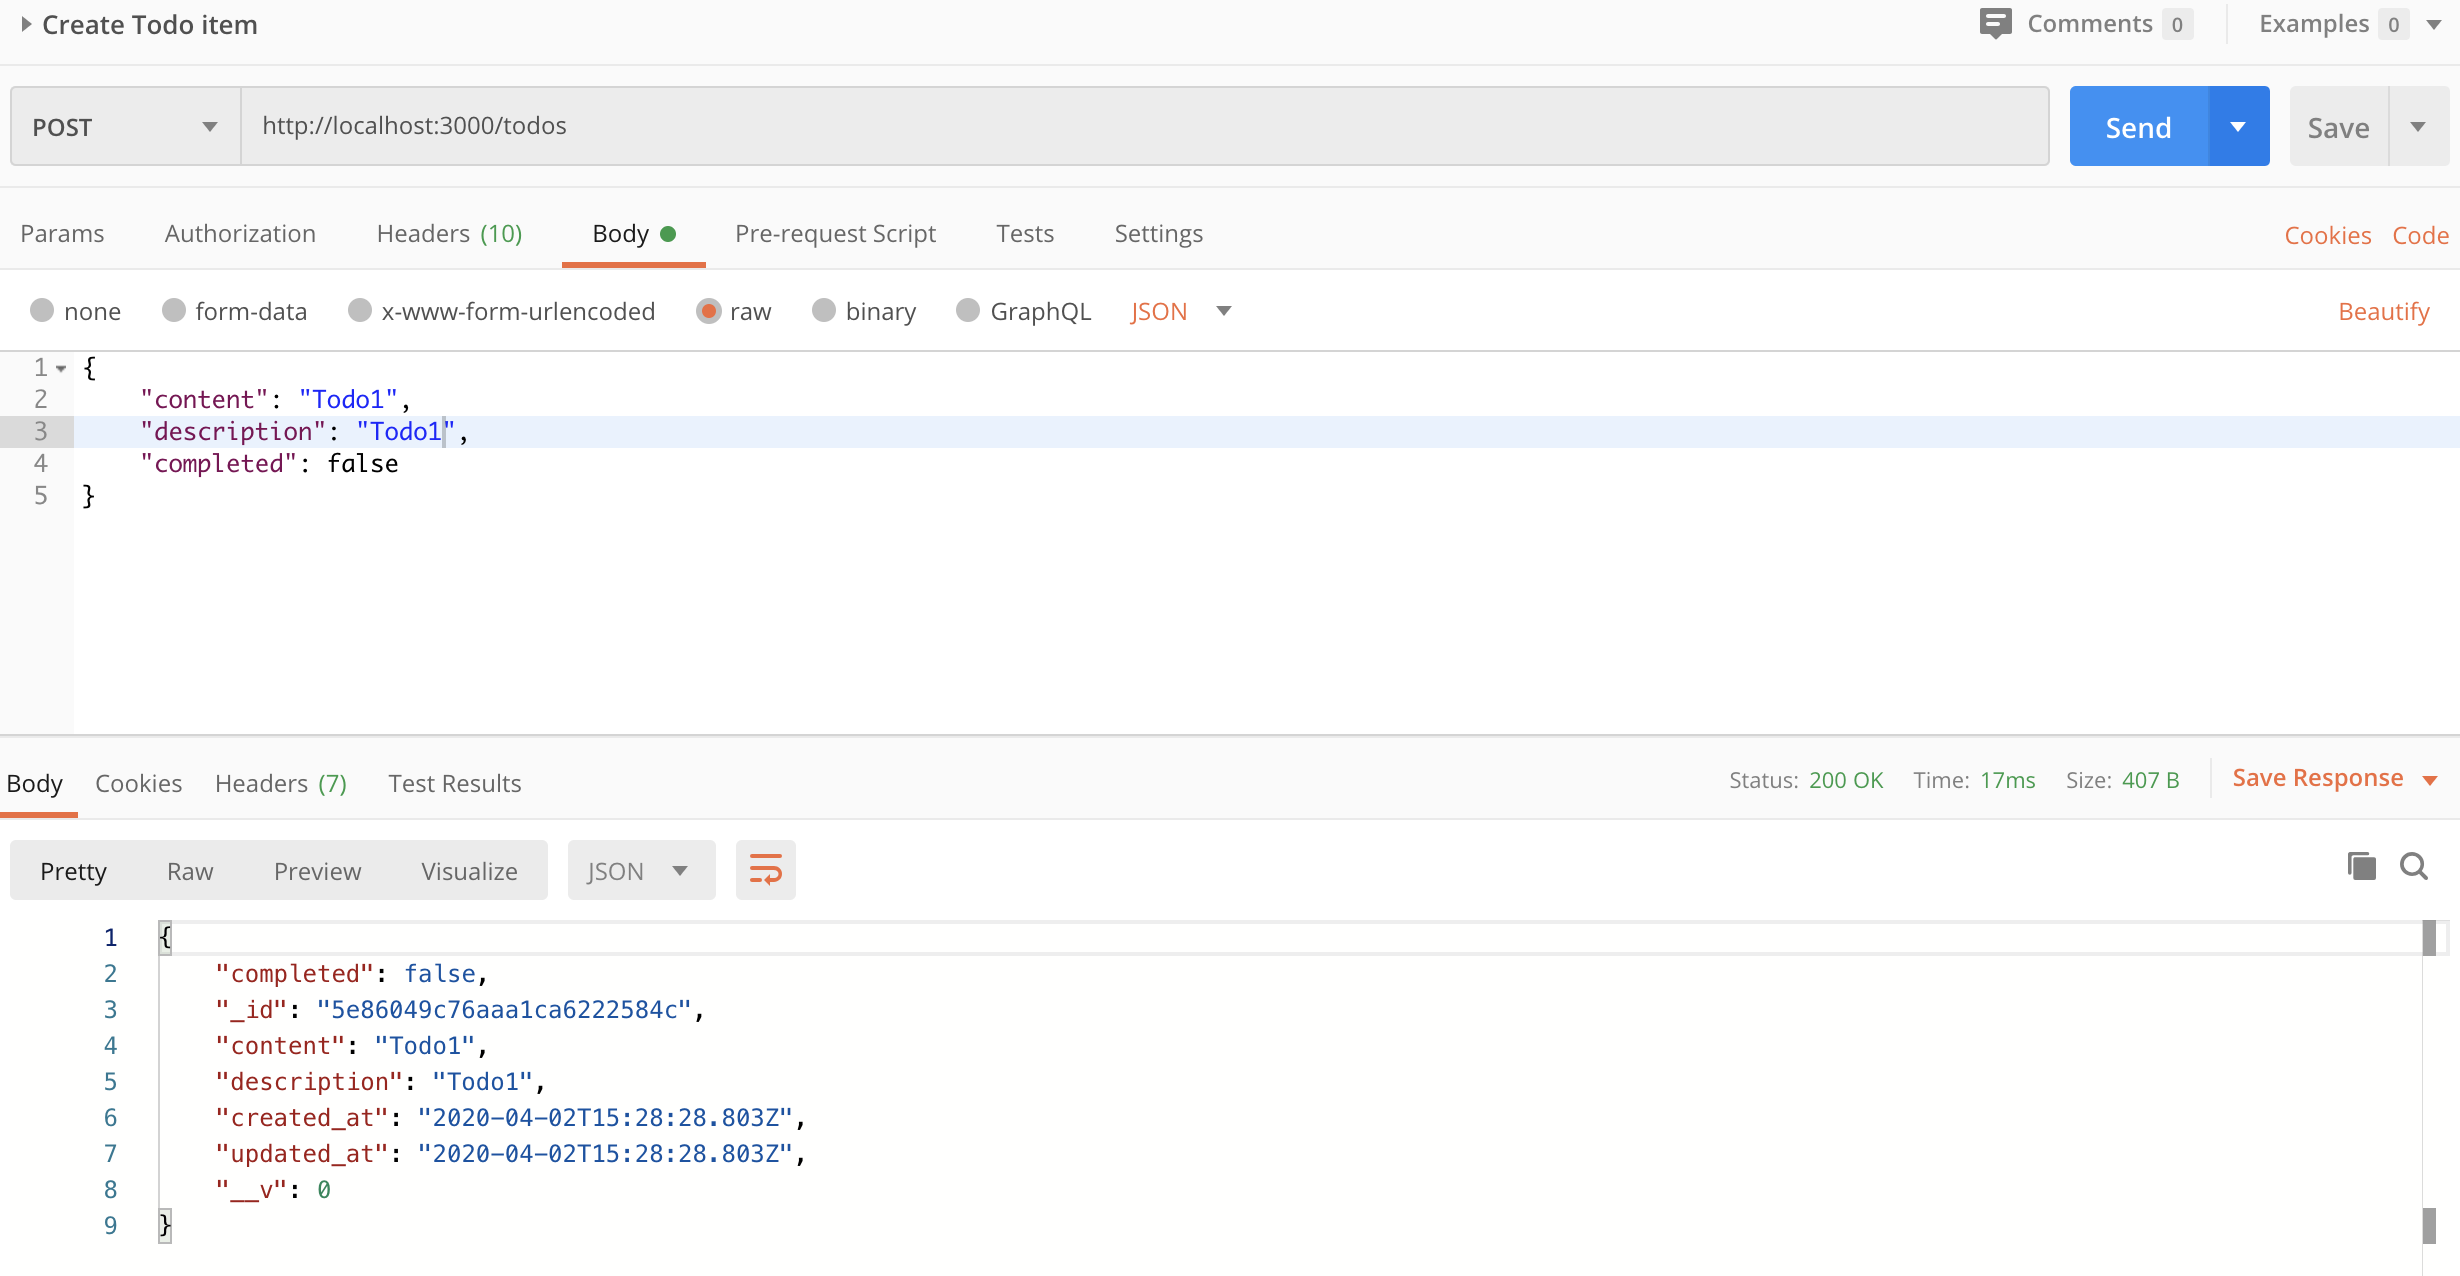
Let’s add a todo item to the database:
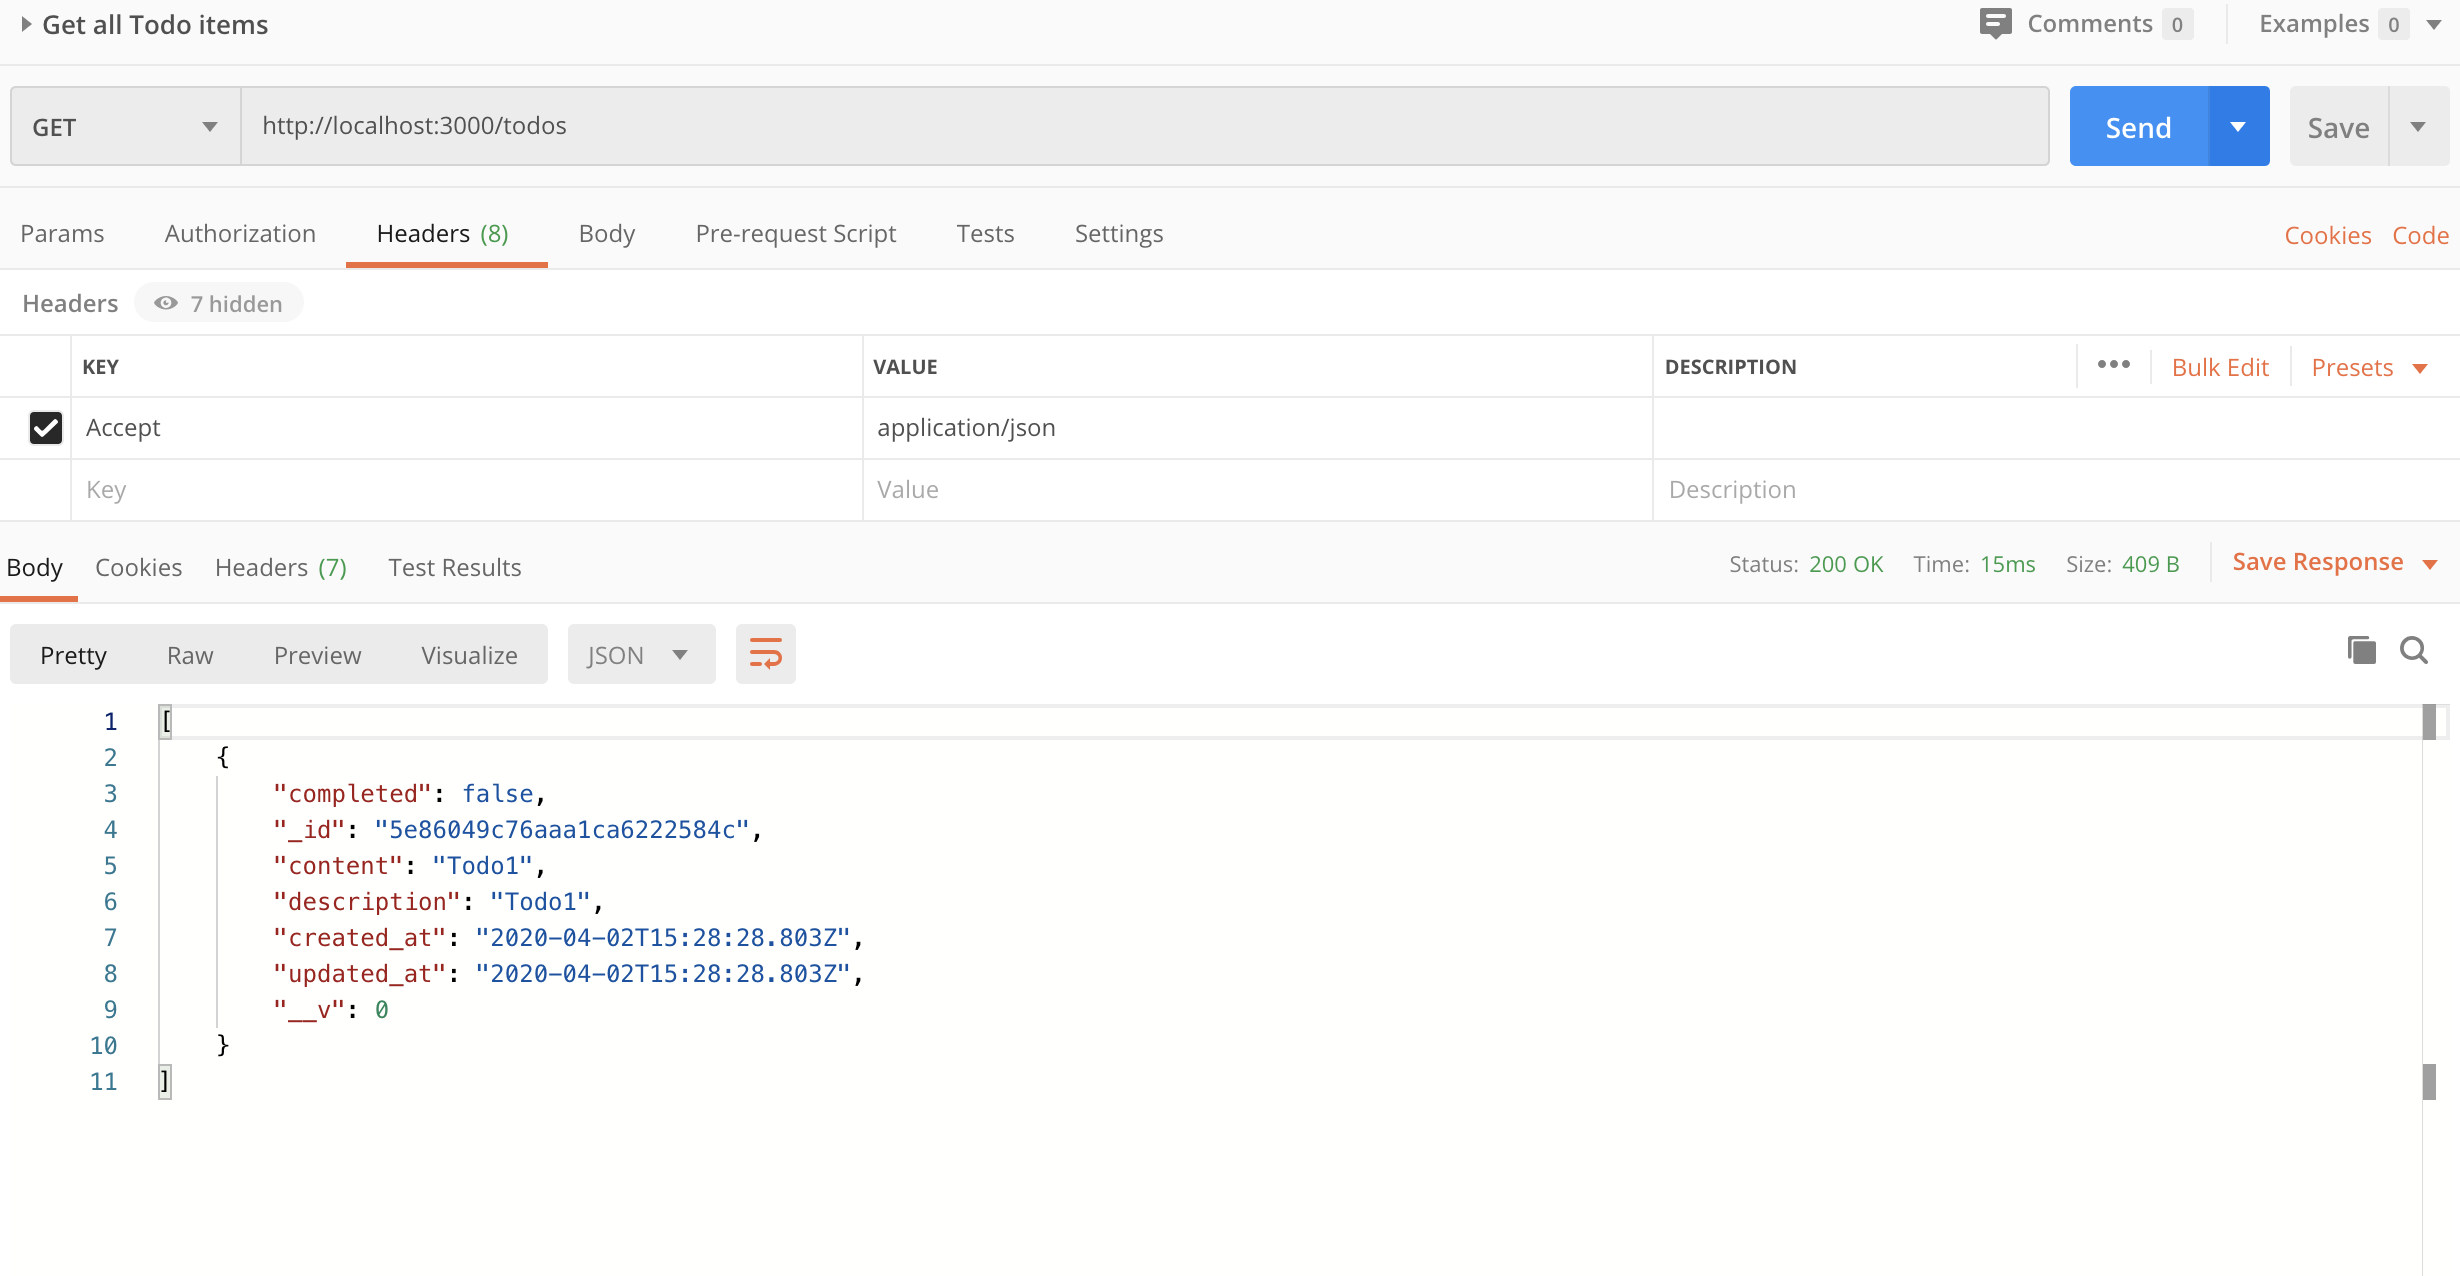
Let’s then be really sure it was added properly. You see that we got back the item we just got returned.
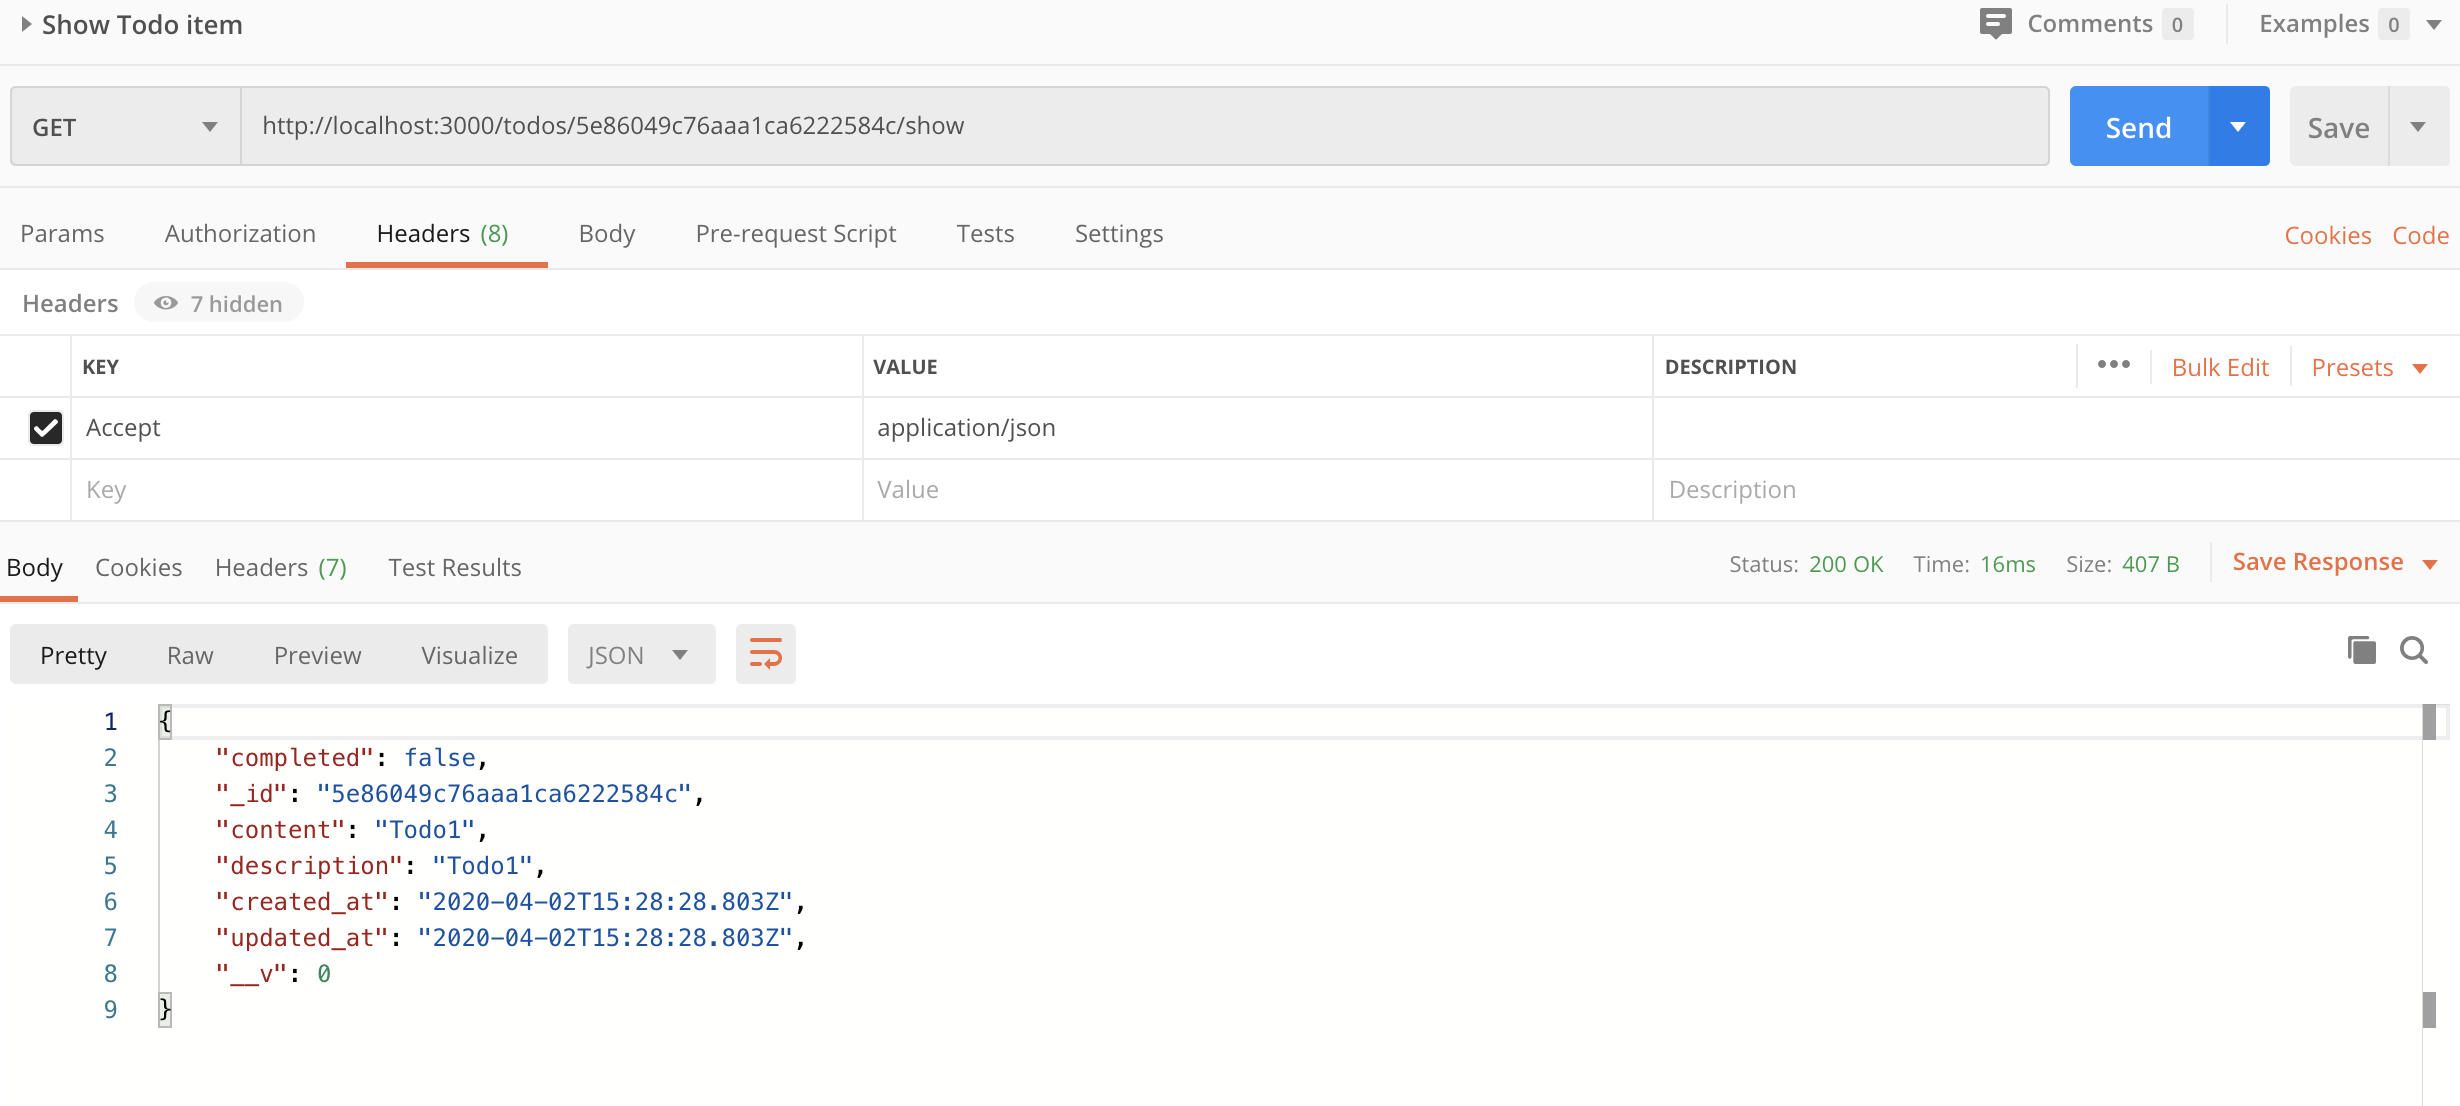
In order to only view that single item, refer to the following screenshot:
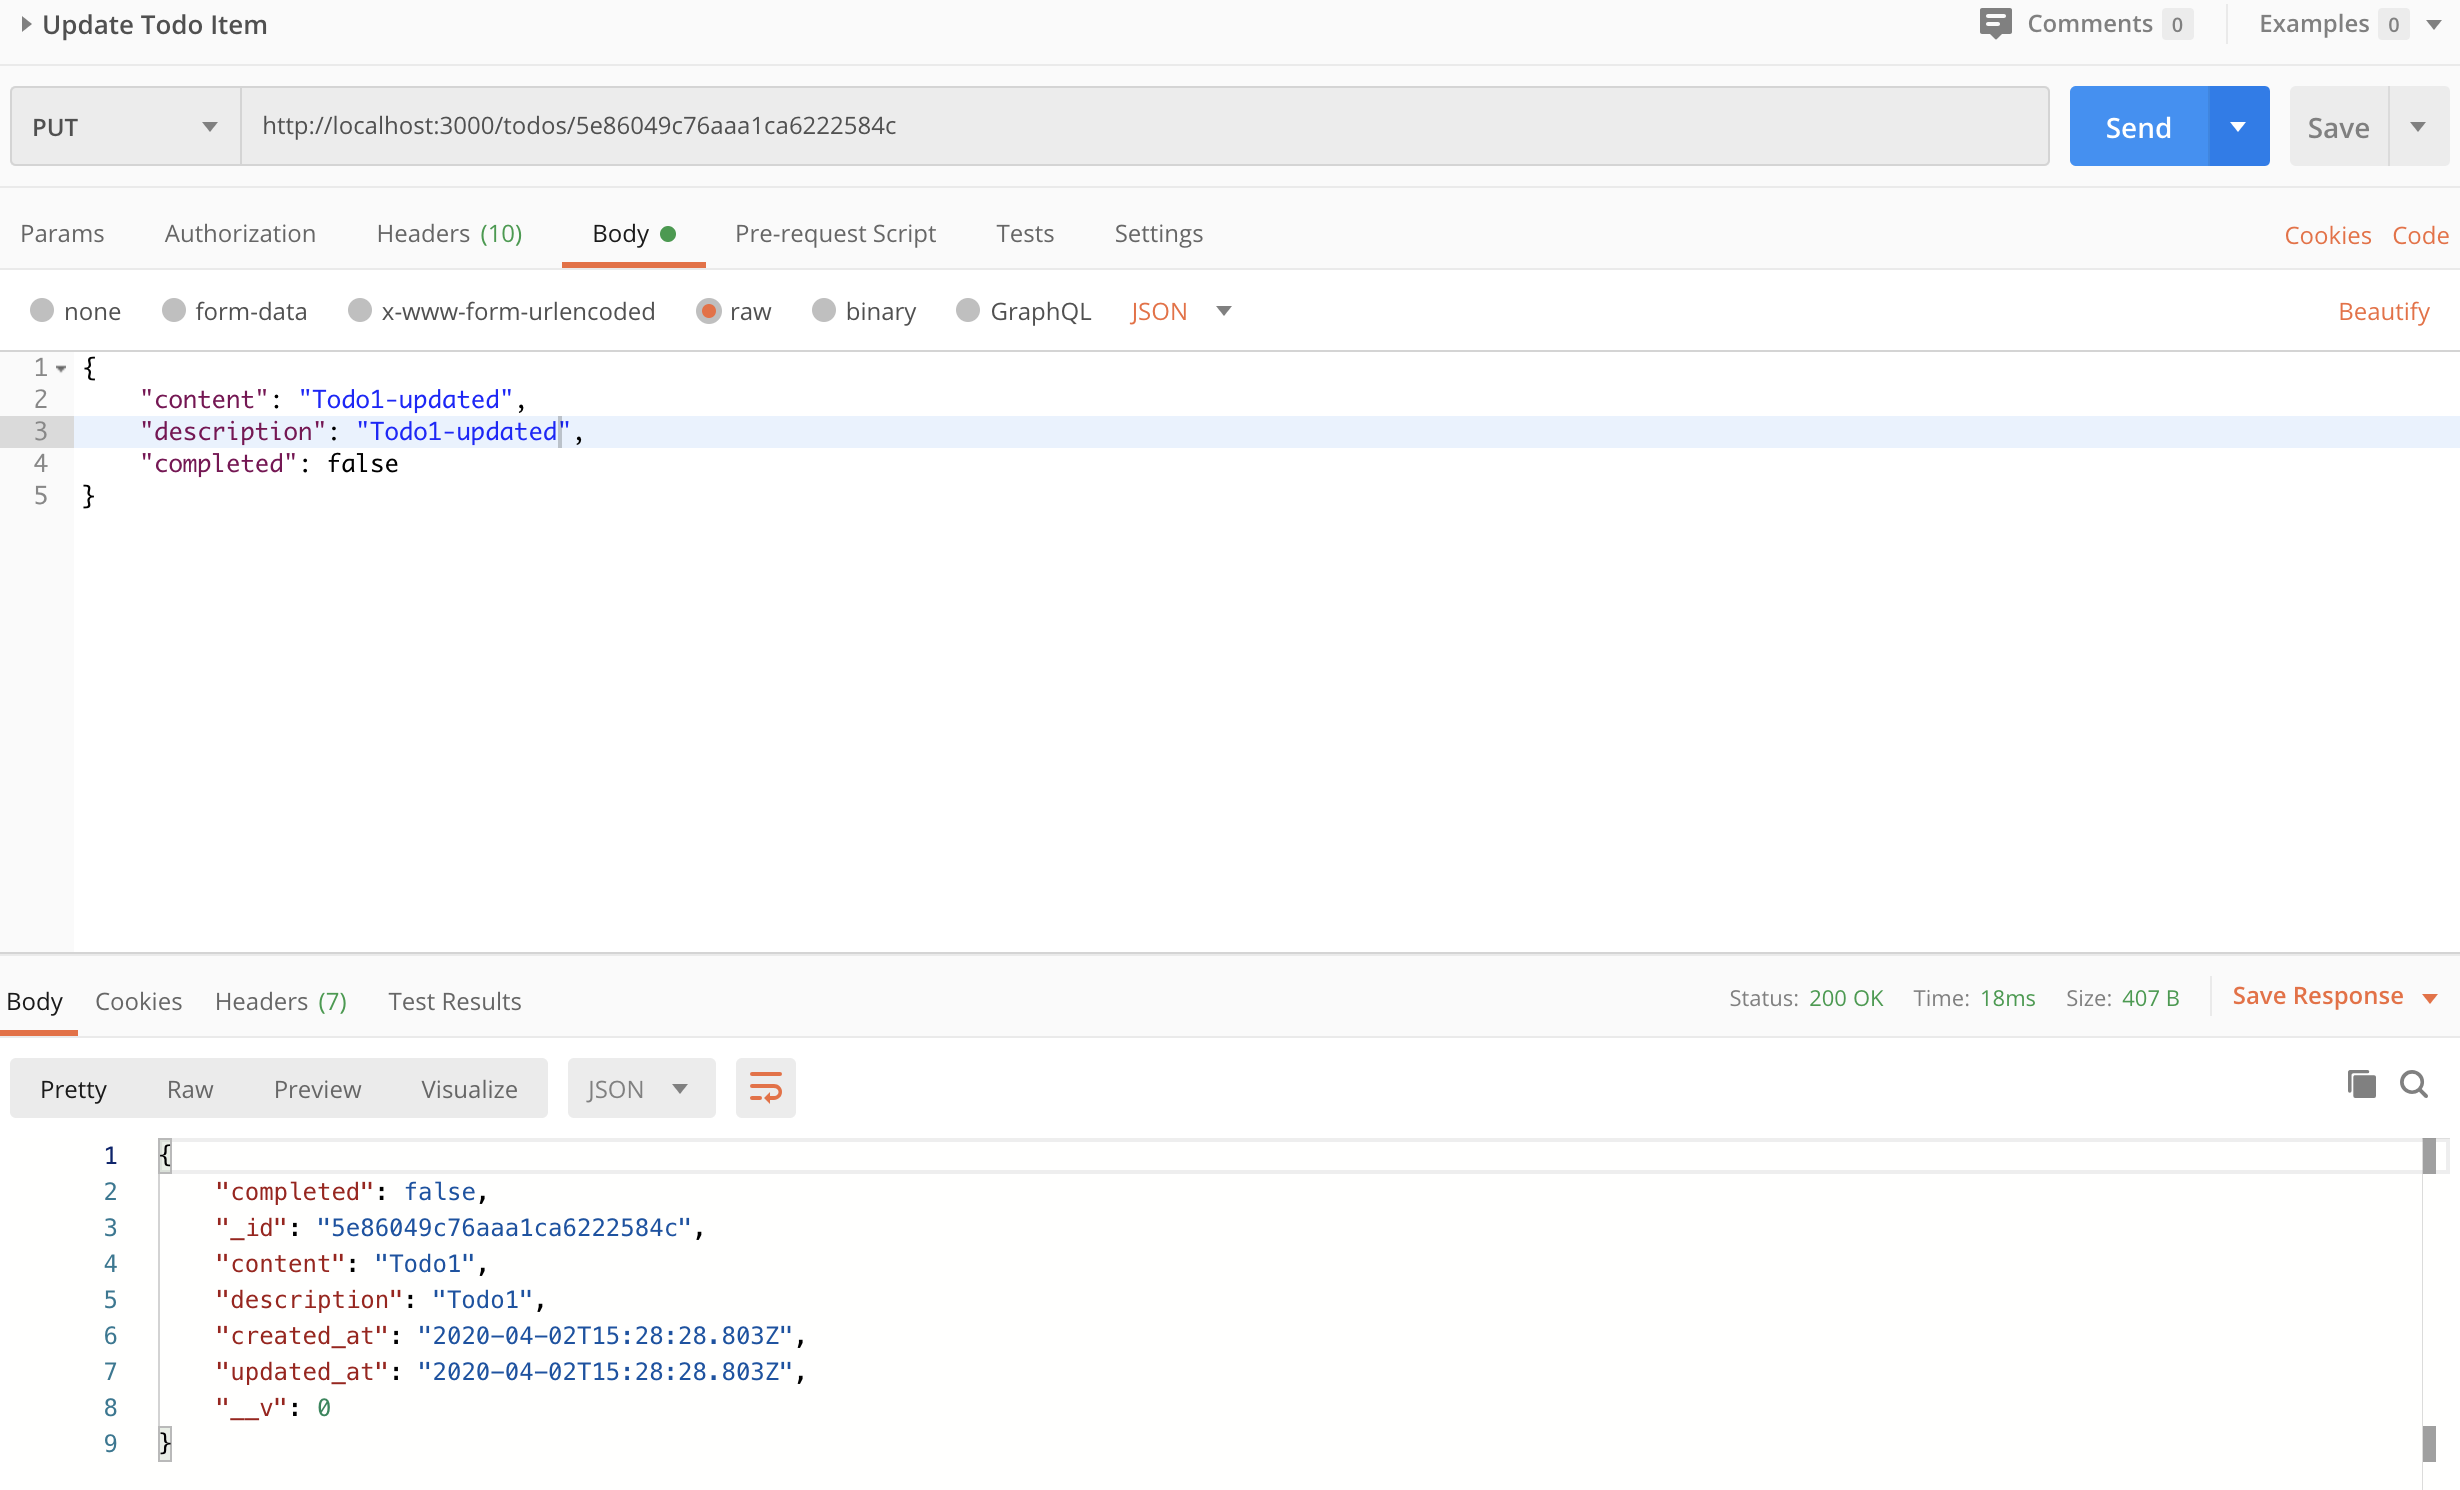
Let’s also update the item now:
And finally also delete it:
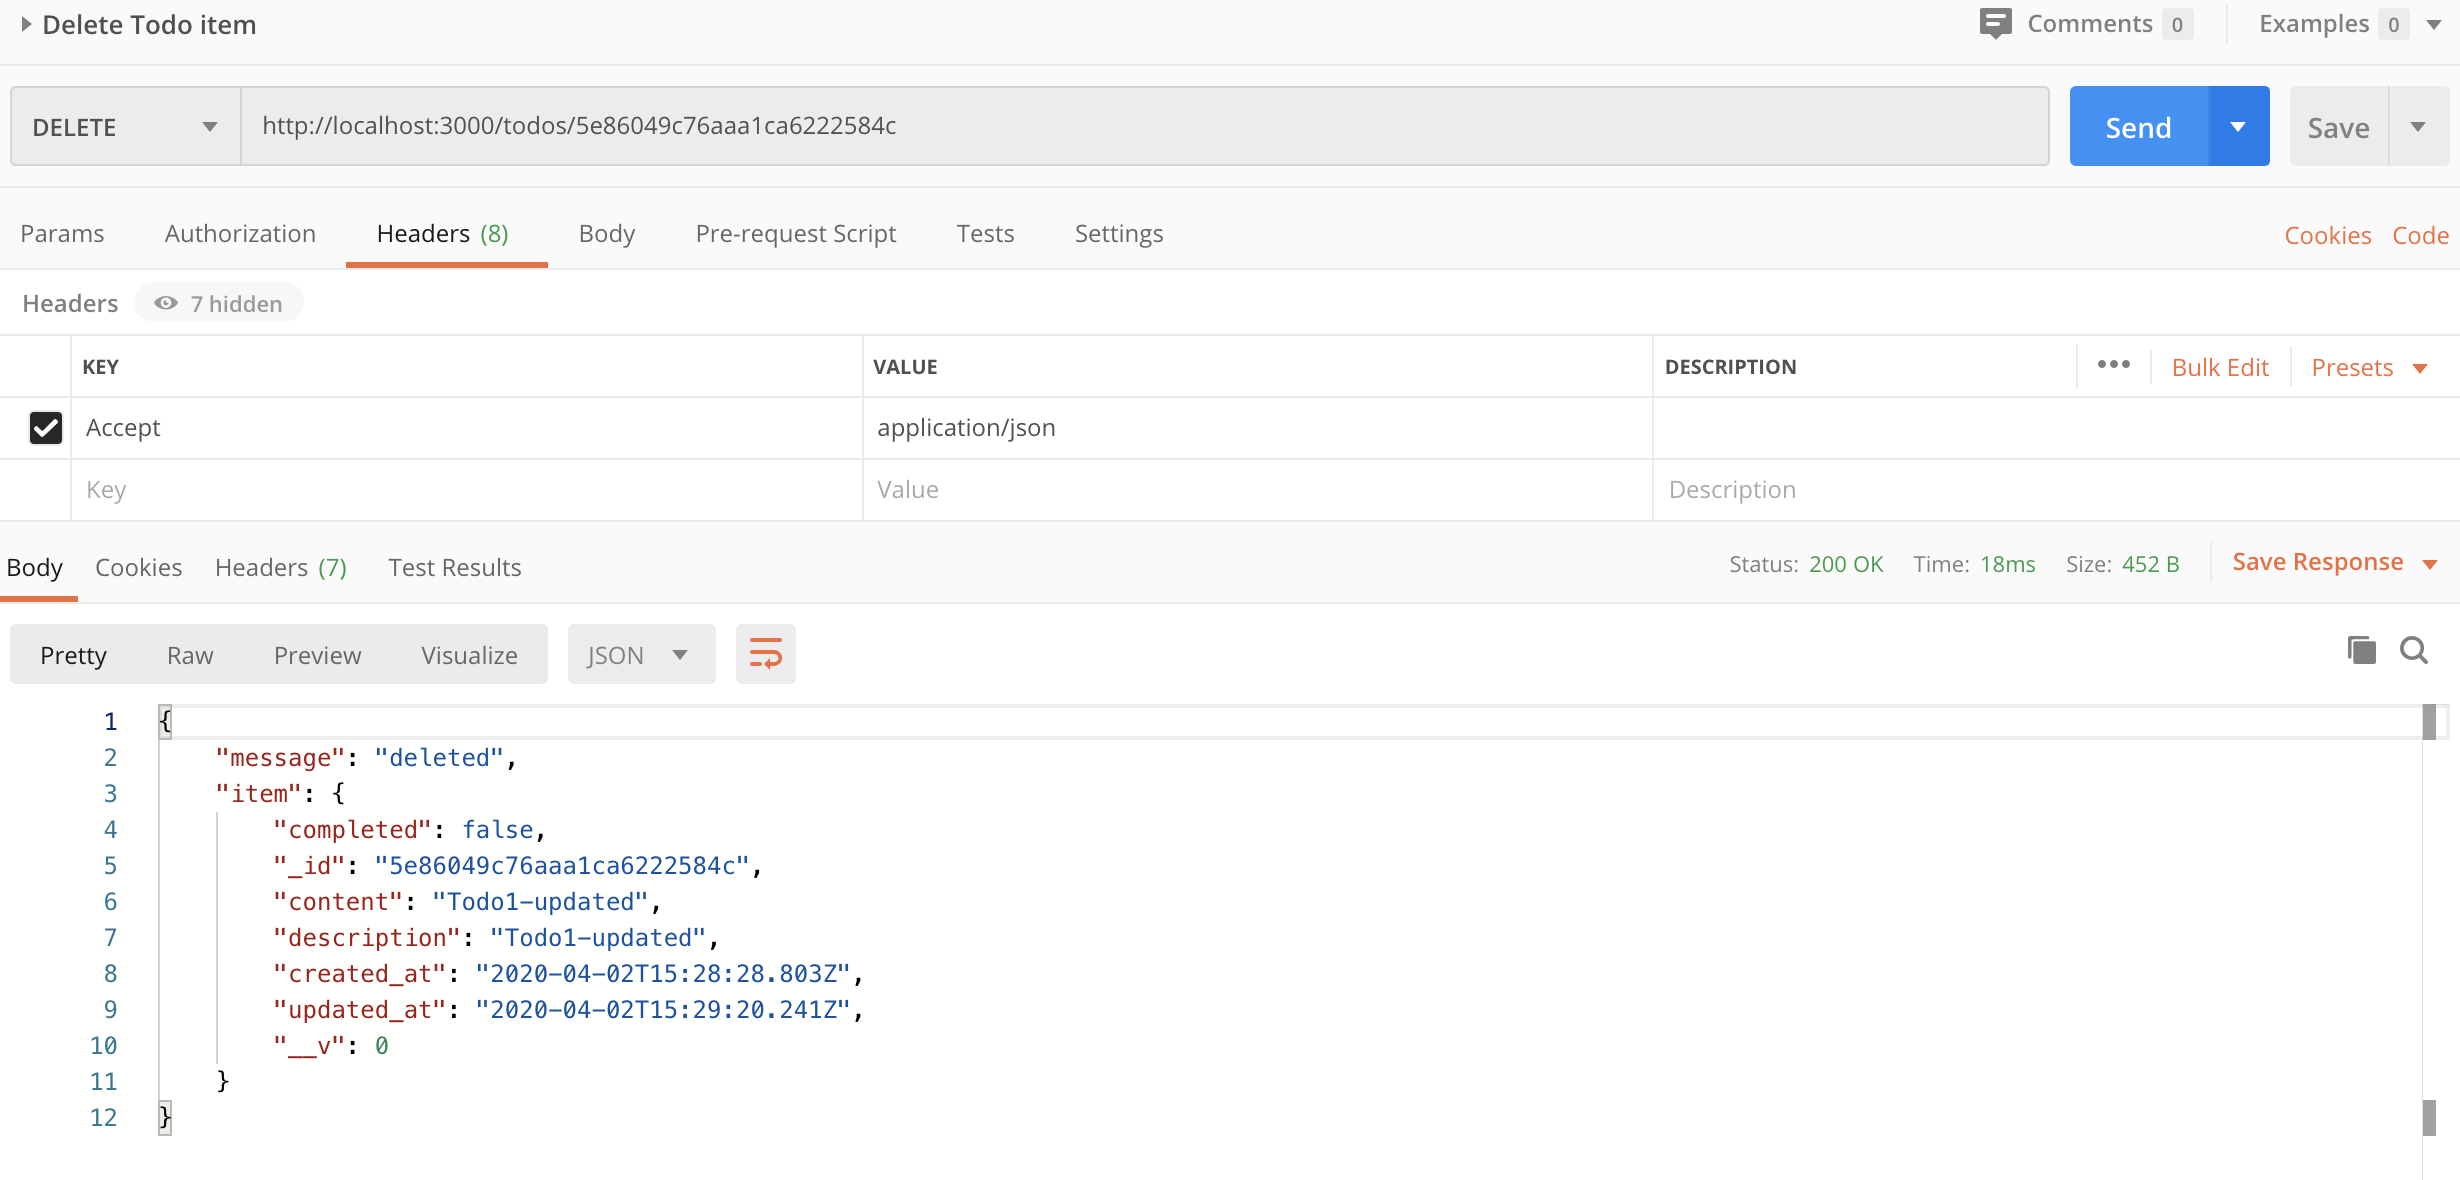
Ensure that it got deleted properly by running the get all todo query again:

The source code for this REST API can be found on my Github repo.
