Packer Introduction with AWS
Introduction
Packer is an open source tool for creating identical machine images for multiple platforms from a single source configuration. In other words, it automates the creation of any type of machine image. It supports building machine images for different platforms such as Amazon EC2, DigitalOcean, Docker, Google Compute Engine, Microsoft Azure, QEMU, VirtualBox, VMware, and more. For those people new to machine images: they are single static units that contain a pre-configured operating system and installed software which is used to quickly create new running machines.
In this post we will experiment a bit with Packer. Although Packer is already quite old (first release dates from June 2013) I never really got my hands dirty with it (as I have always been using standard images).
Installing Packer
Installation instructions can be found here. I personally use mostly MAC OS, so below you will find the commands I have been using to install Packer.
~/SynologyDrive/Programming/Packer/ brew tap hashicorp/tap
~/SynologyDrive/Programming/Packer/ brew install hashicorp/tap/packer
~/SynologyDrive/Programming/Packer/ packer
Usage: packer [--version] [--help] <command> [<args>]

Available commands are:
    build           build image(s) from template
    console         creates a console for testing variable interpolation
    fix             fixes templates from old versions of packer
    hcl2_upgrade    transform a JSON template into a HCL2 configuration
    inspect         see components of a template
    validate        check that a template is valid
    version         Prints the Packer version
Packer templates
Packer requires a configuration file (called a template) which defines what type of image we want to build. It’s in JSON so pretty straightforward. For AWS, the template could look as follows:
{
    "variables": {
      "aws_access_key": "",
      "aws_secret_key": ""
    },
    "builders": [
      {
        "type": "amazon-ebs",
        "access_key": "{{user `aws_access_key`}}",
        "secret_key": "{{user `aws_secret_key`}}",
        "region": "eu-west-1",
        "source_ami_filter": {
          "filters": {
            "virtualization-type": "hvm",
            "name": "ubuntu/images/*ubuntu-xenial-16.04-amd64-server-*",
            "root-device-type": "ebs"
          },
          "owners": ["099720109477"],
          "most_recent": true
        },
        "instance_type": "t2.micro",
        "ssh_username": "ubuntu",
        "ami_name": "packer-example {{timestamp}}",
        "subnet_id": "subnet-f9b317a3"
      }
    ]
  }
To interact with the AWS API, we need to supply our access_key and secret_key. In this example, we will pass them through the CLI. Next we need to tell it what source AMI we want to use to build the machine. The source_ami_filter will search all public images and will filter for the name as indicated in the template (note the use of wildcards) as well as the virtualization-type. As there might be possible more images returned from that search, we have put the most_recent to true so it will only retrieve a single version (which is the latest Ubuntu umage).
Next, we can go ahead and build the image as follows.
~/SynologyDrive/Programming/Packer/AWS ❯ packer build \
-var 'aws_access_key=AKI*****5MQ' \
-var 'aws_secret_key=lO/*****IVZ' \
aws.json

amazon-ebs: output will be in this color.

==> amazon-ebs: Prevalidating any provided VPC information
==> amazon-ebs: Prevalidating AMI Name: packer-example 1602591781
    amazon-ebs: Found Image ID: ami-08f3064d8481f3782
==> amazon-ebs: Creating temporary keypair: packer_5f859c25-bd93-59da-a5cd-bd3c8da97c7a
==> amazon-ebs: Creating temporary security group for this instance: packer_5f859c2d-99a7-7362-064b-6643b7e3d45e
==> amazon-ebs: Authorizing access to port 22 from [0.0.0.0/0] in the temporary security groups...
==> amazon-ebs: Launching a source AWS instance...
==> amazon-ebs: Adding tags to source instance
    amazon-ebs: Adding tag: "Name": "Packer Builder"
    amazon-ebs: Instance ID: i-0f6b8a3701a419d52
==> amazon-ebs: Waiting for instance (i-0f6b8a3701a419d52) to become ready...
==> amazon-ebs: Using ssh communicator to connect: 34.251.239.201
==> amazon-ebs: Waiting for SSH to become available...
==> amazon-ebs: Connected to SSH!
==> amazon-ebs: Stopping the source instance...
    amazon-ebs: Stopping instance
==> amazon-ebs: Waiting for the instance to stop...
==> amazon-ebs: Creating AMI packer-example 1602591781 from instance i-0f6b8a3701a419d52
    amazon-ebs: AMI: ami-0e57a48e91e049cf4
==> amazon-ebs: Waiting for AMI to become ready...
==> amazon-ebs: Terminating the source AWS instance...
==> amazon-ebs: Cleaning up any extra volumes...
==> amazon-ebs: No volumes to clean up, skipping
==> amazon-ebs: Deleting temporary security group...
==> amazon-ebs: Deleting temporary keypair...
Build 'amazon-ebs' finished after 3 minutes 459 milliseconds.

==> Wait completed after 3 minutes 459 milliseconds

==> Builds finished. The artifacts of successful builds are:
--> amazon-ebs: AMIs were created:
eu-west-1: ami-0e57a48e91e049cf4
You will see it goes through a number of steps:
- it searches for (and finds) an image
- it creates temporary security groups and keypairs (authorizes SSH access)
- it launches the instance
- it connects through SSH (as it got access via the security group)
- creates an AMI image from that instance
- terminates the source instance
In below screenshot, you’ll see the instance is running.

But is terminated after a while.

Looking in the AMI section at AWS shows indeed an AMI image (owned by us).

Using provisioners
In the previous section, we just booted a standard Ubuntu instance and created an image from it without customizing it. That’s obviously not what you typically would be looking to do. You’ll want to pre-install some packages onto it, you’ll want to configure an application or what have you. That’s why Packer also supports provisioners. The easiest method is to tell Packer to execute some shell scripts. Let’s do that next.
Create a shell file and let it print a simple text message.
~/SynologyDrive/Programming/Packer/AWS/WithProvisioner ❯ cat helloword.sh
#!/bin/bash
echo "Hello World"
Next, let’s also create a text file with some dummy text
~/SynologyDrive/Programming/Packer/AWS/WithProvisioner ❯ cat helloworld.txt
Hello World
In this section, instead of passing the keys through the CLI, we will be using environment variables. Let’s therefore first export the environment variables.
~/SynologyDrive/Programming/Packer/AWS ❯ export AWS_ACCESS_KEY_ID=AKI***5MQ
~/SynologyDrive/Programming/Packer/AWS ❯ export AWS_SECRET_ACCESS_KEY=lO/***fXDIVZ
The entire script now looks as follows:
{
    "variables": {
      "aws_access_key": "{{env `AWS_ACCESS_KEY_ID`}}",
      "aws_secret_key": "{{env `AWS_SECRET_ACCESS_KEY`}}",
    },
    "builders": [
      {
        "type": "amazon-ebs",
        "access_key": "{{user `aws_access_key`}}",
        "secret_key": "{{user `aws_secret_key`}}",
        "region": "eu-west-1",
        "source_ami_filter": {
          "filters": {
            "virtualization-type": "hvm",
            "name": "ubuntu/images/*ubuntu-xenial-16.04-amd64-server-*",
            "root-device-type": "ebs"
          },
          "owners": ["099720109477"],
          "most_recent": true
        },
        "instance_type": "t2.micro",
        "ssh_username": "ubuntu",
        "ami_name": "packer-provisioner-{{timestamp}}",
        "subnet_id": "subnet-f9b317a3"
      }
    ],
    "provisioners": [
        {
          "type": "file",
          "source": "./helloworld.txt",
          "destination": "/home/ubuntu/"
        },
        {
          "type": "shell",
          "inline": ["ls -al /home/ubuntu", "cat /home/ubuntu/helloworld.txt"]
        },
        {
          "type": "shell",
          "script": "./helloworld.sh"
        }
      ]
  }
In the provisioner section, we specify multiple blocks just to show some different possibilities.
- in the first block, we simply copy the text file to our users’ folder
- in the second block, we execute some inline shell commands
- in the third block, we execute the shell file we created earlier
Let’s now build this image:
~/SynologyDrive/Programming/Packer/AWS/WithProvisioner ❯ packer build aws.json
amazon-ebs: output will be in this color.

==> amazon-ebs: Prevalidating any provided VPC information
==> amazon-ebs: Prevalidating AMI Name: packer-provisioner-1602599590
    amazon-ebs: Found Image ID: ami-08f3064d8481f3782
==> amazon-ebs: Creating temporary keypair: packer_5f85baa7-efc0-1aff-836a-8df85c93606d
==> amazon-ebs: Creating temporary security group for this instance: packer_5f85baaa-a3d5-4574-f7b5-f1e77afc025f
==> amazon-ebs: Authorizing access to port 22 from [0.0.0.0/0] in the temporary security groups...
==> amazon-ebs: Launching a source AWS instance...
==> amazon-ebs: Adding tags to source instance
    amazon-ebs: Adding tag: "Name": "Packer Builder"
    amazon-ebs: Instance ID: i-04a3f9f14adbc2276
==> amazon-ebs: Waiting for instance (i-04a3f9f14adbc2276) to become ready...
==> amazon-ebs: Using ssh communicator to connect: 34.249.118.210
==> amazon-ebs: Waiting for SSH to become available...
==> amazon-ebs: Connected to SSH!
==> amazon-ebs: Uploading ./helloworld.txt => /home/ubuntu/
    amazon-ebs: helloworld.txt 11 B / 11 B [=================================================================================================================] 100.00% 0s
==> amazon-ebs: Provisioning with shell script: /var/folders/27/hzk_ld5j6gb516mtp077gv600000gq/T/packer-shell646929318
    amazon-ebs: total 32
    amazon-ebs: drwxr-xr-x 4 ubuntu ubuntu 4096 Oct 13 14:33 .
    amazon-ebs: drwxr-xr-x 3 root   root   4096 Oct 13 14:33 ..
    amazon-ebs: -rw-r--r-- 1 ubuntu ubuntu  220 Aug 31  2015 .bash_logout
    amazon-ebs: -rw-r--r-- 1 ubuntu ubuntu 3771 Aug 31  2015 .bashrc
    amazon-ebs: drwx------ 2 ubuntu ubuntu 4096 Oct 13 14:33 .cache
    amazon-ebs: -rw-r--r-- 1 ubuntu ubuntu  655 Jul 12  2019 .profile
    amazon-ebs: drwx------ 2 ubuntu ubuntu 4096 Oct 13 14:33 .ssh
    amazon-ebs: -rw-r--r-- 1 ubuntu ubuntu   11 Oct 13 14:33 helloworld.txt
    amazon-ebs: Hello World
==> amazon-ebs: Provisioning with shell script: ./helloworld.sh
    amazon-ebs: Hello World
==> amazon-ebs: Stopping the source instance...
    amazon-ebs: Stopping instance
==> amazon-ebs: Waiting for the instance to stop...
==> amazon-ebs: Creating AMI packer-provisioner-1602599590 from instance i-04a3f9f14adbc2276
    amazon-ebs: AMI: ami-040c8f277953c9bba
==> amazon-ebs: Waiting for AMI to become ready...
==> amazon-ebs: Terminating the source AWS instance...
==> amazon-ebs: Cleaning up any extra volumes...
==> amazon-ebs: No volumes to clean up, skipping
==> amazon-ebs: Deleting temporary security group...
==> amazon-ebs: Deleting temporary keypair...
Build 'amazon-ebs' finished after 2 minutes 23 seconds.

==> Wait completed after 2 minutes 23 seconds

==> Builds finished. The artifacts of successful builds are:
--> amazon-ebs: AMIs were created:
eu-west-1: ami-040c8f277953c9bba
During the execution you will see it follows the same steps as mentioned earlier (in the first section of this post), but it also executes all the blocks from our provisioner section in the template.
When finished, you will see our AMI got created successfully.

Provision machine using our AMI
Next, we can obviously create EC2 instances with our newly created machine image. To do so, during EC2 creation we need to select our AMI image. Ensure you look under My AMIs.

Once finished, you’ll get an EC2 instance running our image.
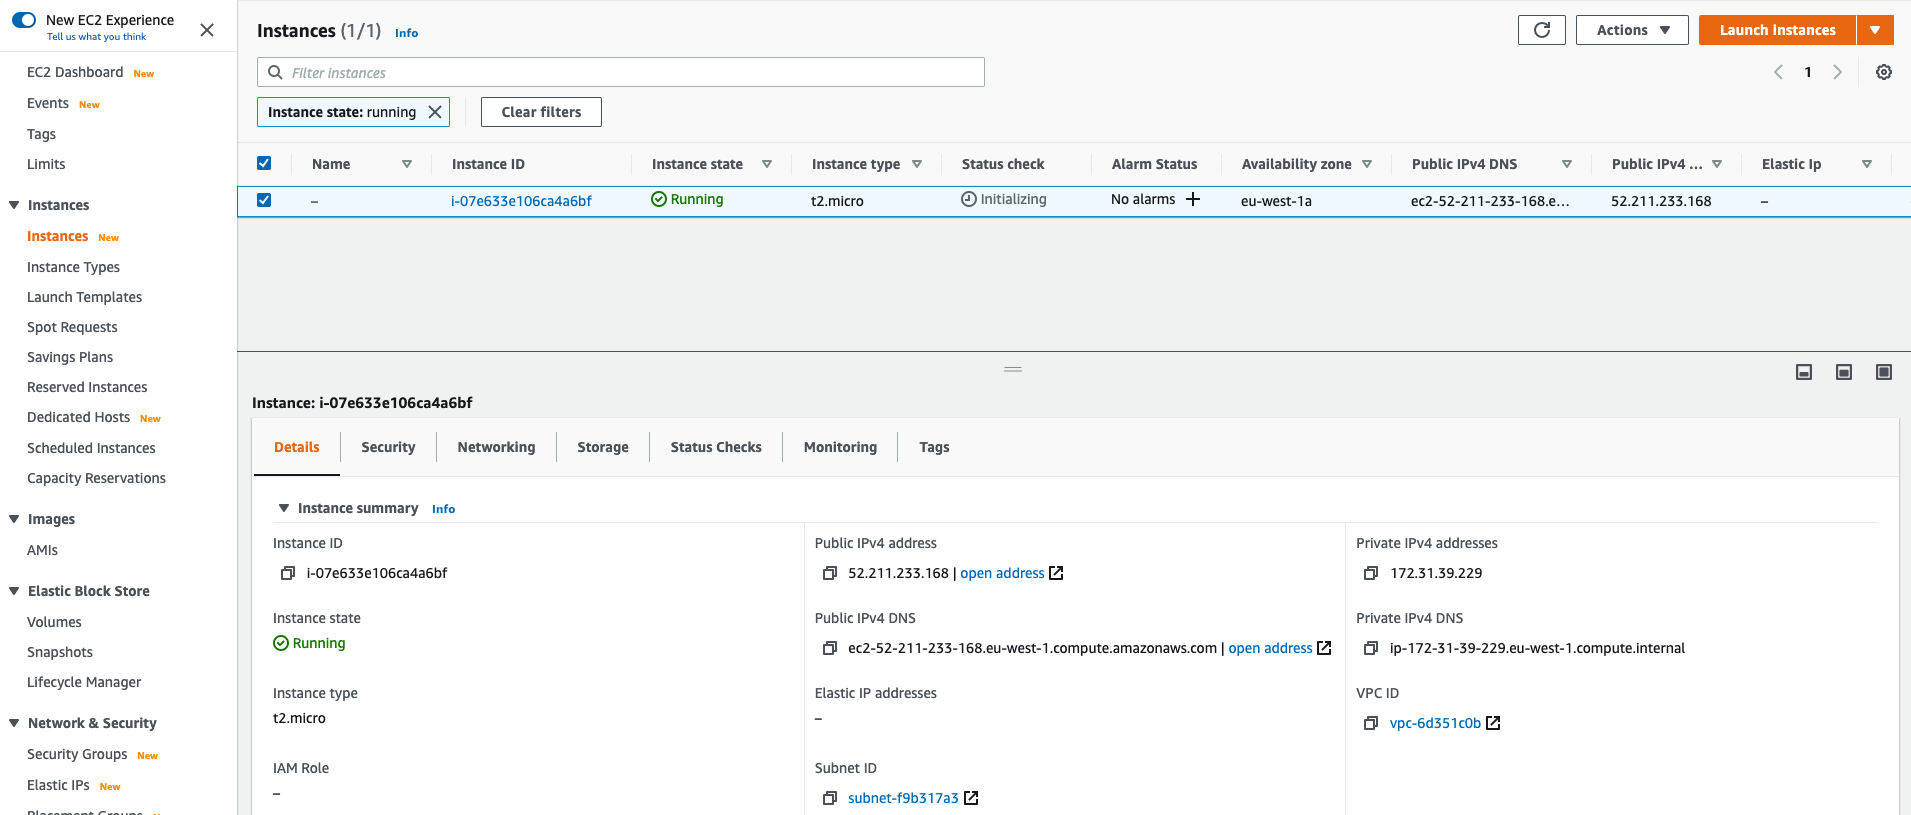
Let’s now login to this instance to really verify it was based on our AMI image.
~/SynologyDrive/Programming/Packer/AWS/WithProvisioner ❯ ssh -i ~/.ssh/AWS-Cisco.pem ubuntu@52.211.233.168
Welcome to Ubuntu 16.04.7 LTS (GNU/Linux 4.4.0-1114-aws x86_64)

 * Documentation:  https://help.ubuntu.com
 * Management:     https://landscape.canonical.com
 * Support:        https://ubuntu.com/advantage

0 packages can be updated.
0 updates are security updates.

New release '18.04.5 LTS' available.
Run 'do-release-upgrade' to upgrade to it.


Last login: Tue Oct 13 14:41:20 2020 from 173.38.220.58
To run a command as administrator (user "root"), use "sudo <command>".
See "man sudo_root" for details.

ubuntu@ip-172-31-39-229:~$ ls -al
total 36
drwxr-xr-x 4 ubuntu ubuntu 4096 Oct 13 14:41 .
drwxr-xr-x 3 root   root   4096 Oct 13 14:33 ..
-rw------- 1 ubuntu ubuntu   28 Oct 13 14:41 .bash_history
-rw-r--r-- 1 ubuntu ubuntu  220 Aug 31  2015 .bash_logout
-rw-r--r-- 1 ubuntu ubuntu 3771 Aug 31  2015 .bashrc
drwx------ 2 ubuntu ubuntu 4096 Oct 13 14:33 .cache
-rw-r--r-- 1 ubuntu ubuntu   11 Oct 13 14:33 helloworld.txt
-rw-r--r-- 1 ubuntu ubuntu  655 Jul 12  2019 .profile
drwx------ 2 ubuntu ubuntu 4096 Oct 13 14:33 .ssh
You clearly see -as we expected- that the helloworld.txt file is located under our home directory.
That was it for today’s post. Pretty simple stuff but happy I finally set aside some time to experiment with this great tool.
Code can be found here.