Cisco DNA Center - Discovery & Command Runner (POSTMAN)
DNAC Series
This is part of a DNAC series:
- Part 1: Getting started
- Part 2: Cisco DNA Center - Devices
- Part 3: Cisco DNA Center - Assurance
- Part 4: Cisco DNA Center - Sites
- Part 5 (this post): Cisco DNA Center - Discovery (POSTMAN)
- Part 6: Cisco DNA Center - Discovery (Python)
- Part 7: Cisco DNA Center - CommandRunner (Python)
- Part 8: Cisco DNA Center - Flow-Analysis (POSTMAN)
- Part 9: Cisco DNA Center - Flow-Analysis (Python)
In this tutorial, we will look into (and experiment) with some more advanced features of DNAC, like Network Discovery and Command Runner. To start with, we will focus on some POSTMAN interactions to get familiar with the flow of these features. As a reminder, the API documentation for DNAC can be found here. Refer to the Network Decovery and the Command Runner section respectively.
Note about equipment
In this post, I’m using my own DNAC in my lab. However, if you want to follow along, you could also use a Cisco sandbox environment delivered by Cisco Devnet. To get a list of all sandboxes, check out this link. For this tutorial, you could use this one. Note that this is a reservable instance as the always-on is restricted in functionality.
Network Discovery
DNAC allows you to discover devices in your network by scanning the network based on a given IP range or through CDP. Let’s see how the IP range based discovery works.
Get Credentials
As a first step we need to retrieve the credentials. The credentials endpoint looks as follows: /dna/intent/api/v1/global-credential. You are supposed to provide a query parameter as well. This can be:
- CLI
- SNMPV2_READ_COMMUNITY
- SNMPV2_WRITE_COMMUNITY
- SNMPV3
- HTTP_WRITE
- HTTP_READ
- NETCONF
Below is an example for the credential type CLI.
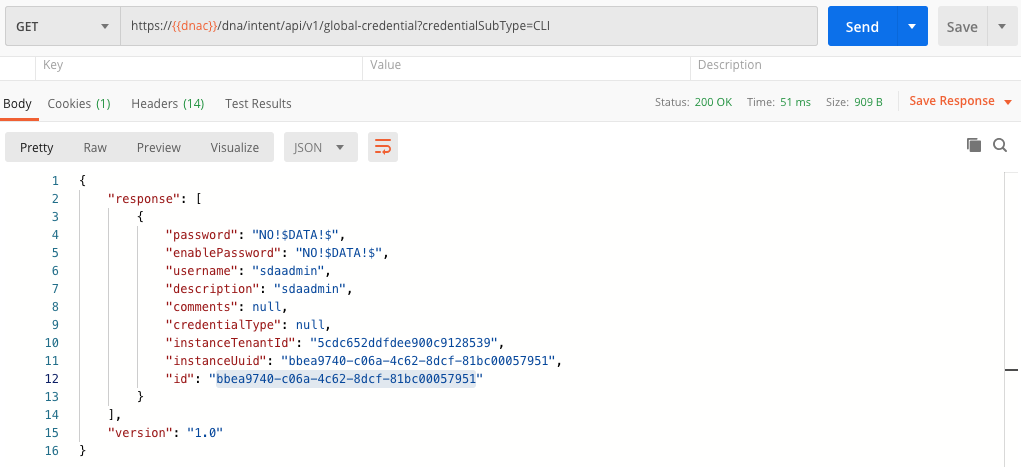
In the next step, we will use the credentials ID.
Start IP based discovery
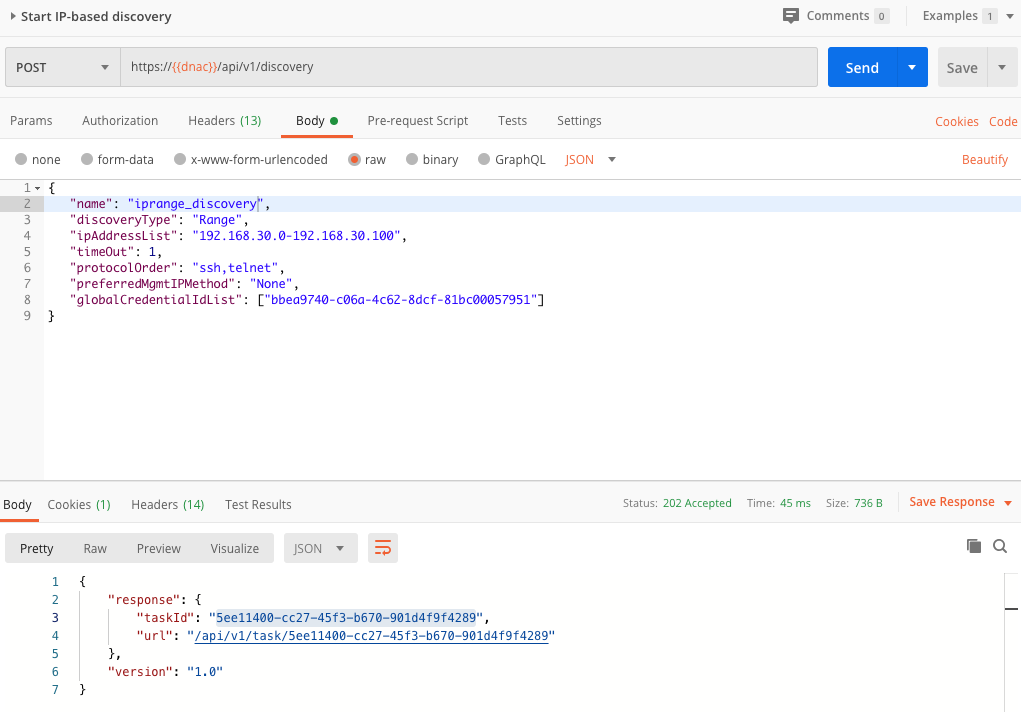
In order to start the IP based discovery, we need to call the dna/intent/api/v1/discovery endpoint and pass a JSON body with the required IP range to search in. Refer to below screenshot for an example.
Check Task
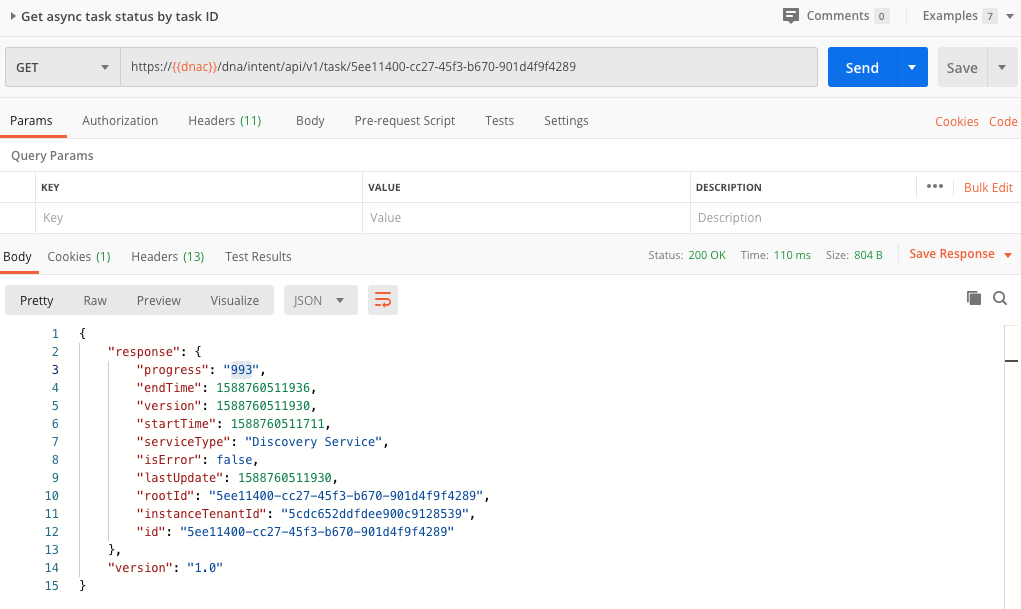
As you can see, we get back from DNAC a response containing a taskID and a URL. The network discovery is done in an asynchronous way so the idea is that we check on a regular base the tasks API. Below screenshot shows an example:
Get Discovery status
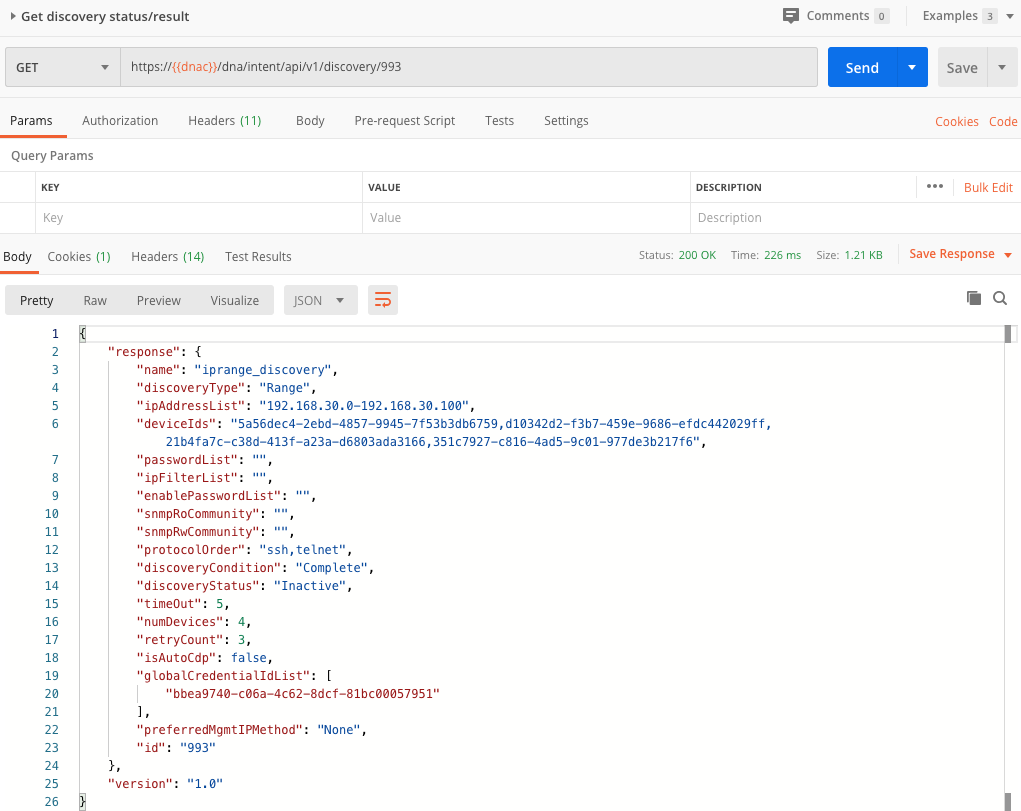
Querying the task API, gives you a response that allows you to check the status of the discovery process. You will see we get back a progress number. This essentially is the ID of the discovery job itself. We will use this ID in the discovery API /dna/intent/api/v1/discovery/{id}. See below for the corresponding screenshot.
Get Discovered devices
In previous screenshot, you could see in the response the line item discoveryCondition: "complete". This essentially means the discovery process was completed successfully. So as a next step, we can actually look at what devices were discovered. You can do this by using the following API /dna/intent/api/v1/discovery/{id}/network-device
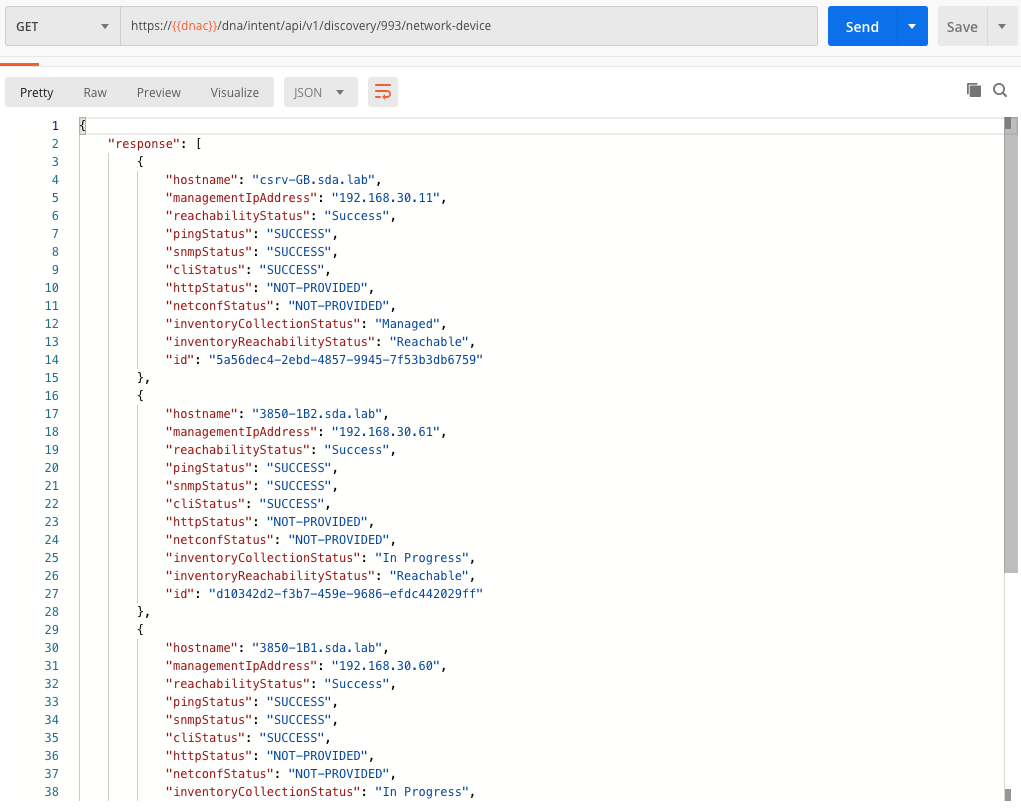
You’ll see we get back a complete list of discovered devices (in the specified IP range) with the corresponding information.
Command Runner
DNAC also allows you to execute commands on a list of devices. It’s something we have already done in many network programmability blog posts before (e.g. using Ansible, using NAPALM, using Netmiko, … ). DNAC also allows you to run commands against our devices. To do so, we will perform a number of steps.
Get list of devices
Firstly, we need to specify the list of devices we want to run the commands against. We will use the API we have seen here already. In that example, we did not specify a query parameter. In the below example we will specify a family and a type parameter to retrieve only the device types belonging to a specific family/category.
See below screenshot for an example how this is achieved.
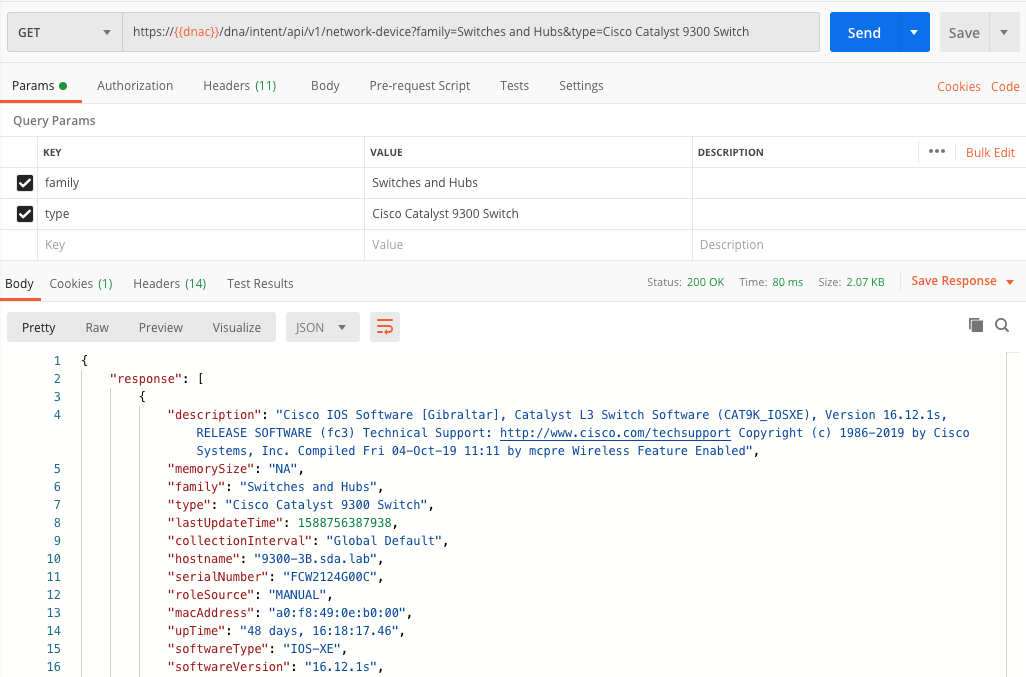
Run command
In above screenshot, you will see we get back a list of devices belonging to a specific type and a specific family, e.g. all Catalyst 9300 switches from the ‘Switches and Hubs’ family. This is the list of devices we will run the commands against in the next step. See the screenshot below for an example. Here we run the show version command on these devices (note: we will pass the device ID’s in the JSON body).
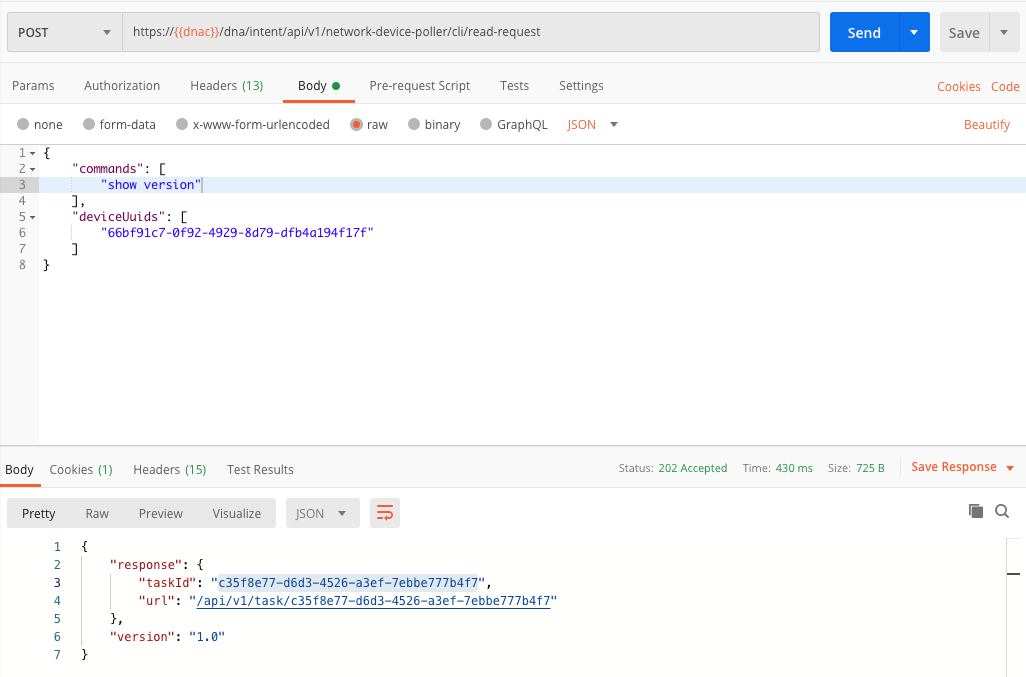
Check Task
From previous screenshot, you see we get back again a task response. These commands are run asynchronously and we are supposed to regularly poll the tasks API to check the response. Below is an example screenshot on how we are doing this.
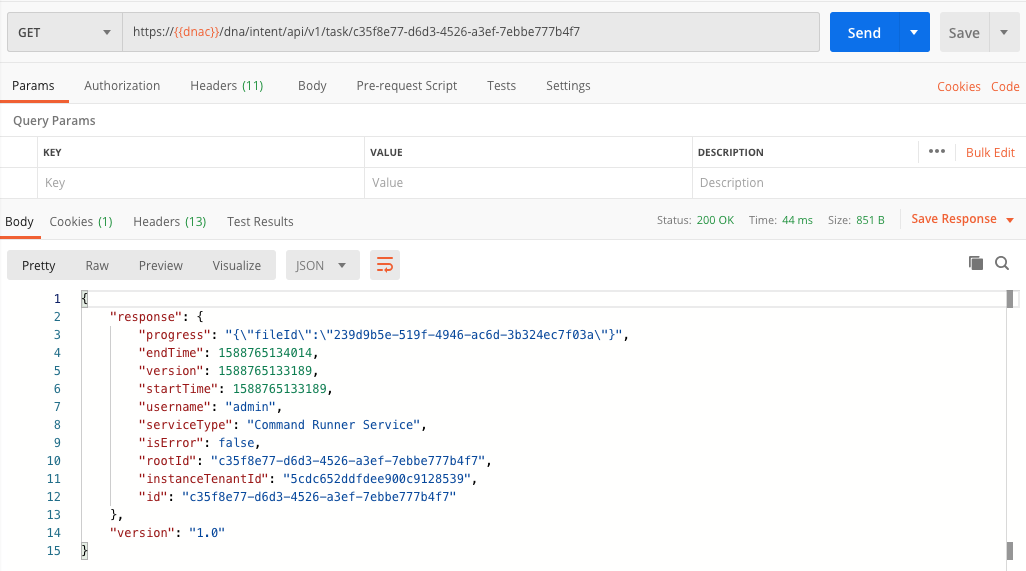
Check result
In previous screenshot, you can see we got back a fileid as part of the process attribute. We can now use that fileid to retrieve the file content. We will use the
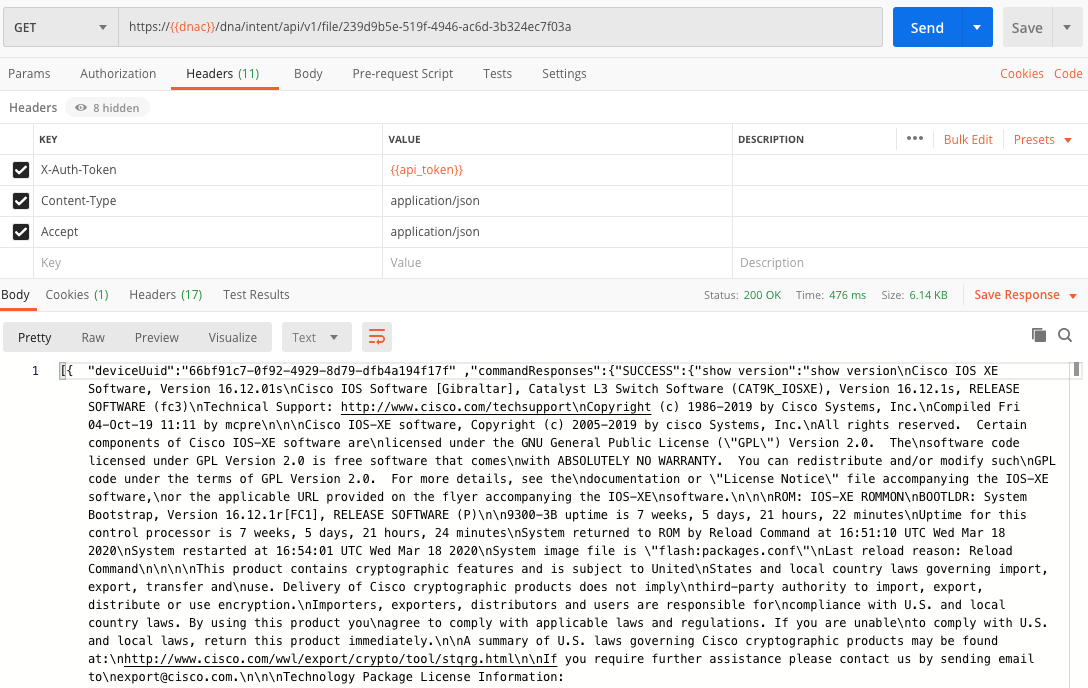
If all works well, you will see the output of the command you wanted to run.
That’s it in terms of getting familiar with network discovery process and running some commands through Command Runner. In the next post, we will implement all of this using Python. Stay tuned!