Cisco DNA Center - Flow-Analysis (POSTMAN)
DNAC Series
This is part of a DNAC series:
- Part 1: Getting started
- Part 2: Cisco DNA Center - Devices
- Part 3: Cisco DNA Center - Assurance
- Part 4: Cisco DNA Center - Sites
- Part 5: Cisco DNA Center - Discovery (POSTMAN)
- Part 6: Cisco DNA Center - Discovery (Python)
- Part 7: Cisco DNA Center - CommandRunner (Python)
- Part 8 (this post): Cisco DNA Center - Flow-Analysis (POSTMAN)
- Part 9: Cisco DNA Center - Flow-Analysis (Python)
Introduction
In this we have been showing some POSTMAN samples for running a Network Discovery and Command Runner. In the next sections, we will explore how we can achieve exactly the same using Python Requests. I recommend you to first go through the POSTMAN post before attempting this one.
Note about equipment
In this post, I’m using my own DNAC in my lab. However, if you want to follow along, you could also use a Cisco sandbox environment delivered by Cisco Devnet. To get a list of all sandboxes, check out this link. For this tutorial, you could use this one. Note that this is a reservable instance as the always-on is restricted in functionality.
Flow Analysis - Start trace
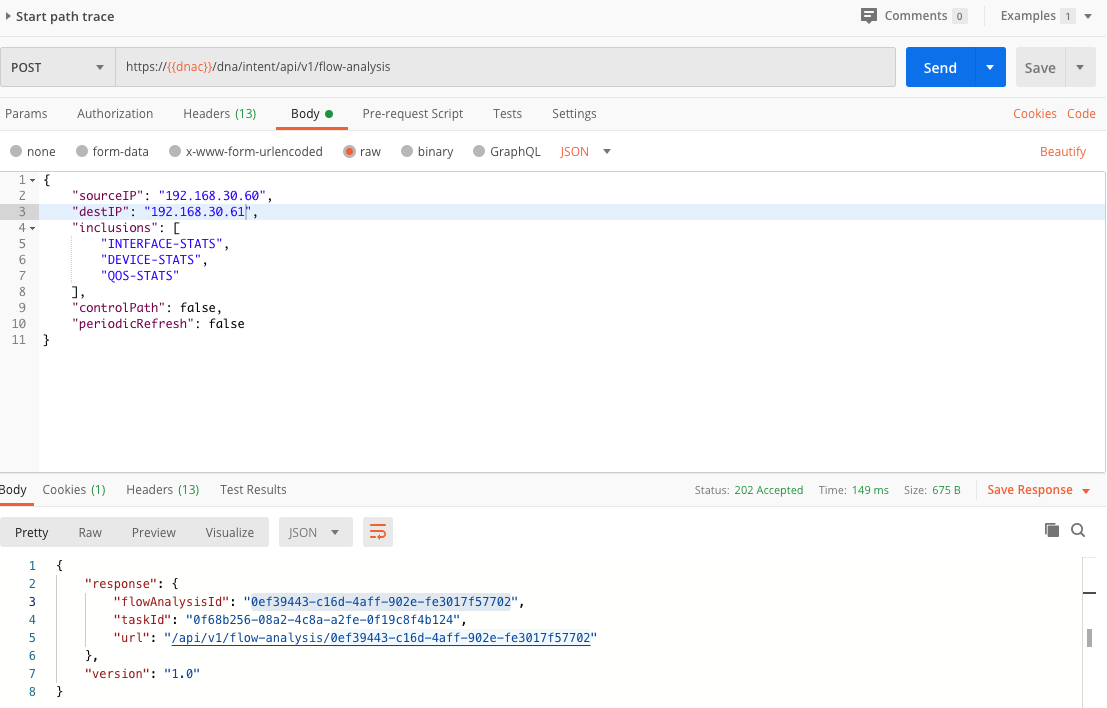
DNAC allows you to perform flow-analysis through the dna/intent/api/v1/flow-analysis API. In below screenshot, pay attention to the JSON body. Here we will perform a trace from 192.168.30.60 to 192.168.30.61

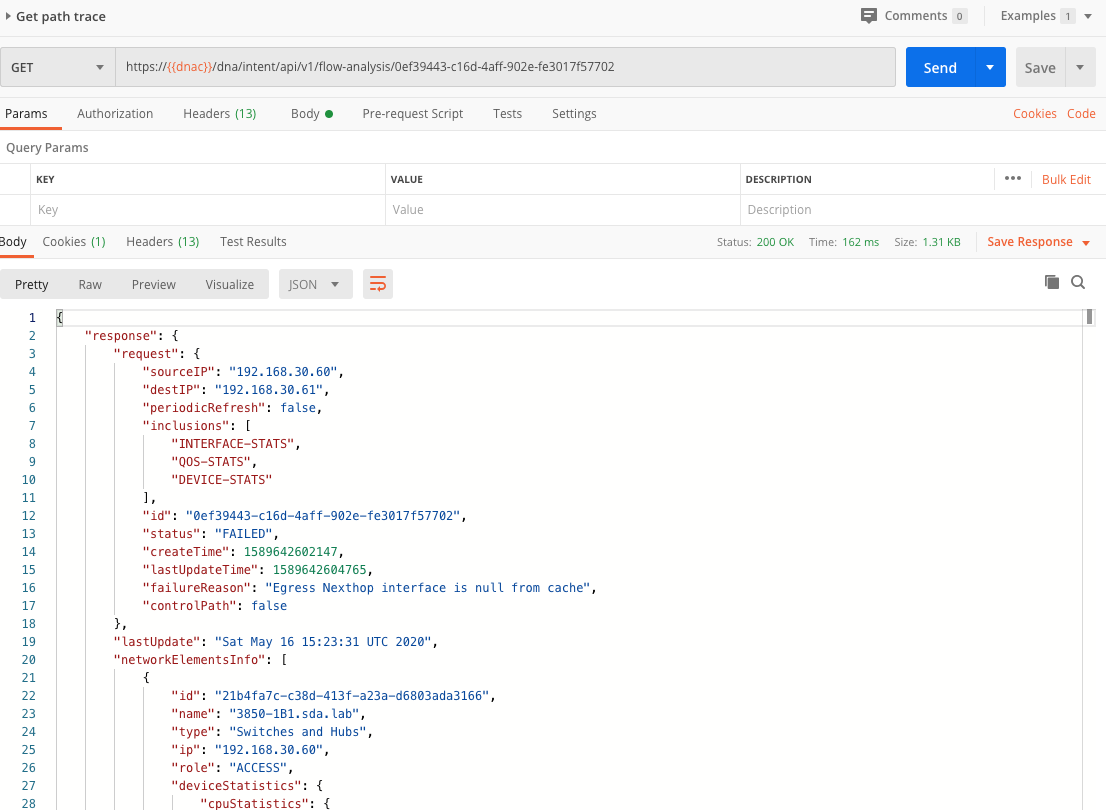
You’ll see we get back a response containing a flowAnalysisId. We can use that ID in the dna/intent/api/v1/flow-analysis/{flowAnalysisId} API call. The response contains the details of the path trace.

That’s it in terms of getting familiar with Flow Analysis. In the next post, we will implement this example using Python. Stay tuned!
